


Models
>
BGHD2433KW0
BGHD2433KW0 Frigidaire Dishwasher
Jump to:
Find Part by Name
Keep searches simple, eg. "belt" or "pump".
Diagrams for BGHD2433KW0
Viewing 7 of 7


Manuals & Guides for BGHD2433KW0
Click to downloadInstall
Installation Instructions
(1.06MB)
Install
Installation Instructions
(1.45MB)
Manual
Owner's Manuals
(1.43MB)
Manual
Owner's Manuals
(7.80MB)
Manual
Owner's Manuals
(7.80MB)
Specs
Product Specifications Sheet
(0.52MB)
Wiring
Wiring Diagram
(0.52MB)
Keep searches simple, eg. "belt" or "pump".

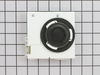
This dishwasher door gasket is attached to the bottom of the door, creating a strong seal between the tub and the outer edge of the door. This seal is prone to wear and tear due to its constant exposu...
In Stock
Order now and your part arrives by Jul 31

The door gasket provides a watertight seal between the tub and the door, to keep water from leaking out of your dishwasher. If your dishwasher is leaking you may need to replace the door gasket. This ...
No Longer Available

$12.05
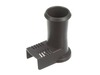
This is a single rack roller kit for your dishwasher. This kit comes with one axel/clip, and one wheel/roller. The kit is used for the lower dishrack, and allows your rack to move freely. You will nee...
In Stock
Order now and your part arrives by Jul 31

$34.97
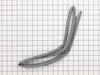
The upper spray arm is found above the top rack in your dishwasher. If your dishes are not properly cleaned after the cycle has finished, the spray arm may need to be replaced. As the part is made of ...
In Stock
Order now and your part arrives by Jul 31

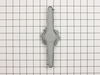
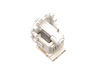
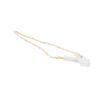
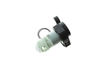
This is a genuine OEM replacement water inlet valve for your dishwasher. The water inlet valve supplies water to the dishwasher by opening and closing the solenoids attached to the valve, depending on...
In Stock
Order now and your part arrives by Jul 31

In Stock
Order now and your part arrives by Jul 31

$16.31
This heating element mounting nut is used in dishwashers and is used to hold the nut to prevent leaking. If your nut is damaged or you notice leaking from the dishwasher, then replacing this nut will ...
In Stock
Order now and your part arrives by Jul 31

$42.59
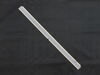
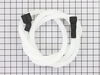
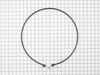
The drain hose connects to the pump located below the lower spray arm. It aids in proper dishwasher drainage. Size: 7.5 feet long
In Stock
Order now and your part arrives by Jul 31

$37.79
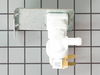
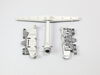
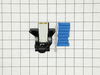
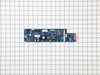
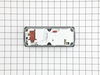
This is an authentic OEM door latch assembly for your dishwasher. The latch has a switch that uses an on-off mechanism which prevents the dishwasher from running when the door is opened. If your dishw...
In Stock
Order now and your part arrives by Jul 31

$31.85
If your dishwasher is leaking from the corners of the gasket, you may need to replace the splash shields. The splash shields attach to the lower front corners of dishwasher and are used to prevent wat...
In Stock
Order now and your part arrives by Jul 31

In Stock
Order now and your part arrives by Jul 31

$43.14
This is a bracket, but it may also be known as a dishrack row clip, or simply a tine clip, and it is used in conjunction with your dishwasher. The purpose of this part is to fasten to the rack and the...
In Stock
Order now and your part arrives by Jul 31
Common Problems and Symptoms for BGHD2433KW0
Viewing 10 of 10Leaking
Fixed by these parts
How to fix it
Not cleaning dishes properly
Fixed by these parts
How to fix it
Not draining
Fixed by these parts

How to fix it
Will not fill with water
Fixed by these parts

How to fix it
Door latch failure
Fixed by these parts

How to fix it
Not drying dishes properly
Fixed by these parts

How to fix it
Will Not Start
Fixed by these parts
How to fix it
Noisy
Fixed by these parts
How to fix it
Door won’t close
Fixed by these parts
How to fix it
Will not dispense detergent
Fixed by these parts
How to fix it


Keep searches simple. Use keywords, e.g. "leaking", "pump", "broken" or "fit".
- Customer:
- Roy from Worcester, MA
- Parts Used:
- 5304506516
- Difficulty Level:
- Really Easy
- Total Repair Time:
- Less than 15 mins
The spray arm would fall off during the washing cycle.
Repair was simple. I unscrewed the old grommet which held the old spray arm and screwed-on the new one. About 30 seconds was required. Other people having this problem should note that the spray-arm is made of three pieces which are inseparable when the arm is new. The arm is sold in this form. However, when your machine is having th
... Read more
e problem that the arm falls off, the three pieces become separate. When you want to replace the spray arm, only one new part needs to be ordered because this part encompases all three components.
Read less
Was this instruction helpful to you?
Thank you for voting!
- Customer:
- CHRIS from ROANOKE, VA
- Parts Used:
- 154637401, 5304532229
- Difficulty Level:
- Easy
- Total Repair Time:
- 30 - 60 mins
- Tools:
- Nutdriver, Pliers, Screw drivers, Socket set, Wrench set
Water leaking from Inlet Valve
Remove the bottom cover plate. Disconnect the water inlet and black rubber hose. Remove 2 mounting screws. Pull out electrical connector. Reverse order. Be sure to get the brass inlet connector really tight so it won't leak. I did the final tightning after the part is mounted. Not a bad repair at all. The only problem was that it
... Read more
leaked in the first place and messed up my subfloor and laminate flooring.
Read less
Was this instruction helpful to you?
Thank you for voting!
- Customer:
- Sandra from Mount Vernon, WA
- Parts Used:
- 5304532229
- Difficulty Level:
- Really Easy
- Total Repair Time:
- Less than 15 mins
Lower Rack Roller Missing
Took the roller out of the package, snapped it into place. Less than 15 seconds. Works good as new.
Was this instruction helpful to you?
Thank you for voting!