


Models
>
EIDW5905JW0A
EIDW5905JW0A Electrolux Dishwasher
Jump to:
Find Part by Name
Keep searches simple, eg. "belt" or "pump".
Diagrams for EIDW5905JW0A
Viewing 8 of 8


Manuals & Guides for EIDW5905JW0A
Click to downloadInstall
Installation Instructions
(1.8MB)
Install
Installation Instructions
(1.79MB)
Manual
Owner's Manuals
(2.55MB)
Manual
Owner's Manuals
(9.78MB)
Wiring
Wiring Diagram
(0.86MB)
Keep searches simple, eg. "belt" or "pump".

In Stock
Order now and your part arrives by Jul 23

$43.14
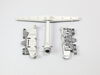
This is a bracket, but it may also be known as a dishrack row clip, or simply a tine clip, and it is used in conjunction with your dishwasher. The purpose of this part is to fasten to the rack and the...
In Stock
Order now and your part arrives by Jul 23

$145.22
Upper Rack Assembly - T3 PRO. This is the complete upper rack and the wash arm.
In Stock
Order now and your part arrives by Jul 23

$117.55
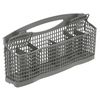
This lower dishwasher dishrack assembly is designed to provide stable support for plates, bowls, and larger cookware during wash cycles, helping ensure thorough and efficient cleaning. Constructed fro...
Special Order

$62.65
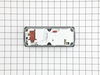
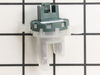
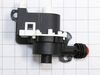
This part releases the detergent and rinse aid into the dishwasher. NOTE: Color may vary but the part will function the same as the original.
In Stock
Order now and your part arrives by Jul 23

In Stock
Order now and your part arrives by Jul 23

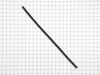
This fold-down tine row is designed to maximize flexibility in your dishwasher’s lower rack, allowing you to accommodate larger pots and pans. Constructed from sturdy, corrosion-resistant materials, i...
Special Order

$14.25
This bracket is designed for use in dishwashers, and it is a genuine replacement part. It is used in the upper dishrack to hold tines in place. This part is made out of plastic. Please note it is sold...
In Stock
Order now and your part arrives by Jul 23

In Stock
Order now and your part arrives by Jul 23


In Stock
Order now and your part arrives by Jul 23

Special Order
Common Problems and Symptoms for EIDW5905JW0A
Viewing 9 of 9Not cleaning dishes properly
Fixed by these parts
How to fix it
Leaking
Fixed by these parts

How to fix it
Will not dispense detergent
Fixed by these parts
How to fix it
Door latch failure
Fixed by these parts
How to fix it
Will Not Start
Fixed by these parts
How to fix it
Not draining
Fixed by these parts
How to fix it
Will not fill with water
Fixed by these parts
How to fix it
Door won’t close
Fixed by these parts
How to fix it
Not drying dishes properly
Fixed by these parts
How to fix it


Keep searches simple. Use keywords, e.g. "leaking", "pump", "broken" or "fit".
- Customer:
- C from Covina, CA
- Parts Used:
- 5304507354
- Difficulty Level:
- Easy
- Total Repair Time:
- 15 - 30 mins
- Tools:
- Screw drivers
Dispenser door broken.
Disconnect from power
Unscrewed 4 phillips screws from top of outer door.
Unscrewed 2 screws each siide of door.
Lower outer door section drops away.
Note wiring sequence on dispenser, then disconnect wires.
Unscrew 6 screws on dispenser and lift dispenser out.
Place new dispenser in place (note orient ... Read more ation), ann fasten in place with screws, remembering to replace wire retainer on left lower screw.
Reconnect wires to dispenser correctly.
Slide lower outer door over tabs and secure with the 4 side screws.
Ensure lower door is up under control panel and secure with the 4 top screws.
Fill dispenser with detergent, reconnect power and test run while enjoying a cup of tea in celebration of a job well done..
Read less
Was this instruction helpful to you?
Thank you for voting!
- Customer:
- Keith from Coventry, RI
- Parts Used:
- A01986801
- Difficulty Level:
- Really Easy
- Total Repair Time:
- Less than 15 mins
Center spray arm broke
I was able to pull out the top basket were the glasses are put then I lined up the back and the center plastic clip an slid on the center spray arm. It took about 2 miniutes
Was this instruction helpful to you?
Thank you for voting!
- Customer:
- Lauren from Peabody, MA
- Parts Used:
- 5304535382
- Difficulty Level:
- Really Easy
- Total Repair Time:
- Less than 15 mins
large holes in the bottom of the basket where pieces of plastic kept breaking off
I replaced the basket. No tools necessary. New basket seems sturdier than original. Very satisfied with my purchase.
Was this instruction helpful to you?
Thank you for voting!