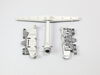
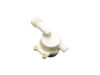
This is a bracket, but it may also be known as a dishrack row clip, or simply a tine clip, and it is used in conjunction with your dishwasher. The purpose of this part is to fasten to the rack and the...
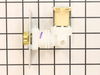
This dishwasher upper rack roller assembly allows the dishrack to slide smoothly in and out for easy loading and unloading. Over time, the wheels can wear out or become damaged, making the rack diffic...
Ask our experts a question about this part and we'll get back to you as soon as possible!
1 question answered by our experts.
< Prev
1
Next >
Sort by:
Search filter:
Clear Filter
Your search term must have 3 or more characters.
Keep searches simple. Use keywords, e.g. "leaking", "pump", "broken" or "fit".
Sorry, we couldn't find any existing answers that matched. Try using some different or simpler keywords, or submit your new question by using the "Ask a Question" button above!
Frank
February 23, 2022
I am getting a code of 01 on the display panel, what does this mean? What parts would be at fault?
For model number EDW7505HPS0A
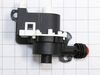
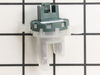
Hello Frank, Thank you for the question. '01' error code on an Electrolux dishwasher indicated water leak. There is a sensor under Electrolux dishwashers that can detect water leaks. We suggest looking for a leak on the underside of the appliance and see if there is a leak at the Valve and Drain Pump. Check the seals as well to make sure there is no wear or damage. If you need help placing an order, customer service is open 7 days a week. Please feel free to give us a call. We look forward to hearing from you!
Disconnect from power Unscrewed 4 phillips screws from top of outer door. Unscrewed 2 screws each siide of door. Lower outer door section drops away. Note wiring sequence on dispenser, then disconnect wires. Unscrew 6 screws on dispenser and lift dispenser out.
Place new dispenser in place (note orient
... Read moreation), ann fasten in place with screws, remembering to replace wire retainer on left lower screw. Reconnect wires to dispenser correctly. Slide lower outer door over tabs and secure with the 4 side screws. Ensure lower door is up under control panel and secure with the 4 top screws.
Fill dispenser with detergent, reconnect power and test run while enjoying a cup of tea in celebration of a job well done..
I was able to pull out the top basket were the glasses are put then I lined up the back and the center plastic clip an slid on the center spray arm. It took about 2 miniutes
The only difficultpart was to figure out how to remove the stainless cover from the door. Seems it slides upwards after screws are removed. After that it is self explainatory and goes back together in 5 minutes.