


Models
>
SHE89PW55N
SHE89PW55N (01) Bosch Dishwasher
Jump to:
Find Part by Name
Keep searches simple, eg. "belt" or "pump".
Diagrams for SHE89PW55N
Viewing 6 of 6


Keep searches simple, eg. "belt" or "pump".

$6.51
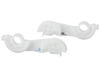
This part is a replacement tine row clip for your dishwasher. The tine row clip is adjustable, and it fits onto your dishrack to holds the tines into place. If your dishrack tine rows will not stay in...
In Stock
Order now and your part arrives by Jul 23

In Stock
Order now and your part arrives by Jul 23

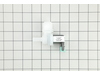
$28.55
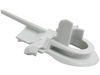
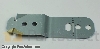
If your dishwasher isn’t filling properly or you're noticing leaks or poor cleaning, this water inlet valve could be the fix you need. It controls how much water enters the tub during each cycle, help...
In Stock
Order now and your part arrives by Jul 23

$41.42
Keep your dishwasher running efficiently with this micro filter, which captures fine particles and debris from circulating water during cleaning cycles. By preventing buildup in the pump and keeping d...
In Stock
Order now and your part arrives by Jul 23

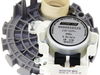
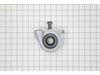
This genuine heat pump assembly fits select Bosch, Thermador, and Gaggenau dishwashers. It circulates and heats water during the wash cycle, helping to clean dishes effectively. Replacing a worn or da...
In Stock
Order now and your part arrives by Jul 23

$28.55
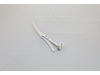
Get your dishwasher back to peak performance with this replacement upper spray arm. Positioned beneath the top rack, it spins as water flows through its nozzles, helping to clean dishes evenly and eff...
In Stock
Order now and your part arrives by Jul 23

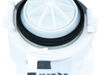
$43.95
This drain pump is designed to remove water from the bottom of your dishwasher at the end of each cycle, helping ensure proper drainage and prevent standing water. Connected to the drain hose, it dire...
In Stock
Order now and your part arrives by Jul 23

$6.51
Introducing the Dishrack Tine Row Holder from Bosch, a high-quality, authentic OEM part designed for dishwashers. This particular component is known for its compatibility with various models from the ...
In Stock
Order now and your part arrives by Jul 23

$6.51
Made from sturdy gray plastic, this tine row retainer secures the adjustable tines on the lower rack of select dishwashers. It helps organize dishes and keeps them stable during the wash cycle. Easy t...
In Stock
Order now and your part arrives by Jul 23

$15.35
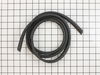
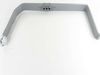
This dishwasher side trim strip kit helps seal the gap between the appliance and surrounding cabinets, creating a clean, finished appearance while also reducing noise and preventing debris from collec...
In Stock
Order now and your part arrives by Jul 23

In Stock
Order now and your part arrives by Jul 23

Common Problems and Symptoms for SHE89PW55N
Viewing 10 of 10Leaking
Fixed by these parts
How to fix it
Not draining
Fixed by these parts

How to fix it
Not cleaning dishes properly
Fixed by these parts
How to fix it
Not drying dishes properly
Fixed by these parts
How to fix it
Door latch failure
Fixed by these parts

How to fix it
Door won’t close
Fixed by these parts
How to fix it
Will Not Start
Fixed by these parts
How to fix it
Will not dispense detergent
Fixed by these parts

How to fix it
Will not fill with water
Fixed by these parts
How to fix it
Noisy
Fixed by these parts
How to fix it

Keep searches simple. Use keywords, e.g. "leaking", "pump", "broken" or "fit".
- Customer:
- Patricia from DALLAS, TX
- Parts Used:
- 20007189
- Difficulty Level:
- Very Easy
- Total Repair Time:
- Less than 15 mins
A prong in the bottom rack had broken nearly through where it attached to the base & was rusting severely. Several other prongs had also started to rust.
The bottom rack of our Bosch dishwasher was discontinued & no longer available anywhere, so we ordered an OEM replacement rack from PartSelect.com & hoped that it would fit.
The new rack fits perfectly & is actually an improvement over the old one. The new rack doesn't have a vase tower, but that is actually a big design impr ... Read more ovement because it can store more dishes & is more flexible than the old one. The new rack comes without a handle cover, but it was very easy to move the handle cover from our old rack to the new one.
The new rack fits perfectly & is actually an improvement over the old one. The new rack doesn't have a vase tower, but that is actually a big design impr ... Read more ovement because it can store more dishes & is more flexible than the old one. The new rack comes without a handle cover, but it was very easy to move the handle cover from our old rack to the new one.
Read less
Was this instruction helpful to you?
Thank you for voting!
- Customer:
- Raymond from VIENNA, VA
- Parts Used:
- 10023852
- Difficulty Level:
- Easy
- Total Repair Time:
- 30 - 60 mins
- Tools:
- Pliers
E:15 error code with Watertap
The E:15 error code means water is detected in the pan under the unit. There are several ways this can happen.
In this case, it was caused by a bad inlet valve. It did not close properly and led to an overflow of water inside that eventually spilled into the pan underneath the unit.
I see now why the pump keeps run ... Read more ning after this error. In this case, it would have led to a big flood in the kitchen if it did not.
I was actually able to run the unit while broke by manually operating the valve under our sink that provides water to the unit.
Be sure to turn off breaker before servicing. Don't get shocked!
Be sure to turn off water before starting! Or, you'll have a flood.
Anyway, I just pulled the unit out (was secured by 2 screws on the sides). I lifted up the insulation material on the left side to get at the valve. Pushed a little green tab to release the electrical plug. Then, use pliers to move clamp off the white water hose on the inside. Then, pull of white hose. This was hard in my case. Took a lot of force. Then, reach behind the unit and use pliers to unscrew water hose. Now, the whole gray panel there can pop out with some force. Then, slip the old valve out and slip new one in. Reconnect hoses and clamp. Note that I put some caulk on the connector where white hose goes. Not sure if needed or not.
Good luck!
Read less
Was this instruction helpful to you?
Thank you for voting!
- Customer:
- KATHLEEN from PECONIC, NY
- Parts Used:
- 10023852
- Difficulty Level:
- A Bit Difficult
- Total Repair Time:
- More than 2 hours
- Tools:
- Pliers, Screw drivers, Socket set, Wrench (Adjustable)
E15 code basin filling up with water
Turned off electric
Slid out unit - the water connection on this model is in the back
Disconnected the H2O hose. This valve access part is the part that connects the dishwasher to the H2O supply. The soon to be replaced part had sediment in it preventing H2O to go into the dishwasher and into the basin instead. The exploded view ... Read more of dishwasher was a big help. It was a guess as to why this was happening. Now that I’ve had it apart it makes sense that this is the part that would fail after a period of time, especially if you have city H2O. My husband Bob did this repair.
Read less
Was this instruction helpful to you?
Thank you for voting!