


Models
>
919-16345
919-16345 (Type 0) Craftsman
Jump to:
Find Part by Name
Keep searches simple, eg. "belt" or "pump".
Diagrams for 919-16345
Viewing 2 of 2

Keep searches simple, eg. "belt" or "pump".

$67.48
This kit is an OEM part direct from Craftsman for air compressors. This kit consists of the parts for building a piston cylinder in the compressor. It is recommended that you release air and unplug th...
In Stock

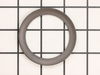
$11.30
This is a single OEM ring designed for an air compressor. The purpose of this part is to distribute the pressure and heat equally by creating a firm seal between the cylinder and piston. It has an app...
In Stock

In Stock

In Stock

In Stock

On Order

In Stock


In Stock

Special Order

In Stock

In Stock
Questions and Answers
We're sorry, but our Q&A experts are temporarily unavailable.
Please check back later if you still haven't found the answer you need.
Common Problems and Symptoms for 919-16345
Viewing 2 of 2

Keep searches simple. Use keywords, e.g. "leaking", "pump", "broken" or "fit".
- Customer:
- Charles from GARRISON, TX
- Parts Used:
- K-0650
- Difficulty Level:
- Easy
- Total Repair Time:
- 30 - 60 mins
- Tools:
- Screw drivers, Socket set
The air was bypassing the compressor gaskets and cylinder wall was worn out
1 remove cover
2 unhook air line to tank
3 remove head bolts
4 remove intake from head
5 remove flywheel bolt to free up pump piston
6 remove screw on top of piston to change out gasket
7 remove the cylinder sleeve install piston from the top
8 reassemble piston rod end and the flywheel
9 on th ... Read more e head cover are two gaskets one on top and one on the bottom head
10 insert intake piece and bolt the head cover back in place
11 reinstall the air line and unit cover and secure with three cover screws
Read less
Was this instruction helpful to you?
Thank you for voting!