



Models
>
GJC3655RB01
GJC3655RB01 Whirlpool Cooktop
Jump to:
Find Part by Name
Keep searches simple, eg. "belt" or "pump".
Diagrams for GJC3655RB01
Viewing 1 of 1
Manuals & Guides for GJC3655RB01
Click to downloadInstall
Installation Instructions
(1.87MB)
Install
Installation Instructions
(0.38MB)
Manual
Owner's Manuals
(3.09MB)
Keep searches simple, eg. "belt" or "pump".
In Stock
Order now and your part arrives by Oct 8
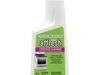
This 10 oz bottle of cooktop cleaner is formulated to safely and effectively remove tough, baked-on residues from glass, ceramic, and porcelain surfaces. Its non-abrasive, creamy texture breaks down s...
No Longer Available
In Stock
Order now and your part arrives by Oct 8
In Stock
Order now and your part arrives by Oct 8

In Stock
Order now and your part arrives by Oct 8
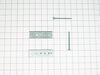
Special Order

$148.22
This dual-wattage surface element provides flexible heating options and replaces elements that no longer heat evenly or reliably.
Special Order
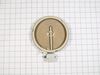
This 6-inch radiant surface element delivers 1200 watts of heat for stovetop cooking. It fits select electric ranges and installs easily using existing connections. A dependable replacement that resto...
In Stock
Order now and your part arrives by Oct 8
In Stock
Order now and your part arrives by Oct 8
Special Order
In Stock
Order now and your part arrives by Oct 8
Common Problems and Symptoms for GJC3655RB01
Viewing 2 of 2Element will not heat
Fixed by these parts
How to fix it
Will Not Start
Fixed by these parts
How to fix it

Keep searches simple. Use keywords, e.g. "leaking", "pump", "broken" or "fit".
- Customer:
- Julie from Newnan, GA
- Parts Used:
- W10355051
- Difficulty Level:
- A Bit Difficult
- Total Repair Time:
- More than 2 hours
Baked on sauce
Used cooktop creme, oven cleaner and Mr. Clean sponges. After many days of working on the surface, we were able to remove 99% of the sauce.
Was this instruction helpful to you?
Thank you for voting!
- Customer:
- Dana from Black Mountain, NC
- Parts Used:
- WP8203546
- Difficulty Level:
- Really Easy
- Total Repair Time:
- Less than 15 mins
- Tools:
- Nutdriver, Screw drivers
Loose terminal caused block to overheat and break
Removed all terminals and block mounting screws. Repaired one burnt terminal and reassembled. Replacement part was an exact fit and reassembly whnet very well.
Was this instruction helpful to you?
Thank you for voting!
- Customer:
- Mary from Duarte, CA
- Parts Used:
- W10355051
- Difficulty Level:
- Really Easy
- Total Repair Time:
- Less than 15 mins
cleaner
just needed clearner for the top of my glass top, the operator was very helpful I received my clearniner in 7 days thank you
Was this instruction helpful to you?
Thank you for voting!