


Models
>
RC30DE60PB0
RC30DE60PB0 Uni Cooktop
Jump to:
Find Part by Name
Keep searches simple, eg. "belt" or "pump".
Diagrams for RC30DE60PB0
Viewing 3 of 3


Manuals & Guides for RC30DE60PB0
Click to downloadInstall
Installation Instructions
(1.37MB)
Specs
Product Specifications Sheet
(0.49MB)
Wiring
Wiring Diagram
(0.49MB)
Keep searches simple, eg. "belt" or "pump".

This switch controls the large surface burner. As per manufacture the original screws will damage new switch. New screws are needed.
In Stock
Order now and your part arrives by Aug 3

$83.20
A burner that won’t heat—or one that only stays on high—can make cooking frustrating. This dual-element infinite switch helps fix that by restoring full temperature control to your cooktop. It adjusts...
In Stock
Order now and your part arrives by Aug 3

This dual radiant surface bridge element provides targeted heat to electric cooktops and ranges by activating a radiant coil beneath the glass surface. Rated at 1800/2600 watts, it ensures efficient a...
In Stock
Order now and your part arrives by Aug 3


$111.69
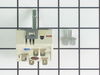
This switch controls the activation of specific appliance functions by opening or closing an electrical circuit. Designed for precise performance, it is replaced when functions fail to respond or operate intermittently.
In Stock
Order now and your part arrives by Aug 3


Special Order
Special Order

Special Order
Common Problems and Symptoms for RC30DE60PB0
Viewing 1 of 1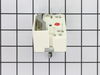
Keep searches simple. Use keywords, e.g. "leaking", "pump", "broken" or "fit".
- Customer:
- Leon from Deer Paerk, TX
- Parts Used:
- 318293825
- Difficulty Level:
- Easy
- Total Repair Time:
- 15 - 30 mins
- Tools:
- Screw drivers
switch was not turning off had to jiggle it to go off
no problem slightly different shape than original but labels for wires matched up mounting screws aligned perfectly works great
Was this instruction helpful to you?
Thank you for voting!
- Customer:
- Michael from Oconomowoc, WI
- Parts Used:
- 318293825
- Difficulty Level:
- Easy
- Total Repair Time:
- 30 - 60 mins
- Tools:
- Pliers, Screw drivers
Large Burner was not heating up properly
Don't be put off when you first get the new switch. It's not an exact duplicate to the one your replacing. You will notice that the new switch has 5 electrical connectors and you'll see 6 wires on the old one. start by removing the L1 wire(s) off the old switch, you will see that it actually has 2 wires connected to the same connector.
... Read more
Now connect to the L1 position on the new switch. Continuie with taking one wire at a time off the old switch and connect to the corresponding connector on the new switch (all the connectors are coded the same, ex. L1, P, etc....) Once complete the switch and burner worked perfectly
Read less
Was this instruction helpful to you?
Thank you for voting!
- Customer:
- larry from chatsworth, GA
- Parts Used:
- 318293825
- Difficulty Level:
- Easy
- Total Repair Time:
- 30 - 60 mins
- Tools:
- Screw drivers, Socket set, Wrench set
burner got to hot
repair it
Was this instruction helpful to you?
Thank you for voting!