


Models
>
X8261RV
X8261RV Maytag Cooktop
Jump to:
Find Part by Name
Keep searches simple, eg. "belt" or "pump".
Diagrams for X8261RV
Viewing 3 of 3


Keep searches simple, eg. "belt" or "pump".

This burner cap assembly is sold with the spark electrode. Please note this part has been redesigned and no longer requires a gasket. Sold individually.
In Stock
Order now and your part arrives by Jul 23

$21.82
This is a screw and it is made for multiple appliances in your home. This model is called a sheet metal screw because it has sharp points, and the threads are closer together. This screw is designed t...
In Stock
Order now and your part arrives by Jul 23

This part may differ in appearance, but functions same as original part. : This part sends enough current to the igniter to create a spark to the bottom of the burner cap.
In Stock
Order now and your part arrives by Jul 23

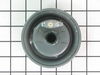
This top burner knob is two inches in diameter. It is primarily a white knob with dark gray lettering denoting the off, low, lite, and high positions. This knob also has a red indicator line as well a...
No Longer Available


In Stock
Order now and your part arrives by Jul 23

This piece of adhesive seal tape is eighty-nine inches long. It is made of black rubber and has a white backing that peels off easily. This seal tape is designed to fit around the drip pans of your appliance.
No Longer Available

In Stock
Order now and your part arrives by Jul 23

Part might differ in appearance, but functions same as original. Sold individually.
No Longer Available

Special Order

Special Order
Common Problems and Symptoms for X8261RV
Viewing 4 of 4Will Not Start
Fixed by these parts
How to fix it
Gas igniter glows, but will not light
Fixed by these parts
How to fix it
Element will not heat
Fixed by these parts
How to fix it
Gas smell
Fixed by these parts
How to fix it

Keep searches simple. Use keywords, e.g. "leaking", "pump", "broken" or "fit".
- Customer:
- Matthew from Brookfield, MA
- Parts Used:
- WP3412D024-26
- Difficulty Level:
- Really Easy
- Total Repair Time:
- Less than 15 mins
- Tools:
- Pliers
A burner wouldn't spark strongly enough to light the gas.
Replacement of these burners is very easy. You just twist the burner counterclockwise a quarter turn and pull it out. (You may need a big wrench if the range is very old.) Once out, just pull the two wires off and push them onto the new burner. Crimp them on with pliers if they're loose -- mine were. Twist the burner back on.
If the ... Read more gasket under the burner has disintegrated, don't worry about it. They don't offer replacements for them because they're not necessary as a safety feature. They were designed to keep overspills from running under the cooktop, but the ridge around the hole is likely higher than you'd ever need.
If the ... Read more gasket under the burner has disintegrated, don't worry about it. They don't offer replacements for them because they're not necessary as a safety feature. They were designed to keep overspills from running under the cooktop, but the ridge around the hole is likely higher than you'd ever need.
Read less
Was this instruction helpful to you?
Thank you for voting!
- Customer:
- jonathan from Bryson City, NC
- Parts Used:
- 12001596
- Difficulty Level:
- Really Easy
- Total Repair Time:
- 15 - 30 mins
- Tools:
- Screw drivers
No spark at top burners, first one then eventually all 4.
Most of the repair time was spent researching the problem online, locating the spark module inside the range, and selecting the part online. Installation was easy. Key troubleshooting info for me was, if there is no clicking, the spark unit is probably worn-out. I traced the ignition wires from the burners down to the spark module, locate
... Read more
d inside a 2x3" metal housing next to the bottom drawer. I removed 2 screws and out it came. The replacement unit pictured on the PartSelect site was not identical to the original but had the same number of contacts. I ordered the part and it arrived a few days later. The old connectors slipped easily onto the new pins, and I screwed the new unit into the range using the new metal housing. All 4 burners now spark up quickly, and we saved at least $100 on a service call. It was well worth the time and effort -- thanks!
Read less
Was this instruction helpful to you?
Thank you for voting!
- Customer:
- arnold from la punte, CA
- Parts Used:
- WP3412D024-26
- Difficulty Level:
- Really Easy
- Total Repair Time:
- Less than 15 mins
- Tools:
- Screw drivers
Burner Was Worn Out
Burner head arrived when I got home from work. Just timely to cook for dinner that monday night, got the 4 burners disconnect the element from the old burner, then connect element to the new bunners, in less than 10 mins, and I had save estimate $600 buying a brand new stove or gas range, this will last me another5 to 10 years. Espec
... Read more
ially this time of recession
Read less
Was this instruction helpful to you?
Thank you for voting!