


Models
>
88LN-6
88LN-6 Magic Chef Cooktop
Jump to:
Find Part by Name
Keep searches simple, eg. "belt" or "pump".
Diagrams for 88LN-6
Viewing 1 of 1
Keep searches simple, eg. "belt" or "pump".

This 10 oz bottle of cooktop cleaner is formulated to safely and effectively remove tough, baked-on residues from glass, ceramic, and porcelain surfaces. Its non-abrasive, creamy texture breaks down s...
No Longer Available

In Stock
Order now and your part arrives by Jul 30

$11.98
Use this scraper for your ceramic/glass cooktop. It has a retractable blade and is an all-purpose tool for cooktops, mirrors, windows and tile. Use it to also remove paint, paper, dirt, stickers and more.
In Stock
Order now and your part arrives by Jul 30

This infinite switch knob is white in color. It is just over two inches in diameter and it has black lettering denoting the off, low, and high positions. This knob is also numbered 2 through 9 in blac...
No Longer Available

$7.60
This is a multi-use frame screw that fits a variety of power tools and equipment. Follow installation instructions and safety practices provided in the manual by the manufacturer.
In Stock
Order now and your part arrives by Jul 30

In Stock
Order now and your part arrives by Jul 30

In Stock
Order now and your part arrives by Jul 30

$21.82
This is a genuine OEM replacement part. This nut is used in a number of appliances. Most often it can be found in the assembly of ranges, air conditioners, cook tops, washers, microwave oven combos, r...
Special Order

Special Order


Common Problems and Symptoms for 88LN-6
Viewing 1 of 1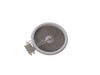
Keep searches simple. Use keywords, e.g. "leaking", "pump", "broken" or "fit".
- Customer:
- dennis from assonet, MA
- Parts Used:
- W10823704
- Difficulty Level:
- Really Easy
- Total Repair Time:
- 15 - 30 mins
- Tools:
- Nutdriver
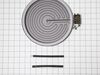
replaced heating element on flat surface stove top
I removed 4 screws and then lifted up the top it gave me access to the element I followed the direction that came with the element (very clear to follow) removed and installed the new element and it worked fine. Remember to unplug the stove if it is electric this is not in the instructions.
Was this instruction helpful to you?
Thank you for voting!
- Customer:
- Brian E from Waldorf, MD
- Parts Used:
- W10823704
- Difficulty Level:
- Easy
- Total Repair Time:
- 30 - 60 mins
- Tools:
- Nutdriver, Screw drivers
Small Element On Counter Top Range Not Heating.
1. Turned off power to trouble shoot the counter top range elements. 2. Raised the counter top up to work on it and slid two evenly placed wooden slats under the bottom of the housfor stability so it would not fall backdown into the counter top cut-out. 3. With a 1/4" nut driver removed the 10 hex-head screw that were holding the blac
... Read more
k glass top in place, pulled off the 4 . Control knobs and carefully removed the glass cover and carefully seet it aside in a safe place. 5. A visual inspection of the non working element showed that it had a burn out spot causing it not to heat. 6. Got the model number of the appliance and checked the internet for parts suppliers, chose parts elect because they had the part in stock and could overnight it for reinstallation the next day, part did arrive the next morning. A visual inspection show that it was the correct part and it would be a like for like swap out. 7. Prior to replacing the element check to see that the electrical power was still off at the circuit breaker, made a quick sketch of the wiring and identified the wires so that they would be reterminated at the same points. 8. Using the needle nose pliers pulled off the 4 stake on terminations. 9. Lifted out the 6" from the body of the unit , removed the 4 phillips screws holding parts what were to be transfered onto the new element. 10. Transfered parts onto the new element, reinstalled the element into the body of the unit, reinstalled the 4-stake-on wires to there appropriate terminals and verified with previous wiring sketch. 11. Reinstalled the glass top, 10 screw holding it in place and the 4-control knobs. 12 . Turned main power to the unit back on and turned on the replaced element, it work correctly, also checked the other 3 elements to make sure that they were working correctly. 13. When the unit had cooled, removed the wooden slats and lowered the counter top back into its cut-out making sure not to damage the glasstop. Job complete.
Read less
Was this instruction helpful to you?
Thank you for voting!
- Customer:
- Julie from Newnan, GA
- Parts Used:
- W10355051
- Difficulty Level:
- A Bit Difficult
- Total Repair Time:
- More than 2 hours
Baked on sauce
Used cooktop creme, oven cleaner and Mr. Clean sponges. After many days of working on the surface, we were able to remove 99% of the sauce.
Was this instruction helpful to you?
Thank you for voting!