


Models
>
91133355591
91133355591 Kenmore Cooktop
Jump to:
Find Part by Name
Keep searches simple, eg. "belt" or "pump".
Manuals & Guides for 91133355591
Click to downloadKeep searches simple, eg. "belt" or "pump".

This is a replacement drip bowl for your range or oven. The drip bowl sits beneath the burner element and collects any drips or spills. This drip bowl is 8 inches in diameter and is used to replace th...
No Longer Available

This burner drip bowl is sold individually. It is white on the top side, and black underneath.
No Longer Available

In Stock
Order now and your part arrives by Jul 31

In Stock
Order now and your part arrives by Jul 31

$37.35
This burner bowl, also known as a drip pan, is a legitimate OEM replacement part for your stove. Turn off power to the unit when conducting this repair. You will need to unscrew the existing burner bo...
In Stock
Order now and your part arrives by Jul 31

$39.63
This burner drip bowl is sold individually. It is white on the top side, and black underneath.
In Stock
Order now and your part arrives by Jul 31

$53.95
This comes set from the manufacturer for Natural Gas. It also includes the conversion to Liquid Propane.
This valve automatically cuts off the flow of gas at a certain pressure.
On Order


On Order


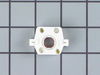
This orifice spud changes the burner from natural gas, to liquid propane. This orifice is sold individually.
No Longer Available

Common Problems and Symptoms for 91133355591
Viewing 1 of 1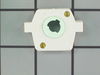
Keep searches simple. Use keywords, e.g. "leaking", "pump", "broken" or "fit".
The porcelain had chipped on the burner bowls
Removed the two screws holding the porcelain burner bowl. Disconected the electric igniter by removing the "w" clip on the underside of the bowl. Then disconnected the igniter from the electric supply cord. Reverse these directions using the new urner bowl.
Really easy.
Really easy.
Was this instruction helpful to you?
Thank you for voting!
- Customer:
- Leon from Lancaster, CA
- Parts Used:
- WB31K5080
- Difficulty Level:
- Easy
- Total Repair Time:
- 15 - 30 mins
- Tools:
- Pliers, Screw drivers
Burner bowl worn out from cleaning
Pulled off burner grates, burner, unscrewed burner bowl, removed clip from igniter and wire, then put it all back together. Was very easy, and the stove looks like new again.
PartSelect is very good with amazing shipment times. The kjpart arrived much sooner than expected.
PartSelect is very good with amazing shipment times. The kjpart arrived much sooner than expected.
Was this instruction helpful to you?
Thank you for voting!
- Customer:
- Keith from Frisco, TX
- Parts Used:
- WB31K5079
- Difficulty Level:
- Very Difficult
- Total Repair Time:
- More than 2 hours
- Tools:
- Screw drivers
burner bowl mounting holes out of alignment
No way to adjust mixer tube assembly so the mounting holes will line up with the holes in the burner bowl. Mounting
holes in bowl should be slotted to prevent future problems.
Had to finally bend the mixer tube mounting bracket enough to get one bowl on. It also made the procelin break
on that bowl because the screw put t ... Read more o much pressure on the side of the hole.
Igighter mounting hole out of position just enough to prevent the burner head from sliding over it and sitting on
the mixer tube correctly.
I solved this problem by fileing the opening slot for the igniter. Even with the igniters being just a little out of
alignment from the original position they still light well.
I did not get new gaskets for the burner bowl but would reccommend that you get them.
Read less
Was this instruction helpful to you?
Thank you for voting!