



Models
>
JEF3115GS0
JEF3115GS0 Jenn-Air Cooktop
Jump to:
Find Part by Name
Keep searches simple, eg. "belt" or "pump".
Diagrams for JEF3115GS0
Viewing 3 of 3


Keep searches simple, eg. "belt" or "pump".
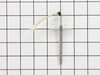
$73.24
This temperature sensor detects the temperature within the oven cavity.
In Stock
Order now and your part arrives by Oct 17
Special Order

Special Order
Special Order
Special Order
Special Order
Special Order
Common Problems and Symptoms for JEF3115GS0
Viewing 5 of 5Oven is too hot
Fixed by these parts
How to fix it
Little to no heat when baking
Fixed by these parts
How to fix it
Oven not heating evenly
Fixed by these parts
How to fix it
Will Not Start
Fixed by these parts
How to fix it
Element will not heat
Fixed by these parts
How to fix it
Keep searches simple. Use keywords, e.g. "leaking", "pump", "broken" or "fit".
- Customer:
- Kenneth from BUFFALO, NY
- Parts Used:
- WPW10131825
- Difficulty Level:
- Very Easy
- Total Repair Time:
- 15 - 30 mins
- Tools:
- Screw drivers
bUILT IN OVEN NOT COMING UP TO TEMPERATURE
Replaced oven temp sensor, removed oven door and interior racks for easy access to oven upper rear sensor access. Used philips head screw driver to remove both screws, gently pulled old senor out of reat oven wall until electrical connector clear of rear wall, disconnected connector, connected new sensor and gently pushed wiring and conne
... Read more
ctor back into opening, reinstalled door and racks. Ran open thru cycle and used oven thermometer to check temp. fast easy install
Read less
Was this instruction helpful to you?
Thank you for voting!
- Customer:
- frank from Wilmington, NC
- Parts Used:
- WPW10131825
- Difficulty Level:
- Really Easy
- Total Repair Time:
- 15 - 30 mins
- Tools:
- Screw drivers
All elements would heat to around 200 degrees, then stop
Disconnect the sensor harness and checked resistance on the sensor,should read around 1100 ohm I only got 25.The sensor is mounted in the oven cavity back wall below upper element,the door must be removed. Unscrew 2 Philips head screw,unhook the harness,install new sensor,reconnect harness,install screws.
Was this instruction helpful to you?
Thank you for voting!
- Customer:
- Sam from TINLEY PARK, IL
- Parts Used:
- WPW10131825
- Difficulty Level:
- Easy
- Total Repair Time:
- 30 - 60 mins
- Tools:
- Screw drivers
Oven will not maintain set temp
Remove rear panel - remove sensor from inside - unplug from rear - reverse to install - did not fix problem
Was this instruction helpful to you?
Thank you for voting!