



Models
>
JEC9530BDR
JEC9530BDR Jenn-Air Cooktop
Jump to:
Find Part by Name
Keep searches simple, eg. "belt" or "pump".
Diagrams for JEC9530BDR
Viewing 4 of 4
.gif "SUPPLEMENTAL INFORMATION Diagram and Parts List for Jenn-Air Cooktop")


Manuals & Guides for JEC9530BDR
Click to downloadInstall
Installation Instructions
(0.61MB)
Install
Installation Instructions
(0.15MB)
Manual
Owner's Manuals
(7.01MB)
Keep searches simple, eg. "belt" or "pump".
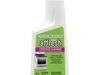
This 10 oz bottle of cooktop cleaner is formulated to safely and effectively remove tough, baked-on residues from glass, ceramic, and porcelain surfaces. Its non-abrasive, creamy texture breaks down s...
No Longer Available
$11.98
Use this scraper for your ceramic/glass cooktop. It has a retractable blade and is an all-purpose tool for cooktops, mirrors, windows and tile. Use it to also remove paint, paper, dirt, stickers and more.
In Stock
Order now and your part arrives by Oct 23
$145.55
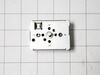
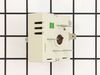
This switch controls the stove top surface burner. To the Rear Right Burner and Center Rear Burner
In Stock
Order now and your part arrives by Oct 23
Special Order

Special Order
Special Order
Special Order
Keep searches simple. Use keywords, e.g. "leaking", "pump", "broken" or "fit".
- Customer:
- James from Pineville, LA
- Parts Used:
- WP74007840
- Difficulty Level:
- Easy
- Total Repair Time:
- 15 - 30 mins
- Tools:
- Nutdriver, Screw drivers
Shorted Switch from a pot boiling over
Lift the cooktop out of it's inset in the counter top, flip it upside down and lay it on towels to protect the cooking surface. There is a raised rectangular panel that covers the switches located about the center front of the bottom. Remove this panel with a small nut driver to expose the switches. Now, locate the dead switch and place a
... Read more
strip of masking tape pointing to it and lapping around the edge so it can be seen when the unit is flipped back upright. Flip cook top back upright. Locate the correct switch by observing the masking tape. There are two small, short-threaded, phillips screws holding the switch in place. They must be accessed from the knob hole (remove rubber grommet)and at a slight angle. There is very little room to extract the screws...this is where I used the magnet to magnitize the tip of a small screw driver. Once the screw is free of the threaded hole, lift it with the magnetized screwdriver out through the knob hole. The switch will fall out easily when the two screws are removed. If you drop one of the screws inside the stove top, don't panic, I was able to shake the cook top and retrieve the screw. Now, flip the top back upside down. Using a pair of pliers remove each wire one at a time from the bad switch and connect it to the same terminal on the new switch...this way there can be no mistakes. Be sure the rubber insulator removed from the bad switch and placed on the new one. Position it where the screw holes show through, then place the switch in position. Turn the top back over in the upright position but position it where you can reach underneath it with your left hand. You will have to hold the switch and maybe move it around slightly to aline the screw holes when replacing the screws. Take a screw on the end of the magnetized screwdriver and carefully insert it into the knob hole and into the switch bracket. once you get one started, the other will be easy. I don't recall the screw replacement being any problem, just that you have to handle the screws carefully, so as to not drop one inside the cook top. Now, flip the top back over and replace the cover over the switches and replace the top in it's cabinet. The job is complete, Oh, and don't forget to flip the stove's cirduit breaker BEFORE even touching the stove!
Read less
Was this instruction helpful to you?
Thank you for voting!
- Customer:
- Julie from Newnan, GA
- Parts Used:
- W10355051
- Difficulty Level:
- A Bit Difficult
- Total Repair Time:
- More than 2 hours
Baked on sauce
Used cooktop creme, oven cleaner and Mr. Clean sponges. After many days of working on the surface, we were able to remove 99% of the sauce.
Was this instruction helpful to you?
Thank you for voting!
- Customer:
- Mary from Duarte, CA
- Parts Used:
- W10355051
- Difficulty Level:
- Really Easy
- Total Repair Time:
- Less than 15 mins
cleaner
just needed clearner for the top of my glass top, the operator was very helpful I received my clearniner in 7 days thank you
Was this instruction helpful to you?
Thank you for voting!