


Models
>
JP970KK1CC
JP970KK1CC General Electric Cooktop
Jump to:
Find Part by Name
Keep searches simple, eg. "belt" or "pump".
Diagrams for JP970KK1CC
Viewing 2 of 2

Manuals & Guides for JP970KK1CC
Click to downloadKeep searches simple, eg. "belt" or "pump".

In Stock
Order now and your part arrives by Jul 21

In Stock
Order now and your part arrives by Jul 21

$139.41
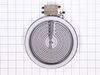
If your cooktop isn?t heating evenly or won?t turn on, this 6-inch radiant heating element might be the fix. It sits under the glass surface and glows red when it?s working, giving you steady heat for...
In Stock
Order now and your part arrives by Jul 21

In Stock
Order now and your part arrives by Jul 21

In Stock
Order now and your part arrives by Jul 21

Special Order

In Stock
Order now and your part arrives by Jul 21
 – Part Number: WB03T10093")
 – Part Number: WB03T10092")
 – Part Number: WB09T10005")
Special Order


Common Problems and Symptoms for JP970KK1CC
Viewing 1 of 1
Keep searches simple. Use keywords, e.g. "leaking", "pump", "broken" or "fit".
- Customer:
- Frank from St Augustine, FL
- Parts Used:
- WB30X44826
- Difficulty Level:
- Really Easy
- Total Repair Time:
- 15 - 30 mins
- Tools:
- Screw drivers
Coil Burned Out
Open lid,un screw coil,pop in new coil snap holders in place,then cook a steak
Was this instruction helpful to you?
Thank you for voting!
- Customer:
- LANCE from ORELAND, PA
- Parts Used:
- WB30X44826
- Difficulty Level:
- Really Easy
- Total Repair Time:
- 15 - 30 mins
- Tools:
- Screw drivers
Heating element burned out.
Unplugged range. Opened oven door and removed two screws from top of oven opening. Lifted oven top and propped up
with a 2 x 3.Unscrewed the two screws that were holding
with a 2 x 3.Unscrewed the two screws that were holding
Was this instruction helpful to you?
Thank you for voting!
- Customer:
- John from Fresno, CA
- Parts Used:
- WB24T10119
- Difficulty Level:
- A Bit Difficult
- Total Repair Time:
- 30 - 60 mins
- Tools:
- Nutdriver, Pliers, Screw drivers
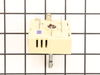
Switch failed
I turned off the circuit breaker and tested the cook top. I pulled the cook top out and laid a piece of plywood over the opening to work on the cook top and not scratch the granite counter top. The mistake I made was to turn the cook top upside down and separate the top from the housing. The dampening springs came off the burners and I
... Read more
could have damaged the elements (but they checked out ok). I turned the whole assembly right side up again and replaced the switch and put it all back together. It works great...thank you for the part.
Read less
Was this instruction helpful to you?
Thank you for voting!