


Models
>
ZGU36KBK2BB
ZGU36KBK2BB General Electric Cooktop
Jump to:
Find Part by Name
Keep searches simple, eg. "belt" or "pump".
Diagrams for ZGU36KBK2BB
Viewing 2 of 2

Keep searches simple, eg. "belt" or "pump".

$15.26
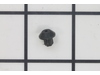
Sourced directly from the manufacturer, this OEM replacement grate foot is for ranges and cooktops. The grate foot attaches to the bottom of the burner grate to prevent the cooktop from being scratche...
In Stock
Order now and your part arrives by Jul 27

$18.54
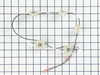
This Genuine OEM GE Electrode Clip is a precision-engineered component designed for use across a wide range of gas ranges. Constructed from durable metal, the clip plays a critical role in securing th...
In Stock
Order now and your part arrives by Jul 27

In Stock
Order now and your part arrives by Jul 27

$53.95
This comes set from the manufacturer for Natural Gas. It also includes the conversion to Liquid Propane.
This valve automatically cuts off the flow of gas at a certain pressure.
On Order


In Stock
Order now and your part arrives by Jul 27

In Stock
Order now and your part arrives by Jul 27


In Stock
Order now and your part arrives by Jul 27

$26.95
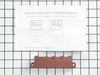
Sold individually. This seal prevents any leaks from getting under the cooktop or into the switch area.
Special Order

$15.26
This orifice spud changes the burner from natural gas, to liquid propane. This orifice is sold individually. Size: .74mm
Special Order
Common Problems and Symptoms for ZGU36KBK2BB
Viewing 3 of 3Will Not Start
Fixed by these parts

How to fix it
Touchpad does not respond
Fixed by these parts
How to fix it
Gas igniter glows, but will not light
Fixed by these parts
How to fix it
Keep searches simple. Use keywords, e.g. "leaking", "pump", "broken" or "fit".
- Customer:
- Kathryn from Star City, AR
- Parts Used:
- WB02T10461
- Difficulty Level:
- Really Easy
- Total Repair Time:
- Less than 15 mins
Grate Foot had worn out
A rubber grate foot on my range top had worn out. I pulled the worn foot out and installed the new grate foot with no tools or accessories. Good as new! Now I don't have to worry about the grate scraping my range top and scratching the paint. I also ordered extras so I won't have to wait if another wears out.
Was this instruction helpful to you?
Thank you for voting!
- Customer:
- Anne from Jacksonville, FL
- Parts Used:
- WB02T10461
- Difficulty Level:
- Really Easy
- Total Repair Time:
- Less than 15 mins
After my housecleaner had been here, I noted that 2 of the little rubber feet were missing from the top grates.
I was pretty upset as the grate wobbled, so I went on line and looked for GE Profile parts. To my amazement, I found the little rubber feet quite easily, and within 2 days they were here at my home. I simply had to stick them in the holes; however, I noted that they did not fit real tight, so I removed them and shot a little glue on the
... Read more
m, and they have been in place ever since. Thanks to you guys, I am a happy camper now!!!
Read less
Was this instruction helpful to you?
Thank you for voting!
- Customer:
- Robert from HARRISON CITY, PA
- Parts Used:
- WB18T10338, WB04T10012, WB04T10011
- Difficulty Level:
- Really Easy
- Total Repair Time:
- 30 - 60 mins
Two igniters inoperable due to bad igniter switches
There are already some very good instructions for this repair on the website - I followed them as written. I recommend going through the instructions carefully first to make sure you have everything you will need and so you know what to expect. Also, if practical I recommend you do the disassembly before ordering the parts so you know e
... Read more
xactly what you need. A couple of burner gaskets got messed up during disassembly, so I decided to replace them and ordered a couple along with the harness assembly. A couple of the igniters were difficult to disconnect from the wiring and I was afraid I was going to break some, but managed to get them off intact. The replacement harness assembly didn't look just like the old one that I removed and at first I thought I'd have to exchange it. Check the paper that comes in the box with the harness and it will show how the new one goes on. Everything went back together easily and all igniters are operating.
Read less
Was this instruction helpful to you?
Thank you for voting!