



Models
>
JP340BM1BB
JP340BM1BB General Electric Cooktop
Jump to:
Find Part by Name
Keep searches simple, eg. "belt" or "pump".
Diagrams for JP340BM1BB
Viewing 1 of 1
Manuals & Guides for JP340BM1BB
Click to downloadInstall
Installation Instructions
(1.07MB)
Install
Installation Instructions
(0.99MB)
Manual
Owner's Manuals
(5.42MB)
Keep searches simple, eg. "belt" or "pump".
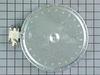
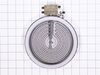
This haliant burner element is a gneuine OEM replacement part for your stove. This element is 8 inches in diameter. The element lies underneath the stovetop, and will need to be replaced if it stops h...
In Stock
Order now and your part arrives by Oct 26
In Stock
Order now and your part arrives by Oct 26
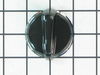
This is a replacement burner knob for your range. It is made of black plastic and is approximately 2 inches in diameter. The knob allows you to turn on and adjust the heat level of the range. If the k...
No Longer Available
In Stock
Order now and your part arrives by Oct 26
On Order
Special Order
Special Order

Special Order
Special Order
Special Order
Common Problems and Symptoms for JP340BM1BB
Viewing 1 of 1
Keep searches simple. Use keywords, e.g. "leaking", "pump", "broken" or "fit".
- Customer:
- Kevin from Leominster, MA
- Parts Used:
- WB30T10045
- Difficulty Level:
- Easy
- Total Repair Time:
- Less than 15 mins
- Tools:
- Nutdriver, Screw drivers
Large burner would not get hot
Repair was very simple. Removed 2 screws under the cooktop, tilt the cooktop back, unplug 4 wires from 8" burner, remove two screws holding retaining clips, install new burner in reverse order. Very simple!
Was this instruction helpful to you?
Thank you for voting!
- Customer:
- John from Hopewell Junction, NY
- Parts Used:
- WB30T10045
- Difficulty Level:
- Easy
- Total Repair Time:
- 15 - 30 mins
- Tools:
- Nutdriver, Screw drivers
Left rear element would not get hot.
FIRST TURN OFF THE CIRCUIT BREAKERS THAT POWER THE COOKTOP!! Remove the cooktop from the counter by removing the screws from the mounting straps under the counter. Then remove the screws that hold the glass cooktop to the frame and lift off the glass top. Next lift up the bad element and unplug one wire from the bad element and plug it in
... Read more
to the new element. Make sure to put it on the exact same terminal of the new element. Do this for all the wires. Remove the two mounting tabs from the old element and put them on the new element. Turn on circuit breakers and your done.
Read less
Was this instruction helpful to you?
Thank you for voting!
- Customer:
- Richard from FAYETTEVILLE, GA
- Parts Used:
- WB30T10045
- Difficulty Level:
- Difficult
- Total Repair Time:
- More than 2 hours
- Tools:
- Nutdriver, Pliers, Wrench (Adjustable)
No Instructions
Lots of jiggling until I found the screws to remove. After finally getting the top off the base there was the Instructions on a pamphlet taped to the bottom. The key tho get the top off is to remove the face and remove the proper screws( they are identifiable)unplug the electric plug 2 screws on the back sides and poof it is free!
Was this instruction helpful to you?
Thank you for voting!