
Models > PP975BM1BB

PP975BM1BB General Electric Cooktop

Jump to:

Find Part by Name

Keep searches simple, eg. "belt" or "pump".

Diagrams for PP975BM1BB

Viewing 1 of 1

Manuals & Guides for PP975BM1BB

Click to download
Keep searches simple, eg. "belt" or "pump".
$15.26
This screw is sold individually.
In Stock
Order now and your part arrives by Jul 11
$62.95
This roll contains 108 inches of tape.
In Stock
Order now and your part arrives by Jul 11
Special Order
In Stock
Order now and your part arrives by Jul 11
In Stock
Order now and your part arrives by Jul 11
Special Order
$127.98
In Stock
Order now and your part arrives by Jul 11
Special Order
Special Order
No Longer Available
In Stock
Order now and your part arrives by Jul 11
No Longer Available

Questions and Answers

Be the first to ask our experts a question about this part!

Common Problems and Symptoms for PP975BM1BB

Viewing 1 of 1
Element will not heat
Fixed by these parts
Fixing Fixing
How to fix it
Keep searches simple. Use keywords, e.g. "leaking", "pump", "broken" or "fit".
Customer:
Stephen from LAUREL, MD
Parts Used:
WB23T10023
Difficulty Level:
A Bit Difficult
Total Repair Time:
1- 2 hours
Tools:
Nutdriver, Screw drivers
Lightning strike blew out my GE cooktop
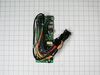
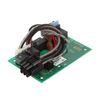
Wife said cooktop was not working. I cut power and dropped the cover on the electronics box under the burners and could see it was burnt up. Looked like it would be hard to fix so I ordered a new cooktop. However, they couldn't place order until they measured - and that would not be for a week. So, I thought I would order the circuit board to see if I could replace it. Parts Select had good links to appliance parts so ordering was easy. Needed help to pull out the cooktop and flip it over but switching in the new board was relatively easy although there were lots of connectors to keep straight. Turned it on and it worked like new and cancelled order. Saved $1300 and was a hero.
4 of 4 people found this instruction helpful.
Was this instruction helpful to you?
Thank you for voting!
Customer:
Roman from FORT MYERS, FL
Parts Used:
WB23T10023
Difficulty Level:
Difficult
Total Repair Time:
1- 2 hours
Tools:
Pliers, Screw drivers, Socket set
Cooktop kept clicking, going on and off when cooking.
Turned the circuit breaker off to ensure no power to the cooktop. Cleared all items in cabinet before accessing the control box where the board power univ. assembly was. 1/4" sock to back off six screws. Took many pictures of the unit inside. Orientation, color of wires, where zip ties are as you will have to cut them in order to disconne ct the cable connections and where plugs we connected and direction.

Pulled box down and disconnected two green grounding cables using a 1/4" socket, again taking pictures to ensure I place the cables in the exact position as it is a tight fit. Unplugged cable connections (be careful as they are tough to disconnect from the bottom of the cooktop) and noted direction and orientation of wires to ensure the new board went int the exact same way. Squeezed the post clips that held the board the backplate.

Installed new board, pushing the post clips back in) be careful not to break them as they are made of plastic and can be broken easily. Reconnected cable connections and reinstalled the zip ties to ensure no cable are pinched when you place the board housing back in place. Reconnected the two grounding cables and ensure they go in the right direction as it is a tight fit in the box assembly. Now this was the hard part.

Putting the board housing back in place and lining up the holes for the six screws. This took some time to do as the new cable wires are new and a little stiff. Had to ensure that no wires were pinched and the cardboard walls where in the right place. Finally, was able to line up one hole a drive home the screw. From there I was able to use gentle force to line up the rest of the holes.

Once that was done and I checked the no wires were protruding out; I cleared out my tools and turned the circuit breaker back on. I tested each setting on the cook top and turned all burners on at the same time. Problem solved and with solid results. Cooktop now working very well and no issues.
2 of 2 people found this instruction helpful.
Was this instruction helpful to you?
Thank you for voting!
Customer:
William from Perryton, TX
Parts Used:
WB30T10043
Difficulty Level:
Easy
Total Repair Time:
15 - 30 mins
Tools:
Screw drivers
Stove Top Element Heat Varies
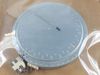
Removed stove top from counter, removed glass top by removing 10 phillps screws, removed control bracked, unplugged connectors(wires) on old control and plugged into the correct position on the new control, replace control on the bracket then reinstalled the stove top and placed the stove top back into counter.
2 of 3 people found this instruction helpful.
Was this instruction helpful to you?
Thank you for voting!