


Models
>
JP930BA1BB
JP930BA1BB General Electric Cooktop
Jump to:
Find Part by Name
Keep searches simple, eg. "belt" or "pump".
Diagrams for JP930BA1BB
Viewing 1 of 1
Keep searches simple, eg. "belt" or "pump".

In Stock
Order now and your part arrives by Jul 20

In Stock
Order now and your part arrives by Jul 20

In Stock
Order now and your part arrives by Jul 20

$79.82
This infinite control switch allows precise adjustment of heat levels for improved cooking accuracy. Smooth regulation enhances cooking performance and safety. Replacing a faulty switch restores dependable heat control.
In Stock
Order now and your part arrives by Jul 20

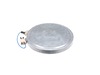
This dual element can be changed to be used as either a small or large burner. It comes with the element limit switch.
In Stock
Order now and your part arrives by Jul 20

This bridge heating element kit restores proper heating across the center of compatible cooktops, allowing even cookware heating and expanded cooking space. It is commonly replaced when the bridge ele...
In Stock
Order now and your part arrives by Jul 20


Special Order
Special Order
Special Order
Common Problems and Symptoms for JP930BA1BB
Viewing 1 of 1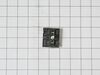
Keep searches simple. Use keywords, e.g. "leaking", "pump", "broken" or "fit".
- Customer:
- Raymond from Salt Point, NY
- Parts Used:
- WB24X29364
- Difficulty Level:
- Easy
- Total Repair Time:
- 30 - 60 mins
- Tools:
- Screw drivers
Cooktop Burner was always on High no matter what the setting on the Control
1) Turn Power off at Circuit Breaker
2) Lift Cooktop out of counter top.
3) Remove all dials from controls by pulling straight up.
4) Remover glass plate which covers burners by removing
screws along outer edge.
5) Remove the two top screws from the control to be
replaced (this holds the infinite contr ... Read more ol to bracket)
6) Remove one wire at a time from the old control and
plug on the new one in correct orientation.
7) Reverse above order to reassemble.
(Note: Not all infinite controls are same PN when
ordering, the drawingings are deceiving that they are)
Read less
Was this instruction helpful to you?
Thank you for voting!
- Customer:
- Roy from Yardley, PA
- Parts Used:
- WB24X29364
- Difficulty Level:
- Easy
- Total Repair Time:
- 30 - 60 mins
- Tools:
- Screw drivers
cook top burner stayed on high
using the info on this site i guessed it was the switch. It was. this is a Radiant Heat in counter drop on cook top. i was nervous about getting it out of the counter but that was eassy, just sits on top. the One issue was diconnecting the BX electric cable from the elecric box. mine did not have threads and a nut. but a push in fitting w
... Read more
ith small tabs.. i forced it out by pushing the tabs in with a screw driver.. later found out it was a band that was eassily removable by just prying it open with a screw driver... and later replacing it.. the glas removal was just screws and the switch was insised a cover with four screws.. plugged the new one in (careful to keep the connections the same, and reversed the process.. ready to fix it again if needed!thanks for having the part... probably saved $200! can take less than 30 minutes if you get past the electric connection quicker than i did... that;s it!
Read less
Was this instruction helpful to you?
Thank you for voting!
- Customer:
- Fielding from Bulverde, TX
- Parts Used:
- WB24X29364
- Difficulty Level:
- Really Easy
- Total Repair Time:
- 15 - 30 mins
- Tools:
- Screw drivers
Switch had lost infinite control.
Removed counter top stove, released zip ties on flex conduit,removed cover glass, removed switch anchor panel, removed old switch,(noting the color of each wire) replaced switch reassembled.
Was this instruction helpful to you?
Thank you for voting!