


Models
>
FEC3X7XAT5
FEC3X7XAT5 Frigidaire Cooktop
Jump to:
Find Part by Name
Keep searches simple, eg. "belt" or "pump".
Diagrams for FEC3X7XAT5
Viewing 4 of 4


Keep searches simple, eg. "belt" or "pump".

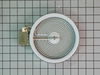
The 6” radiant cooking element with limiter fits under the glass cooktop and supplies heat to the cooking area. If your element is not heating, you can test the element for continuity with a multimete...
In Stock
Order now and your part arrives by Aug 6

In Stock
Order now and your part arrives by Aug 6


$154.75
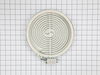
This 8-inch radiant surface element provides 2200 watts of heat for smooth, even cooking on flat-top electric ranges. It’s designed to replace a burner that no longer heats or heats unevenly. Installa...
In Stock
Order now and your part arrives by Aug 6


In Stock
Order now and your part arrives by Aug 6

Special Order

Special Order
Common Problems and Symptoms for FEC3X7XAT5
Viewing 2 of 2Element will not heat
Fixed by these parts
How to fix it
Will Not Start
Fixed by these parts
How to fix it

Keep searches simple. Use keywords, e.g. "leaking", "pump", "broken" or "fit".
- Customer:
- Lori from Winter Haven, FL
- Parts Used:
- 318178110
- Difficulty Level:
- Easy
- Total Repair Time:
- Less than 15 mins
- Tools:
- Pliers, Screw drivers
burned out burner
First we removed two screws under the rim of the range top to open the lid. Lifted the lid and removed the screws from the bracket that holds the elements, Be careful with the clips that hold the element in, if you break them or bend them there aren't any more! Also note which holes they were in, they are marked according to the differ
... Read more
ent sizes of elements. Disconnected the wires, needed needlenose pliers to grip them...connected new element, popped it back in place, replaced bracket, closed top ...Easy peasy!!!
Read less
Was this instruction helpful to you?
Thank you for voting!
- Customer:
- Neil from Jessup, PA
- Parts Used:
- 318198834
- Difficulty Level:
- Really Easy
- Total Repair Time:
- Less than 15 mins
- Tools:
- Screw drivers
rf burner was not working
First I removed 2 screws that held the stove top in place. Raised the stove top and support it. Then, I removed the hold down spring for the burner and removed three wires from the old burner. I found that the connector on the white wire was spread open too much so I crimped it closed for a better fit on the terminal. I reattached the thr
... Read more
ee wires, put the hold down spring back in place, lowered the stove top and installed the 2 screws. JOB DONE
Read less
Was this instruction helpful to you?
Thank you for voting!
- Customer:
- Ruth from MORGANTOWN, WV
- Parts Used:
- 318178110
- Difficulty Level:
- Really Easy
- Total Repair Time:
- 30 - 60 mins
- Tools:
- Nutdriver
2 elements stopped working.
My husband followed the video instructions and it was easy to fix.
Was this instruction helpful to you?
Thank you for voting!