


Models
>
PGP332LD3
PGP332LD3 Frigidaire Cooktop
Jump to:
Find Part by Name
Keep searches simple, eg. "belt" or "pump".
Diagrams for PGP332LD3
Viewing 4 of 4


Manuals & Guides for PGP332LD3
Click to downloadInstall
Installation Instructions
(0.56MB)
Manual
Owner's Manuals
(0.19MB)
Wiring
Wiring Diagram
(0.57MB)
Keep searches simple, eg. "belt" or "pump".

In Stock
Order now and your part arrives by Jul 24

In Stock
Order now and your part arrives by Jul 24

$107.75
This part sends enough current to the igniter to create a spark to the bottom of the burner cap.
Special Order

When the gas burner valve knob is depressed and turned, this part creates a spark that lights the gas and starts the burner.
No Longer Available

In Stock
Order now and your part arrives by Jul 24


Special Order


Special Order

Common Problems and Symptoms for PGP332LD3
Viewing 1 of 1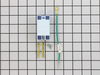
Keep searches simple. Use keywords, e.g. "leaking", "pump", "broken" or "fit".
- Customer:
- Jonathan from Arkport, NY
- Parts Used:
- 5303912606
- Difficulty Level:
- Really Easy
- Total Repair Time:
- Less than 15 mins
- Tools:
- Screw drivers
My burners would not light. There wasn't the tell tale "click, click, click" of the spark module.
First I had to slide the stove out of its cubby and then I removed the two screws holding on the shield. I next removed the wires going to the spark module. I removed the top screw and loosened the bottom one. Installed the new spark module in reverse order. Less than 15 minutes for whole repair. Still have problems with spark module
... Read more
not working if oven is on, but I think it is because there is no air circulation behind the stove.
Read less
Was this instruction helpful to you?
Thank you for voting!
- Customer:
- Jose from El Paso, TX
- Parts Used:
- 5303912606
- Difficulty Level:
- Really Easy
- Total Repair Time:
- 15 - 30 mins
- Tools:
- Screw drivers
tHE ORIGINAL MODULE DIED AFTER 21 YEARS OF SERVICE
First had to move the stove out of its "nest", take the side cover off, remove 1 screw and loosen the other , take the old module out and reverse the operation. That simple.
Part was supplied 1 day before promised date, awesome. Part fitted exactly as the OEM part, works like a charm, everyone happy.
Part was supplied 1 day before promised date, awesome. Part fitted exactly as the OEM part, works like a charm, everyone happy.
Was this instruction helpful to you?
Thank you for voting!
- Customer:
- Duff from Buena Vista, CO
- Parts Used:
- 316032002
- Difficulty Level:
- Easy
- Total Repair Time:
- 30 - 60 mins
- Tools:
- Screw drivers
gas ignitor continued to run after turned on or off
Removed all of the grates, control knobs and gas diffusers. Unscrew the drip pans, two on each pan, which attach the pans to the gas supply. Raised the drip pans from the top and unplugged the ignitors from all pans. Remove the top and the rubber deflector over the ignitor switch. The ignitor switch snaps off and on. One of the seals unde
... Read more
r the drip pan was broken and needed replaced. I would recommend ordering these also. Turned out this was a good time to give everything a goo cleaning then replace as removed.
Read less
Was this instruction helpful to you?
Thank you for voting!