


Models
>
PGT193UW1
PGT193UW1 (P1131612N) Amana Cooktop
Jump to:
Find Part by Name
Keep searches simple, eg. "belt" or "pump".
Diagrams for PGT193UW1
Viewing 5 of 5


Keep searches simple, eg. "belt" or "pump".

In Stock
Order now and your part arrives by Jul 23

This part sends enough current to the igniter to create a spark to the bottom of the burner cap.
No Longer Available

In Stock
Order now and your part arrives by Jul 23

This part sits on top of the valve. Once the knob is turned it will create a spark that will light the gas and starts the burner.
No Longer Available

Part might differ in appearance, but functions same as original. Sold individually.
No Longer Available

This filter assembly is just under eleven inches long and is not quite six inches wide. It is a metallic filter and it is used with some downdraft ranges.
No Longer Available

$21.82
This is a genuine OEM replacement part. This nut is used in a number of appliances. Most often it can be found in the assembly of ranges, air conditioners, cook tops, washers, microwave oven combos, r...
Special Order

$21.82
This is a genuine OEM replacement part. This screw is commonly used in the assembly of ranges, refrigerators, cooktops, air conditioners, wall ovens, dryers, microwave oven combos, microwaves, and was...
In Stock
Order now and your part arrives by Jul 23

Special Order

Sold individually. This is the part that you would grill the food on.
No Longer Available

Valves are attached to the main gas line. When the switch is turned the gas then flows into a tube that mixes with air, creating the appropriate mixture for combustion.
No Longer Available
Common Problems and Symptoms for PGT193UW1
Viewing 1 of 1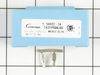
Keep searches simple. Use keywords, e.g. "leaking", "pump", "broken" or "fit".
- Customer:
- Scott from Plymouth, MN
- Parts Used:
- Y0042333
- Difficulty Level:
- Really Easy
- Total Repair Time:
- 15 - 30 mins
- Tools:
- Nutdriver, Screw drivers, Wrench set
The old valve was frozen in the off position.
I pulled a couple of cover plates off with a nut driver, disconnected the gas line to the old valve and installed the new one. It was simple--I should have done this years ago! My wife still hasn't discovered the repair. I'll see if I can pull this off as a Christmas gift!!
Was this instruction helpful to you?
Thank you for voting!
- Customer:
- nicholas from livermore, CA
- Parts Used:
- 1430322
- Difficulty Level:
- Really Easy
- Total Repair Time:
- 30 - 60 mins
- Tools:
- Screw drivers
gas burners and gas oven would not light
unplug the oven and pull it away from the wall. looking at the oven from the back, the spark module is at the bottom on the lower left. there is a two piece sheetmetal cover over the area of the spark module. use a phillips head screwdriver to remove five screws and the covers come off. the spark module is the blue cube with four push
... Read more
on wire connectors. all you have to do is hold the new one next to the old one and swap one wire at a time. both were clearly marked with identical numbers and letters. really nothing to it. it took me longer to clean the back of the oven than to replace the module. the old module was eaton part number Y-54052-3. the new one is eaton part number Y-054052-34.
Read less
Was this instruction helpful to you?
Thank you for voting!
- Customer:
- Adrienne from Lake Havasu City, AZ
- Parts Used:
- 1430322
- Difficulty Level:
- Easy
- Total Repair Time:
- 30 - 60 mins
- Tools:
- Pliers, Screw drivers
The range burners would not catch a spark and ignite. They would just keep clicking with no ignition.
I had an appliance repair rep do the replacement. He made it look relatively easy.
The repair man first turned off the breaker to the range and confirmed there was no power to the range.
After lifting off the range top cover exposing the burner igniters, he unhooked and removed the igniters. He opened the lower oven door exp ... Read more osing the screws which hold the front knob plate in position. He took those out. After loosening the knob plate he was able to unscrew and raise the inside cover which exposes the wires and the spark module.
My spark module was located in the front left corner area tucked a little under the knob plate. That is another reason why he had to loosen the plate. The replacement part was a universal part so he had to do a little work on the wire connectors but it only took a couple of minutes. Once he configured the wire ends, he was able to plug in the new spark module and put the top back together again.
The repair man knew exactly what to do and made it look relatively easy. I did not want to tackle this problem because I did not know exactly where the spark module was since some models have them in the back of the oven and the oven has to come out from the wall. Also, the wire connections had to be worked with a little and he knew exactly how to do that.
The repair man took about 45 minutes from beginning to end with most of that time spent getting to the part and putting it back together. The replacement itself took only about 10 minutes.
Read less
Was this instruction helpful to you?
Thank you for voting!