


Models
>
3JR69
3JR69 (Type 0) DeVilbiss Compressor
Jump to:
Find Part by Name
Keep searches simple, eg. "belt" or "pump".
Diagrams for 3JR69
Viewing 1 of 1
Keep searches simple, eg. "belt" or "pump".

$6.51
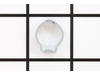
This is a tube seal used with various power tools. The seal prevents air from leaking out of your equipment. It is placed on the outlet tube, and connected to the head of the compressor. Note that thi...
In Stock
Order now and your part arrives by Jul 23

$6.51
This high-quality OEM metal hose clamp is a part found in air compressors, and is sold individually. This part can be used on multiple parts on the air compressor, so the exact location, and repair ma...
In Stock
Order now and your part arrives by Jul 23

$19.98
This is a valve plate for your compressor or generator. This part controls the air flow into the pump. When the air is pumped by the piston, it passes through the valve plate and into the compressor t...
In Stock
Order now and your part arrives by Jul 23

$28.12
Genuine OEM replacement parts kit. This Gasket Kit is used to prevent air leaks in the compressors listed below. Over time the gaskets will become compressed or cracked and you will hear an air leak c...
In Stock
Order now and your part arrives by Jul 23

$29.98
This is an OEM part sourced directly from the manufacturer. The belt is commonly found in Craftsman air compressors. This part is made of flexible rubber, and is used to transfer power between the p...
In Stock
Order now and your part arrives by Jul 23

$48.35
This is a Genuine OEM replacement part designed for use with Air Compressors. This kit Includes: Piston Rod, Compression Ring , Cylinder Sleeve & Bearing. Please note that this kit does not include t...
In Stock
Order now and your part arrives by Jul 23

$43.27
This is an Original Manufacturer Approved replacement part used on some Air Compressors. This Kit Includes: Cylinder Sleeve, Compression Ring, Piston Rod Cap Screw. This is the is a hollow, round cavi...
In Stock
Order now and your part arrives by Jul 23

$12.98
This metal air compressor exhaust tube is used in compressors. It is used to vent gases away from the engine. Keep in mind this part is priced individually. It goes between the hose clamp and the tube...
In Stock
Order now and your part arrives by Jul 23

$6.51
This is a genuine manufacturer-sourced replacement screw which is specially produced for use with portable generators and air compressors. Make sure to refer to the appropriate diagrams of your model ...
On Order

$6.51
This is an original Porter Cable replacement part manufactured for use with air compressors. The rubber isolator is used to reduce vibration caused by the pump and motor. This isolator is sold individually.
In Stock
Order now and your part arrives by Jul 23

$6.51
This is an authentic replacement part sourced directly from the manufacturer. The screw is commonly found in compressors from Porter Cable, Delta, DeVilbiss, Black & Decker, DeWALT, and Bostitch. Th...
In Stock
Order now and your part arrives by Jul 23

$9.83
This is an authentic item that is supplied directly from the original equipment manufacturer for use with air compressors. It is an identical replacement for damaged or missing cylinder head that was ...
In Stock
Order now and your part arrives by Jul 23
Common Problems and Symptoms for 3JR69
Viewing 1 of 1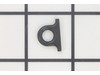


Keep searches simple. Use keywords, e.g. "leaking", "pump", "broken" or "fit".
- Customer:
- Donald from BRYAN, TX
- Parts Used:
- N036518
- Difficulty Level:
- Really Easy
- Total Repair Time:
- 30 - 60 mins
- Tools:
- Nutdriver, Screw drivers
Worn piston rod and sleeve
Disassemble plastic housing around compressor unit using appropriate tools. Remove the four bolts from the compressor head using a 5/16 nut driver. Carefully remove head assembly including airline. Remove bolt through rod bearing with Allen wrench.
Reassemble with new rod and piston assembly. Best to use blue locktite on bolt ... Read more through rod bearing when reassembling. Make sure to torque all bolts to specs listed.
Reassemble with new rod and piston assembly. Best to use blue locktite on bolt ... Read more through rod bearing when reassembling. Make sure to torque all bolts to specs listed.
Read less
Was this instruction helpful to you?
Thank you for voting!
- Customer:
- Linda from CARO, MI
- Parts Used:
- N044359
- Difficulty Level:
- Really Easy
- Total Repair Time:
- 30 - 60 mins
- Tools:
- Screw drivers, Socket set, Wrench set
The compressor was getting air
Put the seal in and it ran like a champ. No vacuum leak and it now runs again!
Was this instruction helpful to you?
Thank you for voting!