



Models
>
DCCS690B
DCCS690B (Type 1) DeWALT Chainsaw
Jump to:
Find Part by Name
Keep searches simple, eg. "belt" or "pump".
Diagrams for DCCS690B
Viewing 1 of 1
Keep searches simple, eg. "belt" or "pump".
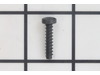
$6.51
Genuine OEM replacement part, this item is sold individually. This screw is used in various places in all of the tools listed below The most common use for this screw is to secure plastic housings tog...
In Stock
Order now and your part arrives by Oct 29
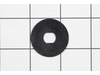
$6.51
This is a washer, located underneath the chain cover by the guide bar of a chainsaw. This washer works with the screw to keep it secure (screw sold separately). Washers can warp or damage over time an...
In Stock
Order now and your part arrives by Oct 29
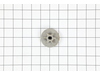
$9.92
This drive sprocket in your chainsaw is responsible for transferring power from the engine to the cutting chain, allowing it to rotate and cut through material. Located on the output shaft, the drive ...
In Stock
Order now and your part arrives by Oct 29
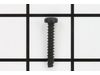
$6.51
It is a genuine replacement screw that is sourced directly from original equipment manufacturer. This is a standard hardware that has multiple uses depending your tool. For correct location and use of...
In Stock
Order now and your part arrives by Oct 29
$31.98
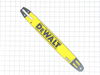
This OEM chain is a genuine replacement part for chainsaws. The chain features 56 drive links, 3/8 in. chain pitch, and a 0.043 gauge. It is specially designed to fit 16-inch bars. You will need to re...
In Stock
Order now and your part arrives by Oct 29
$6.51
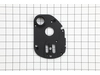
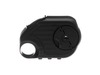
This replacement chain cover is designed to protect your chainsaw’s chain and bar, helping prevent damage from dirt, debris, and regular wear. It also enhances safety by reducing the risk of accidenta...
In Stock
Order now and your part arrives by Oct 29
$6.51
This replacement screw is a high quality hardware that is specially manufactured for use with Dewalt, Black and Decker and Porter Cable power tools. It is a authentic OEM sourced item that has multipl...
In Stock
Order now and your part arrives by Oct 29
$6.51
This oil tank cap is used to securely seal the bar and chain oil reservoir on cordless chainsaws. It provides a tight, leak-free fit to prevent oil loss and ensure proper lubrication during operation....
In Stock
Order now and your part arrives by Oct 29
In Stock
Order now and your part arrives by Oct 29
In Stock
Order now and your part arrives by Oct 29
In Stock
Order now and your part arrives by Oct 29
In Stock
Order now and your part arrives by Oct 29
Common Problems and Symptoms for DCCS690B
Viewing 1 of 1
Keep searches simple. Use keywords, e.g. "leaking", "pump", "broken" or "fit".
- Customer:
- Rodney from Santa Rosa, CA
- Parts Used:
- 90609778
- Difficulty Level:
- Easy
- Total Repair Time:
- 30 - 60 mins
- Tools:
- Wrench set
The problem I was fixing was caused by putting too much pressure on the saw and sheering the bar guide, which is plastic. Since it is plastic, it was bound to happen eventually.
The first steps are simple, and likely have already been done if you ordered the part.
Remove the battery.
Loosen the bar tension thumb screw.
Remove the outer cover by unscrewing the bar tightening knob.
Remove the retaining bolt (left handed thread) and washer for the chain drive sprocket.
Remove the bar, c ... Read more hain and sprocket.
Remove the 6 screws that hold the black plastic bar guide in place. The replacement would have gone quicker if I had taken the new part out of the bag before starting. Build-up of sawdust and oil hid the screws completely. After removing the six screw, the part removes with ease.
Clean sawdust from the area below the old part, being careful not to drop the bar adjustment assembly. It just rests in position when the part is removed.
The hardest part of the job is removing the bar adjustment knob from the old part. This requires pulling the knob away from the plastic piece while compressing the tabs that lock it in place. I cupped the knob between my thumb and forefinger and applied pressure with my hand. I used a cable stripping blade, which allowed me to compress two tabs at once. You have to work your way around the tabs to get it to pop out.
Snap the adjustment knob into position on the new part.
Put the new part in place and secure with the six screws.
Verify the bar adjustment is working correctly.
Put the drive sprocket in place with the left handed bold and washer.
Install the bar and chain. Adjust the bar out to hold the chain to about normal tension.
Install the bar locking cover.
Install the battery and verify the anti-kickback switch is in the normal position.
Test to make sure your saw is working.
Read less
Was this instruction helpful to you?
Thank you for voting!