



Models
>
TQ18R2W-P1181802WW
TQ18R2W-P1181802WW Amana Refrigerator
Jump to:
Find Part by Name
Keep searches simple, eg. "belt" or "pump".
Diagrams for TQ18R2W-P1181802WW
Viewing 10 of 10


Keep searches simple, eg. "belt" or "pump".
In Stock
Order now and your part arrives by Aug 16
In Stock
Order now and your part arrives by Aug 16
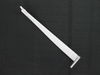
This white freezer door handle is just over eighteen inches long. If the hinges are on the left side of your refrigerator, then this handle becomes the refrigerator door handle. Made of mostly plastic...
No Longer Available
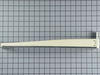
This freezer door handle is a little over eighteen inches long. It is almond colored and is made of metal and plastic. This handle is used for the freezer door of many top mount refrigerators. If your...
No Longer Available

In Stock
Order now and your part arrives by Aug 16
In Stock
Order now and your part arrives by Aug 16



Special Order
Common Problems and Symptoms for TQ18R2W-P1181802WW
Viewing 2 of 2Door latch failure
Fixed by these parts
How to fix it
Door Sweating
Fixed by these parts

How to fix it
Keep searches simple. Use keywords, e.g. "leaking", "pump", "broken" or "fit".
- Customer:
- Andrea from port saint lucie, FL
- Parts Used:
- WP10253524Q
- Difficulty Level:
- Really Easy
- Total Repair Time:
- Less than 15 mins
- Tools:
- Screw drivers
broken door handle
easy repair and looks great!!!
Thank you from a single Mom:-)
Thank you from a single Mom:-)
Was this instruction helpful to you?
Thank you for voting!
- Customer:
- Wayne from Belle Haven, VA
- Parts Used:
- WP12550110Q
- Difficulty Level:
- A Bit Difficult
- Total Repair Time:
- 1- 2 hours
- Tools:
- Socket set
Gasket was off on the bottom
Trial and error. IT would have been nice to have instructions with the part. Tried to install the gasket withour completely removing the frame. Wasn't happening. Finally removed the frame and repair went fairly well.
Was this instruction helpful to you?
Thank you for voting!
- Customer:
- Walter from Green Valley, AZ
- Parts Used:
- WP10253524Q
- Difficulty Level:
- Really Easy
- Total Repair Time:
- Less than 15 mins
- Tools:
- Screw drivers
The plastic cover on the old hadle broke off.
It was very simple. Pulled the little cover off of the bottom screw and removed it along with the 2 top screws. Then just do the reverse to install the new handle.
Was this instruction helpful to you?
Thank you for voting!