



Models
>
AK2H36E4
AK2H36E4 (P1131579N E) Amana Cooktop
Jump to:
Find Part by Name
Keep searches simple, eg. "belt" or "pump".
Diagrams for AK2H36E4
Viewing 3 of 3


Keep searches simple, eg. "belt" or "pump".
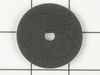
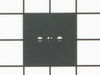
This hole cover is almost two inches in diameter. It fits below the surface burner knob of some ranges, and has a center hole just big enough for the knob's shaft.
No Longer Available
In Stock
Order now and your part arrives by Aug 6
Special Order
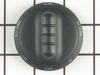
This infinite switch knob is just over two inches in diameter. It is all black in color and is made of plastic. This knob has light gray lettering denoting the off, low, medium low, medium, medium hig...
No Longer Available
In Stock
Order now and your part arrives by Aug 6
In Stock
Order now and your part arrives by Aug 6
$21.82
This is a genuine OEM replacement part. This screw is commonly used in the assembly of ranges, refrigerators, cooktops, air conditioners, wall ovens, dryers, microwave oven combos, microwaves, and was...
In Stock
Order now and your part arrives by Aug 6

Special Order
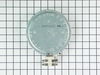
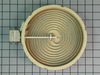
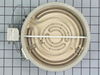
This is an authentic OEM replacement part. This is a radiant surface element used on ranges and cooktops. It is a 6-inch element designed for use with the small burners on your cooktop. This surface r...
No Longer Available
Common Problems and Symptoms for AK2H36E4
Viewing 1 of 1
Keep searches simple. Use keywords, e.g. "leaking", "pump", "broken" or "fit".
- Customer:
- Jeffrey from Miami Lakes, FL
- Parts Used:
- W10823710
- Difficulty Level:
- Really Easy
- Total Repair Time:
- Less than 15 mins
- Tools:
- Pliers, Screw drivers
The burner was not heating up
I removed only 3 screws that allowed me to lift the glass top on the stove. I removed the burner and I could see where it short circuited. I ordered the new burner element. After it arrived I replaced it by moving the wires from the old element to the new element, and put it back together.
I am sure that I saved at least $200 in "lab ... Read more or".
I am sure that I saved at least $200 in "lab ... Read more or".
Read less
Was this instruction helpful to you?
Thank you for voting!
- Customer:
- erik from chester springs, PA
- Parts Used:
- W11121639
- Difficulty Level:
- Easy
- Total Repair Time:
- 15 - 30 mins
- Tools:
- Screw drivers
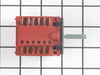
The infinite switch controlling one of the range top burners failed.
1 - Turned off electricity to the cook top.
2 - Removed the range top from the cutout in the counter.
3 - Removed the smooth top by removing the screws around the perimiter of the smooth top.
4 - Removed the screws securing the corner closest to the dead switch.
5 - Removed the screws holding the channel, onto which th ... Read more e infinite switched were attached, to the frame of the cooktop base.
6 - Removed the dead switch by removing the screws that hold it to the channel.
7 - One by one move the wires from the old switch to the new one.
8 - Reversed the process, 6 - 5 - 4 - 3 - 2 - 1, to put the cook top back together.
All in all the part was an exact replacement and the repair went really well.
2 - Removed the range top from the cutout in the counter.
3 - Removed the smooth top by removing the screws around the perimiter of the smooth top.
4 - Removed the screws securing the corner closest to the dead switch.
5 - Removed the screws holding the channel, onto which th ... Read more e infinite switched were attached, to the frame of the cooktop base.
6 - Removed the dead switch by removing the screws that hold it to the channel.
7 - One by one move the wires from the old switch to the new one.
8 - Reversed the process, 6 - 5 - 4 - 3 - 2 - 1, to put the cook top back together.
All in all the part was an exact replacement and the repair went really well.
Read less
Was this instruction helpful to you?
Thank you for voting!
- Customer:
- John from Pride, LA
- Parts Used:
- WPY0307427, W11121639
- Difficulty Level:
- Really Easy
- Total Repair Time:
- 30 - 60 mins
- Tools:
- Nutdriver, Screw drivers
Range burner control switch had a direct short. Burner would not heat up.
First I removed the two screws that held the switch in place and disconnected the five different wires to the device. Then I connected the five wires back in there same locations on the new part and placed it back into the mounting slot / hole. Then put the two screws back to hold it in place. Put the range's back cover back on and connec
... Read more
ted it back to the power supply box under the cabinet. Turned the breaker back on and turned the new burner knobs on high and got the red glow from the burners and the red indication lights from the range. Yeah, back in service just in time for Thanksgiving cooking. (Changed out 2 burner controls and replaced the hole covers on the switch knobs) Complete project. Thanks
Read less
Was this instruction helpful to you?
Thank you for voting!