



Models
>
UWX123CKMMB
UWX123CKMMB (ASWAFRD) LG Air Conditioner
Jump to:
Find Part by Name
Keep searches simple, eg. "belt" or "pump".
Diagrams for UWX123CKMMB
Viewing 1 of 1
Keep searches simple, eg. "belt" or "pump".
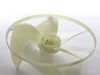
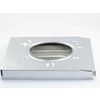
$165.35
This is a genuine OEM replacement part from LG. This is a heating element that is commonly used in air conditioners that have a heating function as well. This part of your air conditioner is what heat...
Special Order
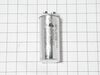
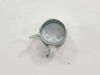
$8.70
The fan blade clamp, also known as a clamp spring, are for air conditioners. The clamp supports the fan blade on the motor shaft. When the motor is running, it signals the shaft to turn and rotate, bu...
Special Order
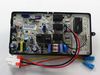
This main control board assembly is a genuine OEM replacement for select LG room and window air conditioners. Acting as the unit’s central control system, it manages cooling functions, fan speeds, tem...
No Longer Available

On Order
Special Order

Special Order
Keep searches simple. Use keywords, e.g. "leaking", "pump", "broken" or "fit".
- Customer:
- John from HARLINGEN, TX
- Parts Used:
- 5900A10009B
- Difficulty Level:
- Easy
- Total Repair Time:
- 30 - 60 mins
- Tools:
- Pliers, Screw drivers
Broken fan axial blade
Unscrewed the unit from the exterior case pulled out the unit unscrewed the 4 screw that hold the fan shroud carefully unscrewed the coil pulled back unclipped the axial fan clip gentlyhit with rubber mallet replacement of new fan replaced clip
15 minutes best investment of 20 bucks as apposed to 400 $
15 minutes best investment of 20 bucks as apposed to 400 $
Was this instruction helpful to you?
Thank you for voting!
- Customer:
- William from GAINESVILLE, TX
- Parts Used:
- EBR76261810
- Difficulty Level:
- A Bit Difficult
- Total Repair Time:
- 30 - 60 mins
- Tools:
- Screw drivers
The a/c compressor would run continuously even when turned off
Unplug the unit next remove the front grill/ filter assembly notice screw on each side and one inside. Lift the bottom out it has clips on each side it takes some effort to remove. Next remove the temperature sensor pull it out from the evaporator. Next remove screws the display control pull it out and remove connecting link to the vent b
... Read more
lades that can be pryed with flat blade screw driver. Next remove screws holding the silver box that contains the pcb assembly pull it out the bottom may have to be pried up and pull over edge. Once the box is out as far as the wires allow open the box by bending it open enough to access the wiring and the pcb assembly. Next take pictures of the inside of the box a lot of pictures it will help you to reconnect all the wires correctly take your time once the replacement is complete reinstall the box back in reverse order then reinstall the grill and filter assembly. Next plug in cord push the on button and unit should work as designed. I hope this helps
Read less
Was this instruction helpful to you?
Thank you for voting!
- Customer:
- Al from CROSS PLAINS, TX
- Parts Used:
- EAE43285408
- Difficulty Level:
- Really Easy
- Total Repair Time:
- 30 - 60 mins
- Tools:
- Pliers, Screw drivers
Capacitor went out
Unplugged and replugged everything and it worked very easy job thank you
Was this instruction helpful to you?
Thank you for voting!