



Models
>
S4NW18K4RDA
S4NW18K4RDA (AT3GEUS) LG Air Conditioner
Jump to:
Find Part by Name
Keep searches simple, eg. "belt" or "pump".
Diagrams for S4NW18K4RDA
Viewing 1 of 1
Keep searches simple, eg. "belt" or "pump".
In Stock
Order now and your part arrives by Sep 24
In Stock
Order now and your part arrives by Sep 24
$54.12
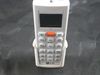
This remote controller assembly allows users to operate and adjust appliance functions conveniently from a distance. Designed for responsive control and ease of use, it restores full remote functional...
In Stock
Order now and your part arrives by Sep 24
$99.87
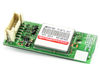
This control board manages cooling functions and communication between refrigerator components. Reliable operation helps maintain consistent temperatures and overall system performance. Replacing a de...
In Stock
Order now and your part arrives by Sep 24

$76.42
This cross-flow fan assembly delivers even airflow across internal components. Designed for steady circulation, it supports temperature regulation and efficient performance.
In Stock
Order now and your part arrives by Sep 24
$237.30
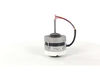
This indoor DC motor assembly is a key component for LG air conditioners, powering the fan to deliver cool air efficiently and quietly while minimizing energy consumption. Built for durability and smo...
Special Order
Special Order
In Stock
Order now and your part arrives by Sep 24
In Stock
Order now and your part arrives by Sep 24
Special Order
On Order
Keep searches simple. Use keywords, e.g. "leaking", "pump", "broken" or "fit".
- Customer:
- DOUG from SHERIDAN, WY
- Parts Used:
- 4681A20042E
- Difficulty Level:
- A Bit Difficult
- Total Repair Time:
- 1- 2 hours
- Tools:
- Screw drivers
Motor Assembly, DC, Stepping had quit working which caused the loover on the front of the air conditioner to remain open
Main problem was removing the cowling from the LG head unit as I had no instructions on how to do it. I had watched the previous technicians that had worked on the unit remove it. Once the cowling is removed all that needs done is remove the 2 mounting screws and unplug the old motor, plug in the new motor and remount it with the 2 screws
... Read more
. Then the cowling has to be reinstalled.
Read less
Was this instruction helpful to you?
Thank you for voting!