


Models
>
58075062501
58075062501 Kenmore Air Conditioner
Jump to:
Find Part by Name
Keep searches simple, eg. "belt" or "pump".
Diagrams for 58075062501
Viewing 5 of 5


Keep searches simple, eg. "belt" or "pump".

In Stock
Order now and your part arrives by Jul 23

Special Order

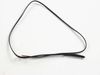
This is a genuine OEM replacement part from LG. This part is a negative temperature coefficient thermistor, and it is commonly used in air conditioners. This is a temperature sensor measures the temp...
No Longer Available

$8.70
The fan blade clamp, also known as a clamp spring, are for air conditioners. The clamp supports the fan blade on the motor shaft. When the motor is running, it signals the shaft to turn and rotate, bu...
Special Order


In Stock
Order now and your part arrives by Jul 23


Special Order
Common Problems and Symptoms for 58075062501
Viewing 2 of 2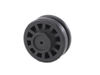
Keep searches simple. Use keywords, e.g. "leaking", "pump", "broken" or "fit".
- Customer:
- Cindy from Baltimore, MD
- Parts Used:
- 6323A20012C
- Difficulty Level:
- Really Easy
- Total Repair Time:
- 15 - 30 mins
- Tools:
- Screw drivers
Bad thermistor
Took front cover off air conditioner and pulled it a little forward out of the outdoor housing. I then flipped the LED display section out to the left and exposed the patch panel. The next step was to remove the panel with a small screwdriver and disconnect the old thermistor plug. I then plugged in the new one, remove the old one from th
... Read more
e grid bracket and placed the new one in. I then replaced everything else in reverse order. I have two LG air conditioners and they both have the same connection setup.
Read less
Was this instruction helpful to you?
Thank you for voting!
- Customer:
- Gary from Aurora, CO
- Parts Used:
- 6323A20012C
- Difficulty Level:
- Really Easy
- Total Repair Time:
- Less than 15 mins
- Tools:
- Screw drivers
Bad thermister, unit would run constantly without cycling.
Remove the front cover. Slide the unit forward a few inches from the case. Remove 1 screw from the top on the control box. Unsnap the old thermister leads going into the circuit board. Snap in the new thermister and place the end in the plastic holder in front of the coils. Install front cover.
Was this instruction helpful to you?
Thank you for voting!