



Models
>
HMG2480-47A
HMG2480-47A Admiral Refrigerator
Jump to:
Find Part by Name
Keep searches simple, eg. "belt" or "pump".
Keep searches simple, eg. "belt" or "pump".
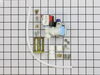
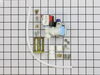
The water inlet valve is a solenoid-operated switch located at the bottom of the refrigerator. When it is energized by electrical power, water is released from the supply line through the water valve ...
In Stock
Order now and your part arrives by Aug 6

$10.88
This is a genuine OEM replacement part. This is a door shelf trim retainer designed for use with refrigerators. The purpose of the retainer is to hold the door shelf in place on the door. This replace...
In Stock
Order now and your part arrives by Aug 6
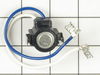
This is an authentic OEM replacement part. This defrost thermostat is commonly used in refrigerators. It features snap on tubing clip, and has two female terminals for connection. The thermostat works...
No Longer Available
$17.44
This is an OEM part sourced directly from the manufacturer. This leveling leg is commonly used with refrigerators, dryers, freezers, ranges, cooktops, and microwaves. This leveling leg ensure that you...
Special Order
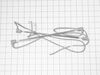
There are two defrost heaters in this kit. Each is twelve inches long.
Special Order
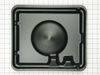
This is an authentic OEM replacement part. This defrost evaporator fan is commonly used in refrigerators and freezers. When the defrost heater is at work melting frost on the evaporator coils the wate...
No Longer Available
$246.42
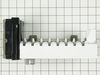
This is a genuine OEM replacement part. This is a complete ice maker kit, it is commonly used in freezers, refrigerators, and ice makers. This ice maker is modular in style and has an 8 crescent cube ...
Special Order
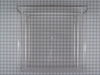
This clear crisper drawer is twenty inches long. It is made entirely of plastic.
No Longer Available
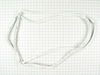
This white fresh food door gasket measures approximately 20 inches by 60 inches. It is all white in color and is made of rubber. This gasket is used for the fresh food door of many side by side model refrigerators.
No Longer Available
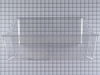
This meat drawer is eighteen inchs long. It is a see-through drawer and it is made of plastic.
No Longer Available

Common Problems and Symptoms for HMG2480-47A
Viewing 6 of 6Ice maker not making ice
Fixed by these parts
How to fix it
Leaking
Fixed by these parts
How to fix it
Fridge too warm
Fixed by these parts
How to fix it
Freezer section too warm
Fixed by these parts
How to fix it
Freezer not defrosting
Fixed by these parts
How to fix it
Ice maker won’t dispense ice
Fixed by these parts
How to fix it
Keep searches simple. Use keywords, e.g. "leaking", "pump", "broken" or "fit".
- Customer:
- Kevin from Boston, MA
- Parts Used:
- 4318047
- Difficulty Level:
- Really Easy
- Total Repair Time:
- Less than 15 mins
- Tools:
- Screw drivers, Wrench (Adjustable)
no water getting to ice maker
The ice maker had been slowly dying and one day just stopped making ice. No water was getting to the trays.
I read that this could be caused by a failure of the valve, even though the continuity test indicated that the solenoid was okay.
I ordered the part Friday afternoon. It was delivered Saturday. I did the repai ... Read more r in 10 minutes.
I pulled the fridge away from the wall.
I unplugged the fridge. I closed the water supply valve.
I unscrewed the two mounting screws using a flat head screwdriver.
I pulled the old valve out from refrigerator.
Using an adjustable wrench I detached the water supply from the valve. I detached the hose leading to the ice maker from the valve.
I pulled the electrical connectors from the connectors on the valve.
I attached the hoses to the new valve, attached the electrical connector, screwed the new valve in its place, opened the water supply, plugged the fridge back in, checked for leaks, and waited for a few hours.
My ice maker is working better than it has in at least two years.
I read that this could be caused by a failure of the valve, even though the continuity test indicated that the solenoid was okay.
I ordered the part Friday afternoon. It was delivered Saturday. I did the repai ... Read more r in 10 minutes.
I pulled the fridge away from the wall.
I unplugged the fridge. I closed the water supply valve.
I unscrewed the two mounting screws using a flat head screwdriver.
I pulled the old valve out from refrigerator.
Using an adjustable wrench I detached the water supply from the valve. I detached the hose leading to the ice maker from the valve.
I pulled the electrical connectors from the connectors on the valve.
I attached the hoses to the new valve, attached the electrical connector, screwed the new valve in its place, opened the water supply, plugged the fridge back in, checked for leaks, and waited for a few hours.
My ice maker is working better than it has in at least two years.
Read less
Was this instruction helpful to you?
Thank you for voting!
- Customer:
- James R from Valley Springs, CA
- Parts Used:
- 4318047
- Difficulty Level:
- Easy
- Total Repair Time:
- 15 - 30 mins
- Tools:
- Nutdriver, Wrench (Adjustable)
Water valve failed, flooded kitchen
Turned off water supply and unplugged appliance. Removed lower panel on back of refrigerator with 1/4 " nutdriver. Then removed supply line, and line to icemaker. removed valve from back panel and replaced with new valve. wrapped water connections with teflon tape, turned on supply line, checked for leaks, everything o.k..Replaced back pa
... Read more
nel and in 45 minutes had first drop of ice. Job requires moderate mechanical ability and minimum tools. Saved a PANT load of money by doing it myself. VERY satisfied with Partselect.com
Read less
Was this instruction helpful to you?
Thank you for voting!
- Customer:
- Ernest from Shelby, MI
- Parts Used:
- WP61001874
- Difficulty Level:
- A Bit Difficult
- Total Repair Time:
- More than 2 hours
- Tools:
- Nutdriver, Pliers, Screw drivers
Refrigerator fresh food side warm, freezer frosted over
First did the easy part, removed and replaced the defrost timer. Didn't correct the problem.
Then got into the defrost heaters. Big job, because the factory didn't provide for repairs. Had to remove the ice maker because there was one screw holding on the cover panel behind it. The factory installed defrost heaters were run beh ... Read more ind the freezer coils so I had to cut them out. Then I had to bend the light aluminum sides with heavy pliers to slip the burned out defrost heaters out and replace them with the new defrost heaters. Didn't use the defrost timer, because I was taking it one step at a time.
Now the refrigerator fresh food side maintains 39 degrees and runs 1/10 the time it was running. My wife says it's better than new! Saved $ 2,400 (the replacement she had picked out).
Then got into the defrost heaters. Big job, because the factory didn't provide for repairs. Had to remove the ice maker because there was one screw holding on the cover panel behind it. The factory installed defrost heaters were run beh ... Read more ind the freezer coils so I had to cut them out. Then I had to bend the light aluminum sides with heavy pliers to slip the burned out defrost heaters out and replace them with the new defrost heaters. Didn't use the defrost timer, because I was taking it one step at a time.
Now the refrigerator fresh food side maintains 39 degrees and runs 1/10 the time it was running. My wife says it's better than new! Saved $ 2,400 (the replacement she had picked out).
Read less
Was this instruction helpful to you?
Thank you for voting!