



Models
>
ICNT22F93
ICNT22F93 (5B78A) Admiral Refrigerator
Jump to:
Find Part by Name
Keep searches simple, eg. "belt" or "pump".
Diagrams for ICNT22F93
Viewing 4 of 4


Keep searches simple, eg. "belt" or "pump".
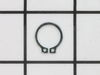
$6.51
Sometimes referred to as a retaining clip, the retaining ring is used to hold the drum support roller onto the shaft in your dryer. The clip may need to be replaced if you find that your dryer is nois...
In Stock
Order now and your part arrives by Aug 6

$21.82
This is a screw and it is made for multiple appliances in your home. This model is called a sheet metal screw because it has sharp points, and the threads are closer together. This screw is designed t...
In Stock
Order now and your part arrives by Aug 6
In Stock
Order now and your part arrives by Aug 6
In Stock
Order now and your part arrives by Aug 6
$11.98
This is a compression nut for your refrigerator/freezer. The compression nut is used with the plastic water line for the icemaker assembly. It is the connection between the water supply line and the o...
Special Order

This drive ring is three inches in diameter. It is all white in color and is made of plastic. This ring is used with a refrigeraor's icemaker assembly.
No Longer Available

$21.82
This is an authentic OEM replacement part. This screw is commonly used in the assembly of refrigerators, microwaves, ice makers, ranges, and smokers. Due to varied uses we recommend you refer to model...
In Stock
Order now and your part arrives by Aug 6
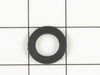
This high pressure inlet hose washer is black. It is an inch in diameter, made of rubber, and used with many washing machines, refrigerators, and dishwashers.
No Longer Available

In Stock
Order now and your part arrives by Aug 6
$18.54
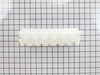
This is an authentic OEM replacement part. This is an ice cube tray that is designed for use with refrigerators and freezers. You simply fill the tray up with water, place it in the freezer portion of...
Special Order
$21.82
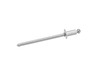
This rivet is an inch and a half long. It is used for many washing machines, microwaves, refrigerators, dryers, and ranges. Use of this rivet requires a rivet tool.
Special Order
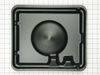
This is an authentic OEM replacement part. This defrost evaporator fan is commonly used in refrigerators and freezers. When the defrost heater is at work melting frost on the evaporator coils the wate...
No Longer Available
Common Problems and Symptoms for ICNT22F93
Viewing 6 of 6Noisy
Fixed by these parts
How to fix it
Leaking
Fixed by these parts

How to fix it
Ice maker won’t dispense ice
Fixed by these parts

How to fix it
Ice maker not making ice
Fixed by these parts
How to fix it
Fridge too warm
Fixed by these parts
How to fix it
Not dispensing water
Fixed by these parts
How to fix it
Keep searches simple. Use keywords, e.g. "leaking", "pump", "broken" or "fit".
- Customer:
- Steven from Crossville, TN
- Parts Used:
- WP63052-2
- Difficulty Level:
- Really Easy
- Total Repair Time:
- Less than 15 mins
- Tools:
- Screw drivers, Wrench set
The threads on the yoke shaft stripped.
I had to cut off the old yoke since the threads had stripped and it would not come off. Once I did that all I had to do was to remove 4 screws on the auger motor and replace it with the new auger motor. Then I put the yoke on the new auger motor shaft and then put the unit back in the freezer. Work time was less than 15 minutes with no pr
... Read more
oblems.
Read less
Was this instruction helpful to you?
Thank you for voting!
- Customer:
- Jon from Nampa, ID
- Parts Used:
- 55440-2
- Difficulty Level:
- Easy
- Total Repair Time:
- 15 - 30 mins
- Tools:
- Screw drivers
the ice/water actuator switch burnt out and was stuck on.
Removed the rubber cover over the actuator switch. Used a screwdriver to remove the switch, disconnected the wires. I then removed the switch from the mounting bracket using a small philips head screw driver. Installed the new switch on the mounting bracket then installed the switch onto the freezer door. The only difficult part was
... Read more
installing the rubber cover. Now I just need to repair the damage to my hardwood floors and carpet from all the water.
Read less
Was this instruction helpful to you?
Thank you for voting!
- Customer:
- Larry from Anchorage, AK
- Parts Used:
- WP61003336
- Difficulty Level:
- A Bit Difficult
- Total Repair Time:
- 30 - 60 mins
- Tools:
- Screw drivers
The plastic ring that is the connection between the drive motor at the back of the freezer compartment to the auger in the ice bin shattered when my wife was dispensing crushed ice.
Part selects cataglog for parts selection was very easy to use and the online service and delivery was great.
When I got the part, it was not apparent on how to remove the auger so that I could insert the new connector. There were about about 8 visible screws, with star drive heads that I fortunately had a screwdriver that fit, and ... Read more I could not tell if I had to remove all of them or only a couple.
I ended up removing all, but still could not separate the dispenser portion which held the front of the auger from the back of the ice bin. I finally figured out that the dispenser door trip lever had to be disconnected and I almost lost it when I removed the metal clip that attached it to the outside of the ice bin when the spring loaded lever tried to unwind. I managed to hold it in place, separate the dispenser holding the auger from the rest of the ice bin and replace the connector. I them got the pieces back in place and was able to refasten the spring loaded lever and then replace the screws.
If the spring loaded lever had unloaded, it would have been tricky to try to replicate the amount of turns (load) on the spring tension.
When I got the part, it was not apparent on how to remove the auger so that I could insert the new connector. There were about about 8 visible screws, with star drive heads that I fortunately had a screwdriver that fit, and ... Read more I could not tell if I had to remove all of them or only a couple.
I ended up removing all, but still could not separate the dispenser portion which held the front of the auger from the back of the ice bin. I finally figured out that the dispenser door trip lever had to be disconnected and I almost lost it when I removed the metal clip that attached it to the outside of the ice bin when the spring loaded lever tried to unwind. I managed to hold it in place, separate the dispenser holding the auger from the rest of the ice bin and replace the connector. I them got the pieces back in place and was able to refasten the spring loaded lever and then replace the screws.
If the spring loaded lever had unloaded, it would have been tricky to try to replicate the amount of turns (load) on the spring tension.
Read less
Was this instruction helpful to you?
Thank you for voting!