


Models
>
HMG22494-0A
HMG22494-0A Admiral Refrigerator
Jump to:
Find Part by Name
Keep searches simple, eg. "belt" or "pump".
Keep searches simple, eg. "belt" or "pump".

$99.38
If your freezer has stopped making ice cubes, it may be time to replace your ice maker. Normal wear and tear, or accidental damage may be the cause of this. This model includes the control device and ...
In Stock
Order now and your part arrives by Aug 6

$40.71
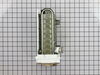
This is an OEM part sourced directly from the manufacturer. This defrost heater assembly is designed for use with refrigerators. These heaters melt the frost that builds up on the evaporator coils dur...
In Stock
Order now and your part arrives by Aug 6

$61.55
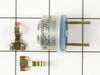
This part is also known as the cycling thermostat and this bi-metal device controls the activation of the icemaker ejection cycle.
In Stock
Order now and your part arrives by Aug 6

$10.88
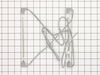
This is a genuine OEM replacement part. This is a door shelf trim retainer designed for use with refrigerators. The purpose of the retainer is to hold the door shelf in place on the door. This replace...
In Stock
Order now and your part arrives by Aug 6

This is an authentic OEM replacement part. This defrost thermostat is commonly used in refrigerators. It features snap on tubing clip, and has two female terminals for connection. The thermostat works...
No Longer Available

$124.19
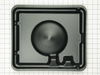
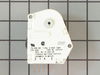
This is an OEM part sourced directly from the manufacturer. This six-hour defrost timer is commonly used with refrigerators, and freezers. The defrost heater is in place to briefly heat the evaporator...
In Stock
Order now and your part arrives by Aug 6

This is an authentic OEM replacement part. This defrost evaporator fan is commonly used in refrigerators and freezers. When the defrost heater is at work melting frost on the evaporator coils the wate...
No Longer Available


This is an OEM part sourced directly from the manufacturer. This retainer bar is designed for use with your refrigerator. It is cut-to-fit the door shelf on the inside of your appliance. It is simple ...
Special Order


This clear crisper drawer is twenty inches long. It is made entirely of plastic.
No Longer Available

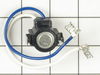
The water inlet valve is a solenoid-operated switch that, when activated, releases water from the supply line to the water valve and into the compact icemaker mold and to the water dispenser.
No Longer Available
Common Problems and Symptoms for HMG22494-0A
Viewing 15 of 15Ice maker not making ice
Fixed by these parts
How to fix it
Leaking
Fixed by these parts
How to fix it
Ice maker won’t dispense ice
Fixed by these parts
How to fix it
Fridge too warm
Fixed by these parts
How to fix it
Freezer not defrosting
Fixed by these parts
How to fix it
Freezer section too warm
Fixed by these parts
How to fix it
Ice maker dispenses too little ice
Fixed by these parts
How to fix it
Ice maker dispenses too much ice
Fixed by these parts
How to fix it
Won’t start
Fixed by these parts
How to fix it
Frost buildup
Fixed by these parts
How to fix it
Will Not Start
Fixed by these parts
How to fix it
Fridge runs too long
Fixed by these parts
How to fix it
Noisy
Fixed by these parts
How to fix it
Fridge and Freezer are too warm
Fixed by these parts
How to fix it
Freezer too cold
Fixed by these parts
How to fix it


Keep searches simple. Use keywords, e.g. "leaking", "pump", "broken" or "fit".
- Customer:
- Bernie from Diamond Bar, CA
- Parts Used:
- D7824706Q
- Difficulty Level:
- Easy
- Total Repair Time:
- 30 - 60 mins
- Tools:
- Nutdriver
Icemaker producing few or no cubes and often leaving "kling-ons" on ice tray
Interior surface of ice tray felt rough & flaky (coating deteriorated) so cubes would not release.
Unplug appliance.
Remove timer cover by hand pressure @ edge.
Remove single attachment screw & bracket at lower front of icemaker.
Disconnect wiring harness from socket @ rear of compartment.
Tricky part was determin ... Read more ing what type of connection held the other two attachment points along the long edge of the icemaker. I did not have repair manual or useful drawing but looked @ PartsDirect pic of side brackets & used a small mirror to confirm that mine were also some sort of "snap in" attachment.
Remove icemaker unit by pushing upward and outward on the unit. I takes a good bit of pressure and will pop loose, but be careful not to break attachment bracket from freezer wall.
Scavenge shut off bar and wiring harness from old icemaker once you have it out & attach to new one before installing it back in freezer.
Again, you might find a mirror useful to align those pesky snap-in brackets with the new unit.
Since you probably kept your freezer running while waiting for the part, the plastic snap-ins will be cold and brittle. I warmed them up first by applying a dampened cloth heated in the microwave to make them a little more pliable.
A good push of the new unit towards the snap-ins along with some upward force will get it stable.
Reattach the metal screw in bracket & connect the wiring harness to rear plug... and don't forget to plug the whole thing back in.
It will take awhile for the first batch of cubes dump as the timer may need to cycle completely around to get to the fill cycle... be patient.
Dump the first couple of batches of cubes just to make sure you're free of any residue.
Read less
Was this instruction helpful to you?
Thank you for voting!
- Customer:
- Harry from Grand Ledge, MI
- Parts Used:
- D7824706Q
- Difficulty Level:
- A Bit Difficult
- Total Repair Time:
- 30 - 60 mins
- Tools:
- Pliers, Screw drivers
Water overflowed ice maker turnning ice bucket into solid mass of ice
My ice maker has been shedding its non-stick coating for over a year. Within the last month of so, it started pouring water into the ice bucket below, turning it into a solid mass of ice. So I purchased a new ice maker assembly. I encountered two problems not mentioned in the 21 or so do-it-yourselfer repair stories that precede this on
... Read more
e. First problem: one of the three screws that hold the ice maker to the refrigerator wall is hidden behind the large (black) end of the ice maker and is difficult to access. Before trying to replace the ice maker, make sure you have the physical dexterity to remove that screw. Second problem: it is not apparent how to remove the wire harness that plugs into the ice maker assembly. BEFORE you can remove the wire harness, you MUST remove the large white cap that covers the black end of the ice maker assembly and then push in a retaining tab to release the wire harness. If you don't do this, the wire harness will not release. Other than those two problems, it was relatively easy to remove three screws, unplug the wire harness, transfer three small, metal parts from the old ice maker to the new, plug in the new wire harness, mount the ice maker assembly so that the water tube is in the proper position, and then re-install the three screws. The ice maker works fine now. (P.S. I was told by an expert that the real problem might be a malfunctioning fill valve. I would have replaced the fill valve if replacing the ice maker assembly had not fixed the problem.)
Read less
Was this instruction helpful to you?
Thank you for voting!
- Customer:
- John from Matthews, NC
- Parts Used:
- WP61001846, WP52085-29
- Difficulty Level:
- Easy
- Total Repair Time:
- 1- 2 hours
- Tools:
- Nutdriver, Pliers
The freezer was cold but refrigerator was warm
This is a problem in the defrost cycle. It is one of three items the heater, timer or thermostat.. I removed the screws from the back side of the freezer and romoved the sheet metal from the back which exposes all the elements. Below the evaporaro coils are two small plates which cover the heating elements ( two glass tubes conected to in
... Read more
sulated wire), You may be able to look at it and tell if they are bad. Mine was burnt and obviously gone. If you disconnect from conectors you can check for conitinuity to tell if bad. Simply remove the four screws holding these in place and install new one the same way. quite easy. I did check the thermostat for continuity and relaced it also. It simply plugs into a clip on the back wall and two power connectors. If checking themostat for continuity make sure it is cold otherwise it will be open and you won't get a good read. The timer for this model is under \neather behind the grill on the bottom. simply turn the dial and if the motor stops it is probbably good. It runs 8 hr. and then will shut off for defrost heater to come on. Do this before closing up to tell that your new heater is working. It will get red quickly. Saved a lot of money on this one
Read less
Was this instruction helpful to you?
Thank you for voting!