


Models
>
S500
S500
Jump to:
Find Part by Name
Keep searches simple, eg. "belt" or "pump".
Models for S500
Click on the best match to narrow your results.
- S500 (Type 1) Black and Decker Power Scrubber (Scumbuster)
- S500 (Type 2) Black and Decker Power Scrubber (Scumbuster)
- S500 (0601190023) Bosch Cordless Drill (Diamond Drill Stand)
- S500 (0601190020) Bosch Tool Stand & Cart (Drill Stand)
- S500-04 (Type 1) Black and Decker Power Scrubber (Scumbuster)
- S5000T ( 8872-0 8872-0 ) Generac Generator (5,000 Watt Portable Generator)
- S5000T (8872-0) Generac Generator (5000 Watt Portable Generator)
- S5002 (8983-0) Generac Generator (5000 Watt Portable Generator)
- S5002 (8983-2) Generac Generator (5000 Watt Portable Generator)
- S5002 (8983-3) Generac Generator (5000 Watt Portable Generator)
- S5002 (8983-4) Generac Generator (5000 Watt Portable Generator)
- S5002 (8983-5) Generac Generator (5000 Watt Portable Generator)
- S5002 ( 8983-2 8983-2 ) Generac Generator (5,000 Watt Portable Generator)
- S5002 ( 8983-5 8983-5 ) Generac Generator (5,000 Watt Portable Generator)
- S5002 ( 8983-3 8983-3 ) Generac Generator (5,000 Watt Portable Generator)
- S5002 ( 8983-0 8983-0 ) Generac Generator (5,000 Watt Portable Generator)
- S5002 ( 8983-4 8983-4 ) Generac Generator (5,000 Watt Portable Generator)
- S5007W0 Roper Range (Ranges, Electric*)
- S500A (0601190025) Bosch Tool Stand & Cart (Drill Stand)
- S500PRO ( 966866101 967637301 ) Husqvarna Lawn Tractor Accessories (S500 Pro - 966866101 (967637301))
- S500PRO (967637301) Husqvarna Dethatcher (Scarifier)
- S500PRO ( 966866101 2015-06 ) Husqvarna Lawn Tractor (Lawn Care Equipment)
- S500PRO ( 966866101 2017-04 ) Husqvarna Lawn Tractor (Lawn Care Equipment)
Keep searches simple, eg. "belt" or "pump".

$8.70
This chrome drip bowl is an OEM approved replacement part designed for use with various models of electric ranges and cooktops. This drip bowl fits under 6-inch burner elements and has a diameter of a...
In Stock
Order now and your part arrives by Apr 24

$19.75
This is a genuine OEM 40-Watt replacement light bulb that is compatible with various types of appliances. It has a frosted glass bulb with a standard metal socket base, making it easy to screw and uns...
In Stock
Order now and your part arrives by Apr 24

$16.35
The drip bowl is found underneath the burner element of ranges with a rolled terminal style plug-in surface element. The purpose of the bowl is to catch any drips or spills that may occur while cookin...
In Stock
Order now and your part arrives by Apr 24

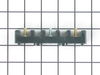
This is a genuine OEM replacement part. This surface burner plug-in block kit is designed for use with surface elements of your ranges and cooktops. This kit helps connect the wire harness to the surf...
In Stock
Order now and your part arrives by Apr 24

NOTE: The manufacturer recommends that you replace the burner receptacle at the same time.
In Stock
Order now and your part arrives by Apr 24

$6.51
Genuine Black and Decker replacement part, this item is sold individually. The 173471-0 is one of the compliments of accessories that can be used on the Black and Decker Scumbusters shown below. Use: ...
In Stock
Order now and your part arrives by Apr 24

This 6-inch coil surface element is designed to replace a broken burner on compatible electric ranges, restoring direct heat for everyday cooking. With a power output of 1250 watts, it efficiently hea...
In Stock
Order now and your part arrives by Apr 24

This is a multi-use cover screw. It fits appliances such as dryers, ranges, washers, dishwashers, refrigerators, air conditioners, washer dryer combos, freezers, wall ovens, microwaves, dehumidifiers,...
In Stock
Order now and your part arrives by Apr 24
 – Part Number: 387854-00")
Genuine Black and Decker replacement part, this item is sold individually. This is the Battery that powers all of the Black and Decker products shown below. You will need to look up your model number ...
No Longer Available

In Stock
Order now and your part arrives by Apr 24

In Stock
Order now and your part arrives by Apr 24

Common Problems and Symptoms for S500
Viewing 2 of 2Element will not heat
Fixed by these parts


How to fix it
Will Not Start
Fixed by these parts

How to fix it


Keep searches simple. Use keywords, e.g. "leaking", "pump", "broken" or "fit".
8 inch burner wouldn't come on. Wires shorted out
One screw holds the block onto the stove top. Had to clean out fitting for phillips screwdriver or screw would have stripped because it was old with lots of buildup. Even cleaned out, this screw required great force with phillips screwdriver to keep from stripping. Caution! If you strip it, you'll have to drill it out! The rest was a snap
... Read more
. Cut the old wires leading to the old block (not too close to where wires disappear into back of stove, though!). Strip insulation off both wires and attach with the connectors that came in the kit. Then push the wires into the block, and finally, attach the block back to the stove top (new screw is supplied). Restore power and everything should be fine. One problem: Roper/Whirlpool built their appliance in such a way that when the connector block shorts out, it usually takes the infinite switch with it. So I ended up having to go back and purchase that switch as well (which just so happens to cost twice to three times as much!). If you put it all back together and it still doesn't work, that's probably what happened, so go ahead and remove the knob panel and check that switch (it's right behind the control knobs on the front). You will probably find a burned connector at the back top left or the switch. Don't forget to write down which wire goes where (or just take a picture of it).
Read less
Was this instruction helpful to you?
Thank you for voting!
- Customer:
- Edward from Malvern, AR
- Parts Used:
- W10900107
- Difficulty Level:
- A Bit Difficult
- Total Repair Time:
- 30 - 60 mins
- Tools:
- Pliers, Screw drivers
Burner would not heat
First i shut off the power since this is an electric cook top/range. I then removed the knob and the two screws that hold the burner switch in place. I removed the wires one at a time and connected each to the new switch. I then reattached the screws to the switch. The most difficult part to me was breaking off the switch stem at the
... Read more
right level. I got that done and finally selected the appropriate adapter for the stem/knob fit.
Read less
Was this instruction helpful to you?
Thank you for voting!
- Customer:
- Phillip from Pekin, IL
- Parts Used:
- 330031
- Difficulty Level:
- Really Easy
- Total Repair Time:
- 15 - 30 mins
- Tools:
- Screw drivers
One burner didn't work all the time the other would go red hot
I unplugged the stove from the outlet, then removed the two burners I was going to be working on and the drip pans. Then I raised the top part of the stove and removed the screws holding the plug-in blocks to the stove. Then I cut the two wires going to the old plug-in block and stripped the wires back to match the new wire parts. Then I
... Read more
placed the sleeves over the new wires, then I placed the new wire beside the wire I stripped on the stove and screw on the wire cap making sure it was tight. I repeated this three more times, once I had all four wires connected I then placed the sleeves over the connections and heated them up until they were formed around the connection. Once I had all the connections done I placed one wire at a time into the plug-in block until it locked into place ( I looked at my old plug-in blocks first to make sure I placed the new wires in the correct way ).I then used the metal mounting bracket that matched my old ones and snapped the correct one onto each plug-in block. Before mounting them onto the stove I compared them to my old ones to make sure they were correct. Then I used the new screws to mount them to the stove. I took a second look at everything I had done before closing the top cover of my stove. After lowering the cover back into place I put both the drip covers in place and then installed the burners.I then plugged the stove back into the outlet and tried the burners. This was very simple and the video on the web site shows this very well which made my job very simple.
Read less
Was this instruction helpful to you?
Thank you for voting!