

Like what you're reading?
Get your fix of expert articles delivered straight to your inbox!
Oops! Please double check your email address.
No Thanks - I don't like cool stuff


A table saw is probably not the first power tool that comes to mind when you think of craftsmanship, artistry, and woodworking. It is, after all, just a saw mounted to a table. At least, that’s the definition most people ascribe. What’s so crafty about that?
In a word? Joinery.
At its foundation, joinery is simply the process of joining materials (usually wood) to form furniture, finishes, framework, and other functional fixtures found in most homes. Some believe that joinery is a fine art that requires a lifetime – and a lifetime of savings – to learn. While there is some truth to the statement, several key questions remain.
Is joinery difficult to learn? Not necessarily, but it does require a very skillful hand. Do you need specialized tools to get started? I’ll answer that question with one of my own. Do you have a table saw?
If so, you’re one step closer to becoming a joiner. This article will show you how to create a few fundamental joints (including half-laps, butt joints, and tenons) using your existing table saw.
Let’s start with some definitions that go beyond “table” and “saw.”
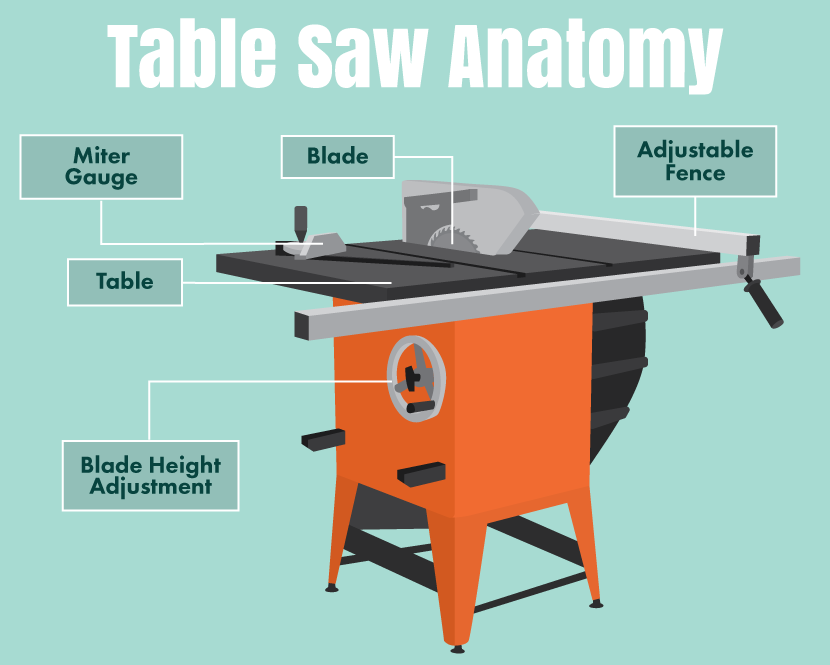
Table saws are available in both open base (benchtop) and enclosed base (cabinet) styles. High-quality table saws can be found in either style, but the cabinet-style saws do have slight advantages in the areas of stability and dust control. Regardless of style, any decent saw will feature some common table saw parts – locking rip fence and a smooth, precise tabletop, often made of cast iron, that includes miter slots, rails, and openings to accommodate table inserts.
The rip fence is the backbone of the cutting system. It provides a foundation on which every cut is calculated, so it is essential that the fence does not falter under pressure. The quality of fences varies widely across table saw models, so it is a good idea to test every fence before purchasing a new saw. A simple test is to lock the fence in position and apply pressure at various points along the sides.
A good fence will not move at all. Trunnions are another common feature found on most table saws. Trunnions are used to raise, lower, and tilt the blade. Typical table saws include two separate trunnions: one for adjusting the blade’s height, and one for adjusting its angle. Benchtop models often include a handle for raising the blade and a lever for tilting it.
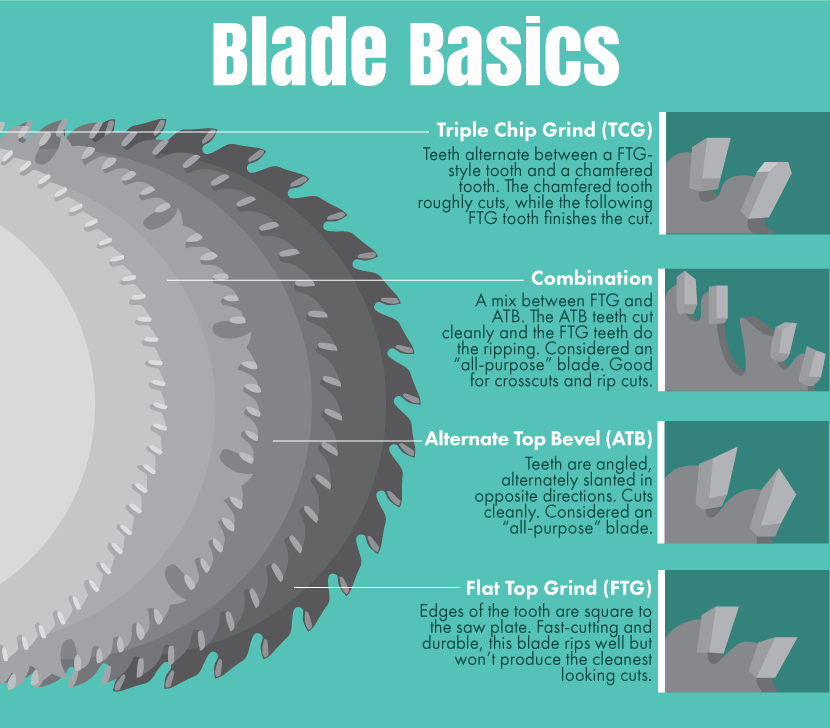
Speaking of blades, few things are as vital for obtaining consistently precise cuts as premium-quality blades. Tooth configuration is another important consideration. Not all blades are created equal. Every blade is designed to perform a specific task on a specific type of material, and there are dozens of unique tooth configurations available. Here are a few of the most common:
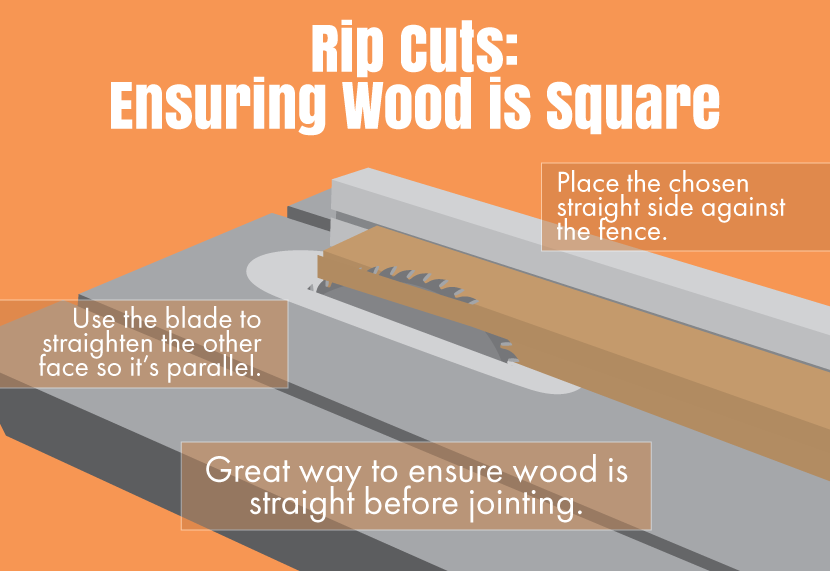
The cardinal rule of edge-joining is this: your materials will not get straighter later. In other words, it is imperative that you begin your project with perfectly straight, square, and smooth surfaces. The process usually starts at the jointer, although it is possible to achieve reasonably smooth surfaces on the table saw (with proper blade selection).
Place the smooth, jointed side of the material against the saw’s fence. Use the blade to smooth, square, and straighten the second face, which is parallel to the original. To achieve a smooth rip-cut on the table saw, you will need to use the proper blade. A glue line rip blade is ideal. This blade will produce a clean cut, and it has a thicker plate, which produces less vibration.
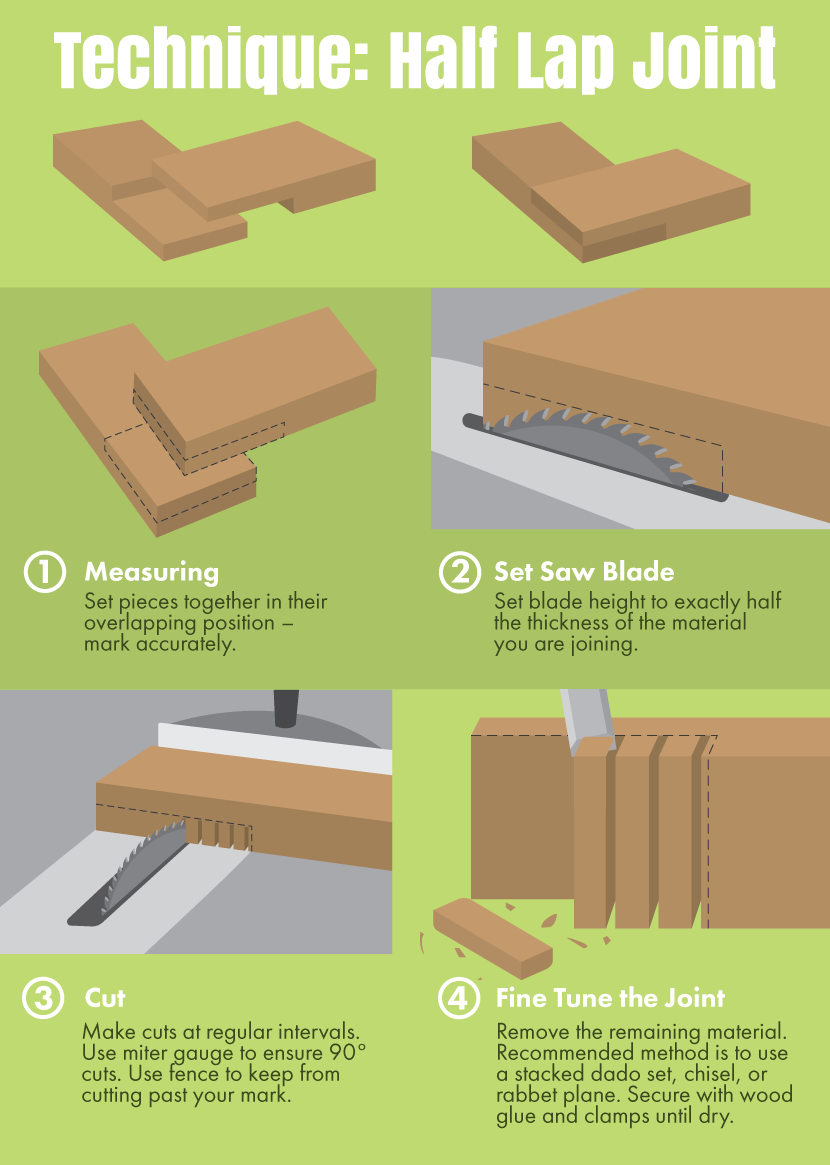
Ideal for creating smooth, stable, seamless right-angle connections, this joint involves overlapping two pieces of material from which half of the original thickness of each has been removed. Once joined, they create a single joint, matching the original thickness. Typical uses for this joint would be joining face-frame components in high-end furniture, or connecting table legs to the table’s stretchers.
The execution of clean, square shoulder cuts and precise milling around the shoulders of the material is essential to achieving seamless half-lap joints. This ensures that the faces of each board are flush.
Begin your half-lap joint by marking the shoulder cuts on each work piece. Take your time to ensure the accuracy of these markings; both work pieces need to be flush with each other. You will use your table saw’s miter gauge to make the shoulder cuts. The gauge should be set up with an accurate square to ensure perfectly square cuts.
Use a sharp crosscutting blade to make the shoulder cuts. An 80-tooth ATB blade works great for this step. The height of the blade should be set to exactly half the thickness of the material you are joining. Use an adjustable square or a table saw blade-height gauge to set the blade’s height.
Once the shoulders have been defined by these first cuts, you’ll remove the remaining material. There are a few different ways to do this, but one of the best is to use a stacked dado set. A high-quality stacked dado is one of the most important accessories you can add to your table saw. (Try to find one that delivers smooth, even cuts; read reviews before purchasing.) Set the dado blade’s height to exactly half the thickness of the material. Now, cut away the rest.
After making the initial cuts for the half-lap joint, you can fine-tune the fit using a chisel or a rabbet plane if necessary. When you are satisfied with the fit of the joint, secure it with wood glue and clamps until it dries completely. For a stronger half-lap, you can drill through the assembled joint and install a dowel pin. Use wood glue to secure the dowel. This is also a simple way to “dress-up” your lap joint.
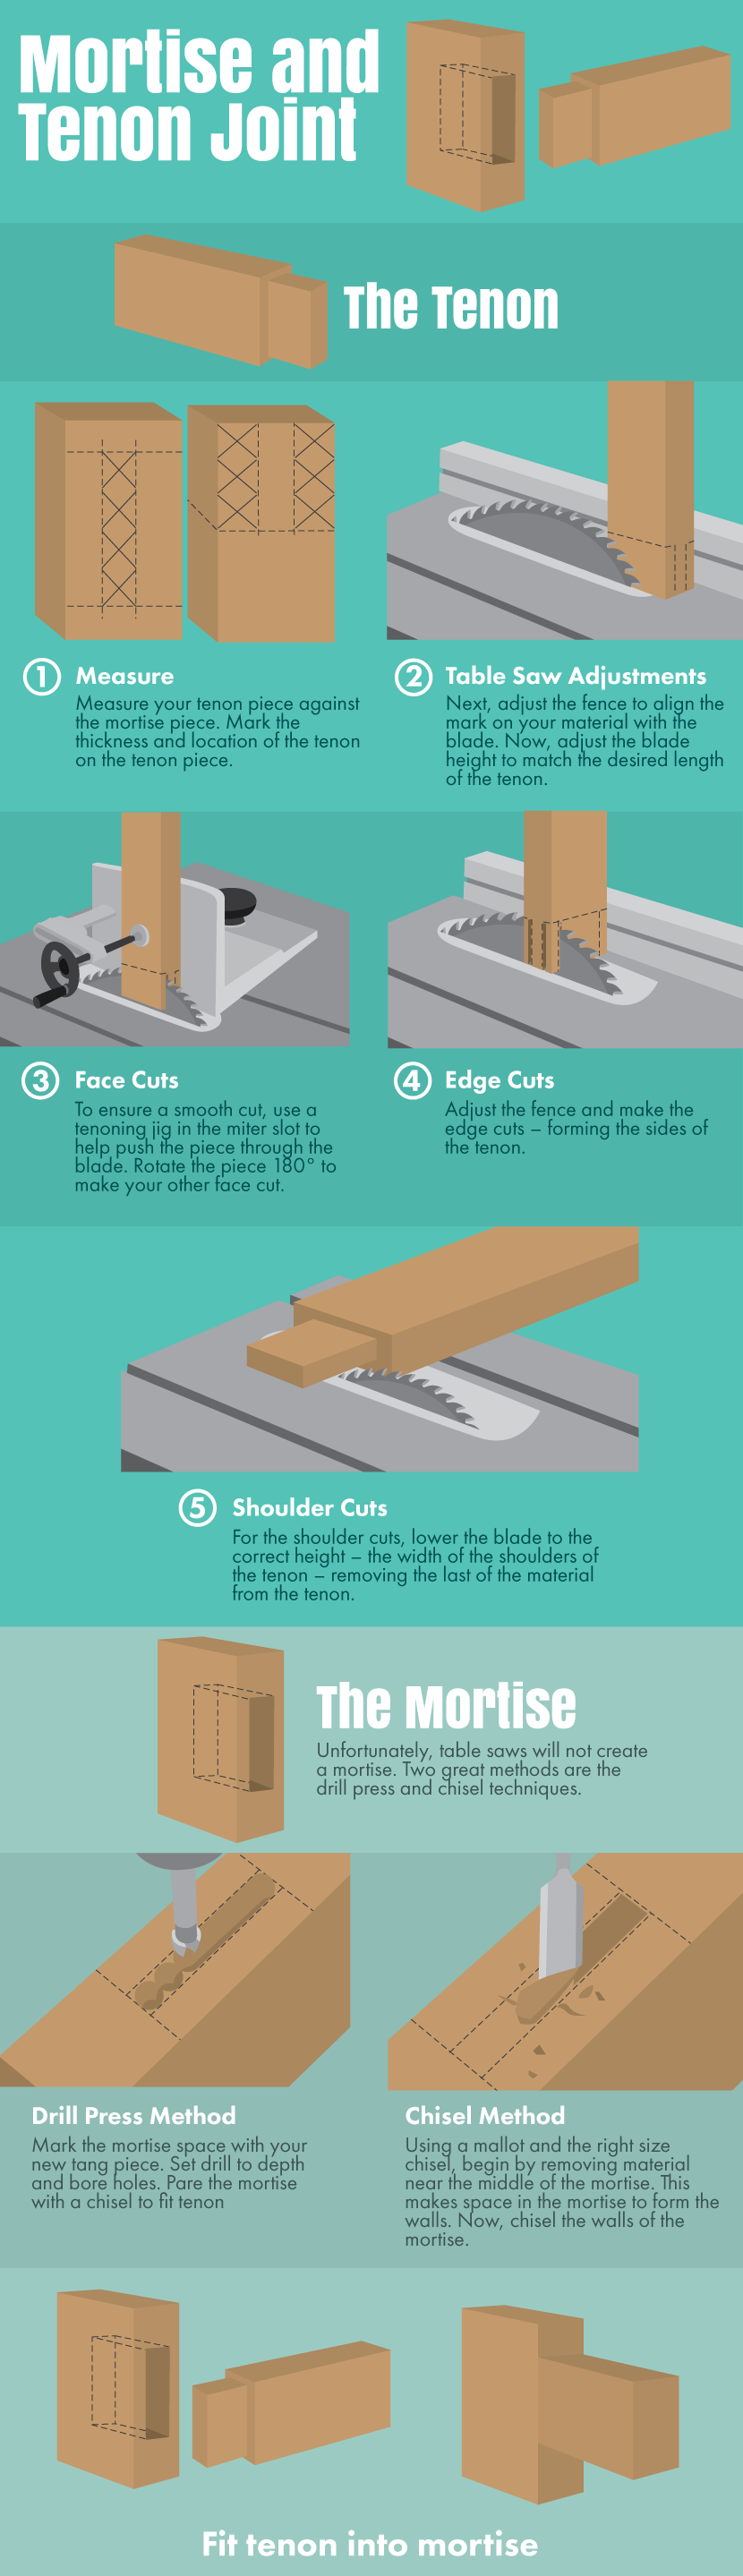
Using a Tenoning Jig: One of the most timeless joints in the history of woodworking is the mortise and tenon joint. Using a table saw and tenoning jig is the best way to form the tenon portion of this joint. The tenoning jig fits into the miter slot on your table saw. Its purpose is to vertically stabilize the work piece, allowing you to safely make the face cuts of your tenon.
The first step is to measure your tenon. Mark the thickness and location of the tenon on your chosen work piece.Typically, the tenon will be centered on the work piece. Although thicknesses may vary depending on intended use, the tenons should be cut as thick as is practical.
For three-quarter-inch material, a three-eighths-inch tenon would be common. A marking gauge is an easy way to make your reference lines. If your project has multiple, identical tenons, you’ll only need to mark the first one. You’ll use this original piece as a template to set up your tenoning jig.
Clamp the original work piece into the jig. Next, adjust the jig into alignment laterally, so the mark on your material is aligned with the blade. Now, adjust the blade height to match the desired length of the tenon. A high-quality crosscut blade works well for cutting tenons.
To ensure a smooth cut, push the tenoning jig slowly through the blade. The symmetry of the jig makes the remainder of this process simple. After aligning and cutting the initial face, simply reverse the work piece in the jig by rotating it 180 degrees, and make your second cut. Repeat this process to cut the face portions of all the tenons.
Once the faces have been cut, it’s time to make the shoulder-cuts. Use a miter gauge and the same crosscut blade for this step. Align the blade to the width of the shoulder and complete your shoulder-cuts on both sides of the work piece.
There are many good machines available for cutting mortises.
Unfortunately, the table saw is not one of them. Mortising machines and drill press mortising attachments are the fastest and most accurate. You can also use a combination of router-specific mortising jigs. If you have none of these, you’ll need to use your drill press and a variety of bits to cut the majority of your mortise, and then finish it with a hand chisel. If you are really ambitious, or very traditional, you can craft the entire mortise using only a chisel. That’s woodworking in its most classic form.
The butt joint is one of the most common joints in woodworking. It’s also one of the simplest to make. The process involves joining two work pieces perpendicular to each other by simply “butting” them together. The butt joint is commonly used to join face-frame components. Although this is a very easy joint to make, it is very weak. For this reason, butt joints will always require additional reinforcement, besides glue, to stabilize and secure.
The key to cutting clean butt joints is to make perfectly square cuts, so a quality blade is essential. You don’t want to tear the edges of your work piece. A high-quality, 80-tooth crosscut blade is ideal. Use an accurate square to ensure that your miter gauge is precisely set. Finally, cut the material slowly to produce smoother cuts.
As mentioned earlier, glue alone cannot stabilize a butt joint. This joint will require reinforcements, which commonly include dowels, biscuits, or pocket-hole screws. The method you choose will depend on the tools you have available, because there are dozens, if not hundreds of different jigs, bits, and attachments available for each method.
So begins your journey into the world of do-it-yourself table saw joinery. Hopefully, this article has given you some ways to expand your potential without expanding your expenses. Using your existing table saw is an easy and economical way to create many traditional woodworking joints. It also provides valuable experience as you progress on your journey. Now, back to that original question. Is table saw joinery something that you can learn to do in your own shop?
Saw for yourself and see.
Embed the article on your site

Written by:
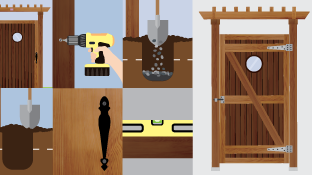
Proper structural elements are key when constructing a wooden gate to last ...
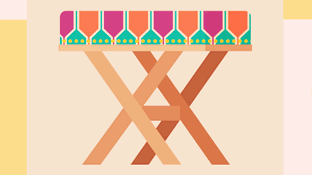
The easy-to-build, multi-use X-bench has been a popular and efficient piece...
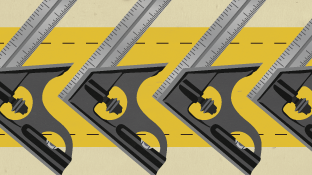
Ever wondered what you could do with a combination square? Learn what it is...
Get your fix of expert articles delivered straight to your inbox!
No Thanks - I don't like cool stuff