

Like what you're reading?
Get your fix of expert articles delivered straight to your inbox!
Oops! Please double check your email address.
No Thanks - I don't like cool stuff


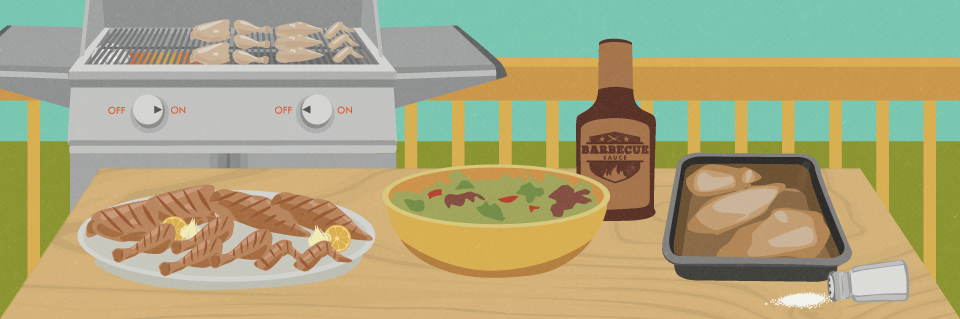
From late spring to the end of summer there are countless opportunities for big backyard barbecue blowouts. There’s Memorial day, Father’s Day, the Fourth of July, Labor Day, Flag Day (one of my personal favorites), and let’s be honest, any given Sunday! During these festive occasions we invite friends, family, neighbors, co-workers, co-workers’ neighbors, the mailman, less-than-casual acquaintances, and then wonder how the hell to cook all the food needed to feed a hungry mob. This leads to the inherent problem with grilling for the masses – the more we make of anything, the worse it gets.
Chicken cooked for two is usually much more delicious than a batch meant for 20. Cooking chicken on the grill is particularly problematic. The breasts dry out due to lack of fat and the thighs burn from too much fat dripping through the grates. There are, however, some simple steps the backyard grill warrior can take to make sure chicken, even for a large crowd, is moist and delicious.
But first, let’s make sure we understand the different parts of a chicken and save some money. I know this sounds self-explanatory, but it will become vitally important later. Buy whole chickens, rather than higher priced pre-carved chickens, and then cut them into the four types of pieces that can be grilled: breast, thigh, leg, and wing.
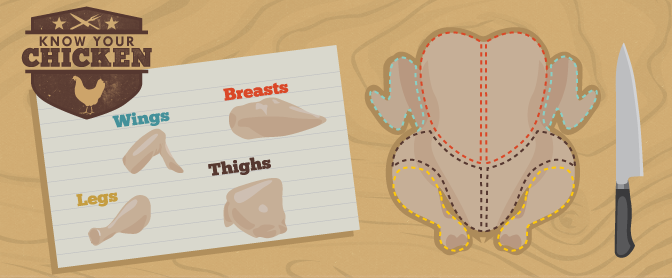
The breast is the largest cut of meat, yet it – along with the wing – takes the least amount of time to cook. It’s counterintuitive based on the size of that piece, but the breast has the least fat and thus it dries out the fastest. The thigh is the second largest and takes the longest to cook because it is dark meat and loaded with that juicy, delicious fat. The leg takes the second longest to cook because of the extra fat it holds. Now that we have our chicken carved into manageable cuts, let’s make sure each piece stays super moist.
Thou shalt brine thy chicken. Take that to the bank, write it in stone, and tattoo it on your forehead. Brining is essential to managing a large cookout where chicken is the primary protein. So, what is brining? It’s submerging meat in a saltwater solution (generally about six percent salt). Some may wonder if the salt will dry out the meat, but that’s not how it works.

The salt solution pushes moisture into the meat. I could use words like “diffusion” and “denatured proteins” and “protein sheaths,” as above, but in layman’s terms, liquid travels from the brine into the meat, making the chicken juicier. The salt in the brine also starts to break down muscle filaments, making the meat more tender. But we’re not done. To take your brine to the next level, substitute cider, root beer, or coffee for the water. The liquid that goes into the meat from these brine bases will make the chicken juicier, tenderer, and more flavorful. It all comes down to this: brining moisturizes, tenderizes, and flavorizes meat. I know that last one isn’t a word, but you get the idea.
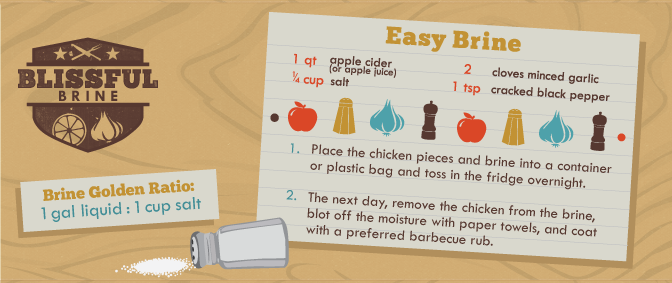
There is a golden ratio that must be followed for a brine and that’s one gallon of liquid to one cup of salt. My go-to brine is one quart of apple cider (or apple juice), one quarter-cup salt, two cloves minced garlic, and one teaspoon of fresh cracked black pepper. With countless brine combinations available, go with whichever recipe you prefer.
Place the chicken pieces and brine into a container or plastic bag and toss in the fridge overnight. The next day, remove the chicken from the brine, blot off the moisture with paper towels, and coat with your preferred barbecue rub. Now it’s time to get the grill ready.
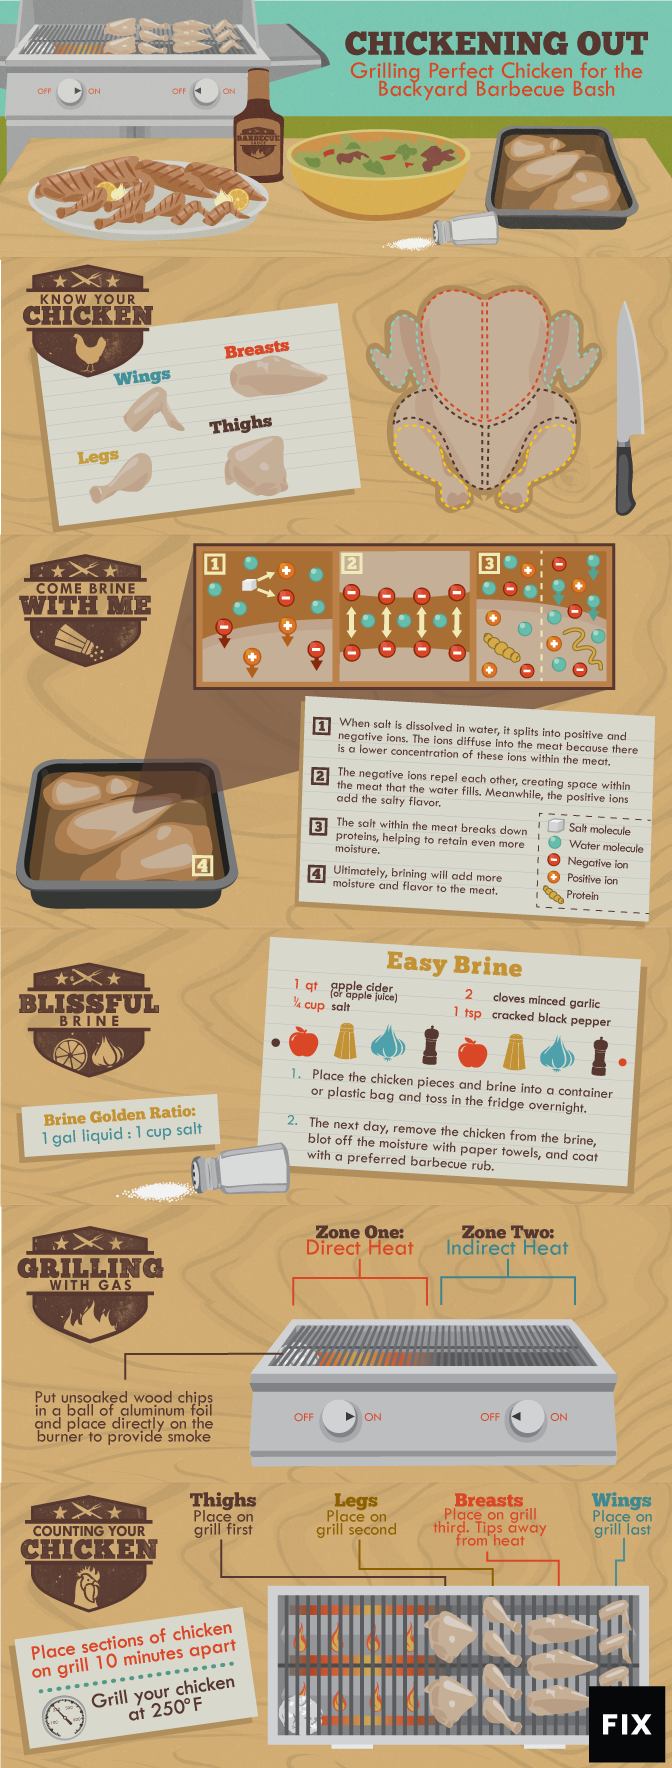
Prepare the charcoal grill for two-zone cooking with direct and indirect areas. There should be coals on one side and nothing on the other. The chicken will go on the side with no heat and a chunk of fruit wood will go on the other to provide the smoke. If using a gas grill, turn on one burner on the far side and leave the others off. Put unsoaked wood chips in a ball of aluminum foil and place that ball as close to the actual lit burner or charcoal as possible to provide the smoke. Keep adjusting the fuel flow (gas) or vents (charcoal) until a temperature of 250 degrees is achieved inside the grill.

Barbecue-goers often eat dry chicken breasts or have raw thighs thrown back onto the grill for one of two reasons. Either the pitmaster put all the chicken parts on at the same time regardless of size and meat type, or the pieces were put on in order of size, regardless of meat type. The proper way to put chicken on the grill is in this order: thigh, leg, breast, wing.
Once the grill is a nice 250 degrees and smoke is wafting out of the vents, place the thighs on the side with no heat but closest to the coals/lit burner. Close the lid for 10 minutes, then place the legs on the grill behind the thighs and close the lid for another 10 minutes. Then place the breasts on the grill, skinny tip of the breasts away from the heat, and place the wings on the coolest edge of the grill at the same time. Close the lid.

The only time any of this chicken should be moved while smoking is if the thighs closest to the heat start to burn on one side. Simply slide them a little farther from the heat or, if there’s not enough room to slide them back an inch or two, rotate them 180 degrees. If they have to be rotated once, they will likely need to be rotated a few times before they are done.
Once the chicken reaches an internal temperature of 150 degrees (about an hour depending on size of the chicken and heat of the cooker) open the grill and add some charcoal to fire up the hot side, or turn up the burner on a gas grill. Move the chicken from the cool side to the hot to put a nice char on the outside. This firms up the skin and caramelizes the protein, lending a sweet crispness. Once all the pieces have been charred nicely, dunk them in barbecue sauce and put them back on the side of the grill with no heat, stacking the chicken pieces up so they insulate each other. At this point no more cooking is needed (hence the stacking) but the sauce needs to thicken, so close the lid. After 15 minutes, slather with sauce again and close the lid for another 15. Ensure the chicken is at least 160 degrees before pulling dinner from the grill, using an instant-read stem thermometer. Then serve the moist, tender, and delicious chicken to starving party guests.
If of age, feel free to enjoy your favorite adult libation while basking in the glory of all the accolades tossed in your direction after your guests strip the meat off those chicken bones like a school of hungry piranha would a wounded goat that slipped into the Amazon.
Embed the article on your site
Written by:
Want to add something different to your next barbecue? Consider grilling pi...

Vegetables come to life on the grill! Here's everything you need to know ab...
Barbecue-goers often assume overcooked steak comes with the territory – no ...
Get your fix of expert articles delivered straight to your inbox!
No Thanks - I don't like cool stuff