

Like what you're reading?
Get your fix of expert articles delivered straight to your inbox!
Oops! Please double check your email address.
No Thanks - I don't like cool stuff


Avid gardeners dream of extending their growing season. With the price of food constantly rising, and gardening resources more available than ever, building a greenhouse makes perfect sense! You can even beat Mother Nature when the cold and frost settle into your area!
The concept of a greenhouse is simple – creating an enclosed environment with glass or a clear composite material to capture and contain the sun’s energy in the form of heat, benefiting your crops.
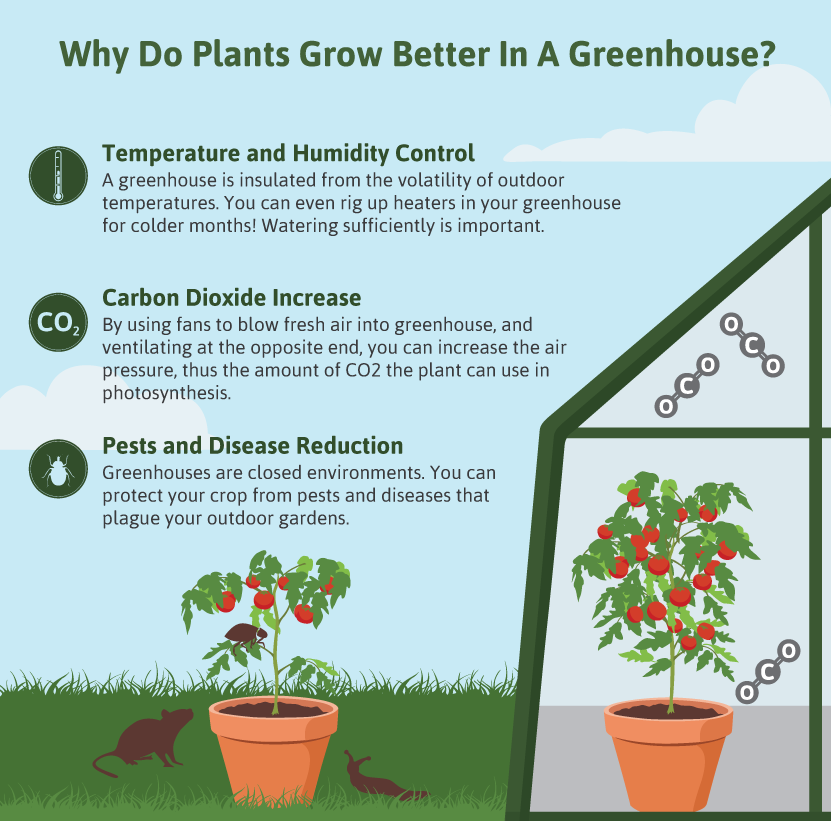
The greenhouse effect is when light energy is captured in a closed system, and converted to heat energy. In your greenhouse, sunlight permeates its clear walls, is converted to heat energy, and warms the air trapped inside. Plants now have a warmer environment, which encourages growth. This heat is regulated by matter inside the greenhouse. Soil, wood, metal, water, and even plants, absorb and release this heat slower than the air. This helps to moderate the temperature inside the greenhouse throughout the day and night.
In many regions, you may have to artificially heat your greenhouse during cold winter months. Adding a small space heater will help keep your plants warm.
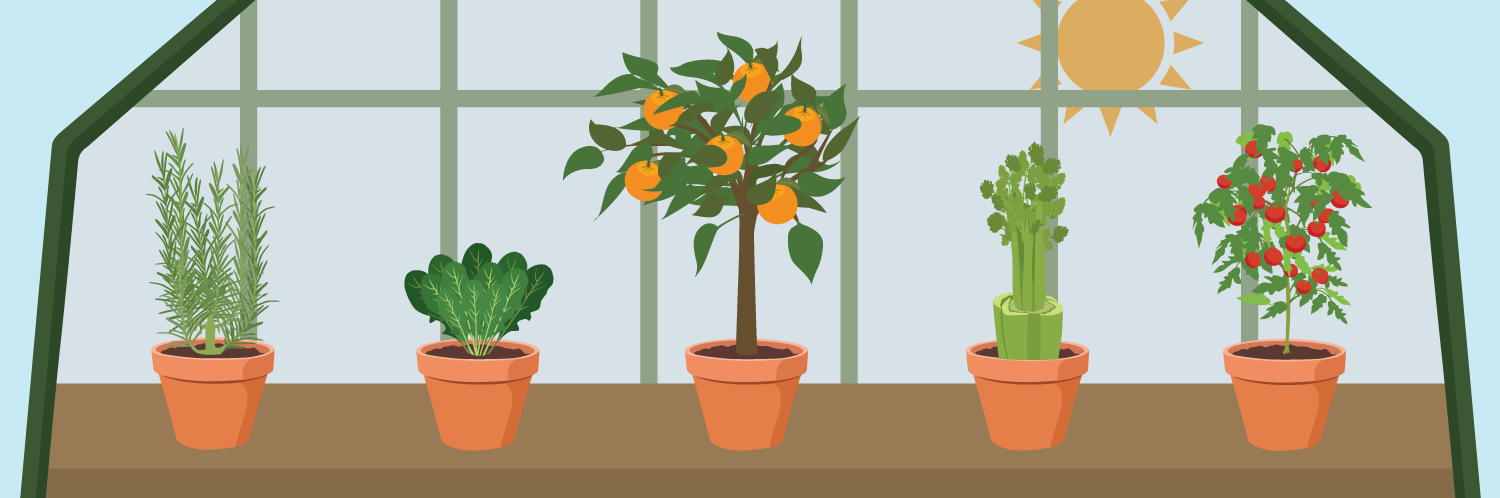
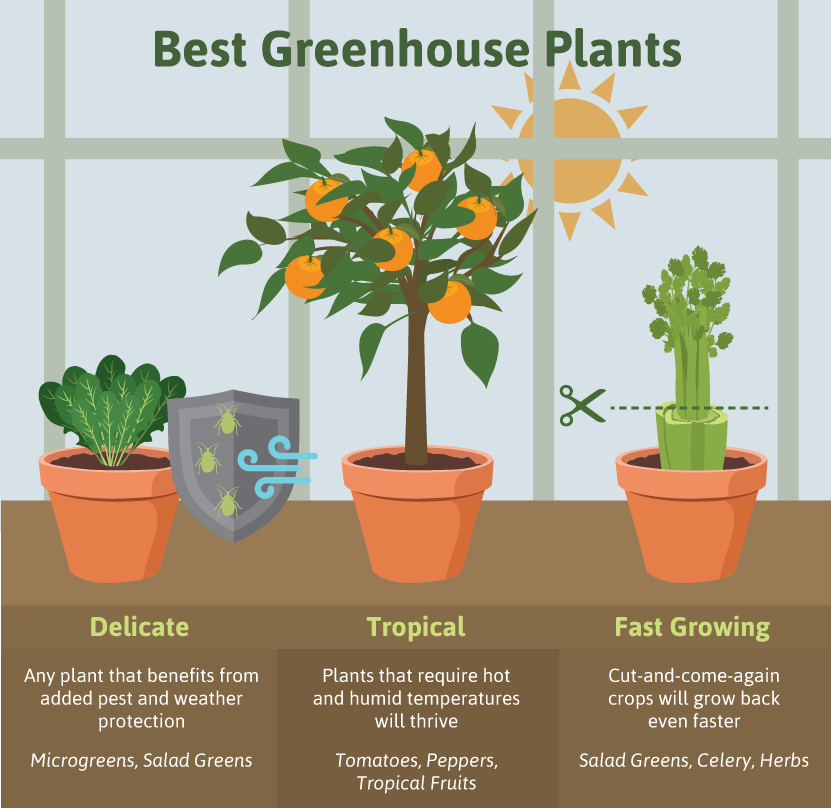
If you are just starting out, you may want to choose some hardy, easy-to-grow varieties of plants that are not susceptible to insects or mold. You can look at daily vegetable staples, like tomatoes, beans, onions, peppers, cucumbers, spinach, and many varieties of lettuce, when you first start out with greenhouse crops.
As your experience and confidence in managing your crops builds, you can challenge yourself with more unique types of vegetables that are hard to get or more costly during the colder months in your area. Timing the growth of your crops to the seasons in your region can be crucial to both the success of your harvest and your grocery expenses.
Using your greenhouse to start seedlings in late winter is a great way to kick start the growing season. For example, some tomato varieties may take up to 80 days to grow from a seedling to maturity. You can even collect seeds from your best-producing plants in the previous growing season. Starting these seeds in containers is a great way to begin the season.
By transplanting and growing plants in movable containers, you can maintain an even greater level of control on the crop. The hotter the greenhouse, the more water evaporates from your plants. These hot temperatures can burn or damage your crop. Growing in a greenhouse brings the added responsibility of monitoring moisture levels in the soil and air temperatures on a regular basis. The ability to move your maturing crops outside can lessen the time you spend cooling or watering your future harvest.
The rule of thumb with this type of planting is to use containers that are not too cumbersome and awkward to move around. This usually works better with smaller greenhouses (around 100 sq. ft.).
Depending on the size of the greenhouse, some careful planning regarding air control will go a long way in providing a stable growing environment for your plants. For larger greenhouses, ventilation for adjusting heat and humidity is key. Cross-ventilation allows you to flood the structure with fresh air while controlling the heat and humidity that build up under the right conditions. Even during the cold months, a greenhouse can overheat, leading to plant damage. Allow the heat to escape, either through windows, doors, or vents, in both high and low locations on the structure, using fans if necessary. A greenhouse can also be covered or shaded artificially to help keep it from over-heating on warmer days.
Picking a spot with maximum sunlight is great in the cooler months, but it may keep you busy in the hot summer, so plan the structure and its use accordingly.
Now that we have discussed some of the reasons for building and using a greenhouse, let’s talk about building one. You model your greenhouse in many different ways and styles. You can also purchase one of the multitude of kits on the market. Depending on the size and shape of your ideal structure, you will need to focus on making it strong enough to support snow loading and to endure heavy winds, both of which can ruin such a structure in a hurry.
If you have decided not to purchase a ready-made kit, you can easily turn an old carport frame into a do-it-yourself greenhouse! These frames usually consist of a curved or peaked steel frame with a series of ribs set 24 inches apart. The steel frame can be anchored into a concrete pad or a wood base on either side of the structure.
Start by measuring the space or footprint that your frame will occupy. The nice thing about these structures is that you can construct a small unit about 6–8 feet deep. The width of the pre-formed steel tubes will dictate how wide your greenhouse will be. Depending on the amount of framing material you have, you can make the structure deeper to suit your needs.
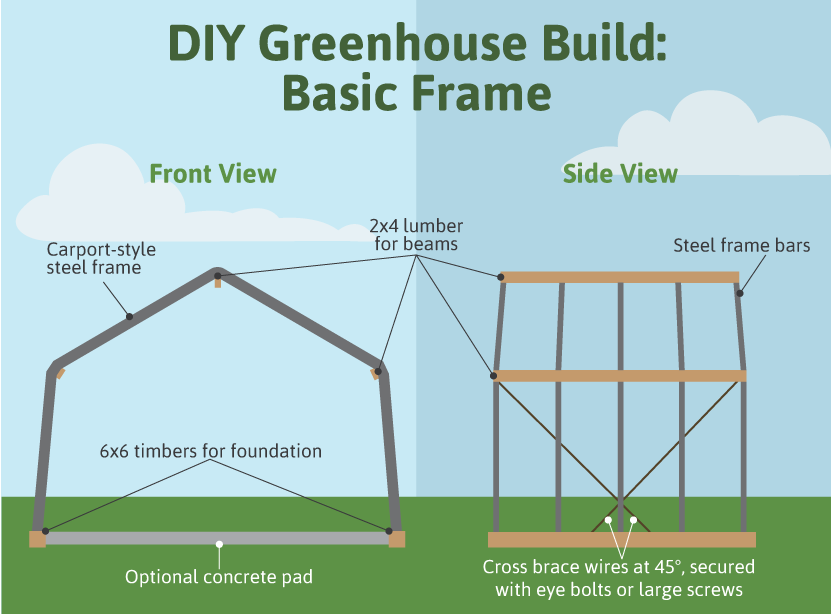
After you have prepared the ground space with either a wooden base frame made with 6 x 6 timbers or a concrete pad, begin securing your frames to the base along the perimeter by bolting it in and then securing the space between the frames with 2 x 4s or additional poles. This provides lateral support in windy conditions. If you find the frame a bit wobbly, you can use steel cable as X-bracing or cross-bracing to give it more lateral strength.
Once the structure is secured, inspect the joints and connections in your frame for any rough spots or sharp corners that may damage the plastic sheet you will drape over your frame. You can use an angle-grinder to smooth out the rough edges or wrap them with soft fabric to act as a cushion for your covering material.
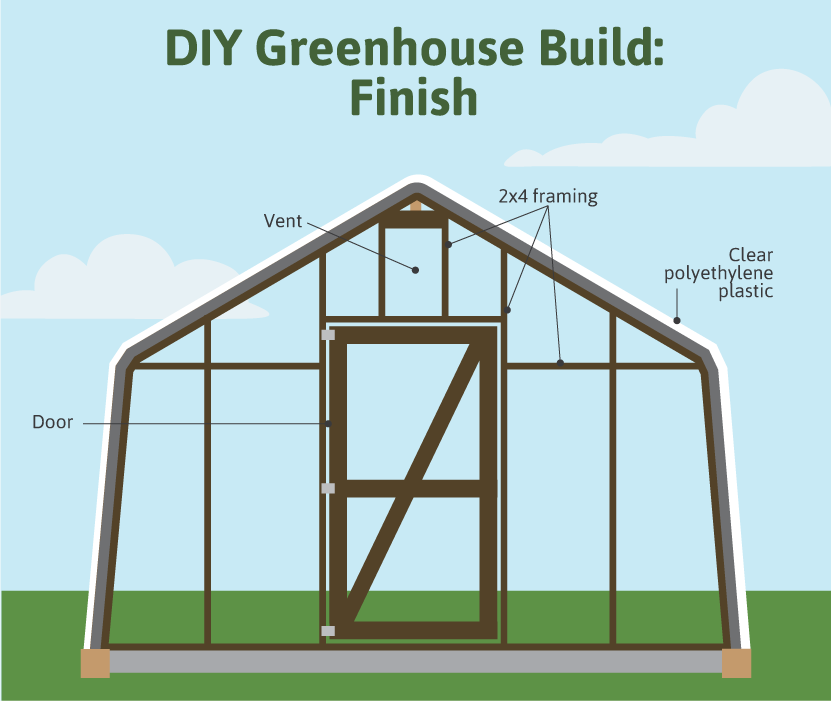
Next, seal up the two ends of your structure. You can build a wood frame wall to fit the curve of the steel roof supports. Make sure to include a door at each end of the wood frame. Depending on the size of the structure, you can include some extra windows for maximum light. Above the door, if the frame is tall enough, you can drop in a vent or a louvered-style window to help with airflow from the inside.
Drape clear 6-mil polyethylene plastic sheeting over the entire roof structure, and secure it at each side by rolling a pressure-treated 2 x 4 tightly into the edge of the poly-material. Make the 2 x 4 slightly longer than the length of the plastic so the wood sticks out of each end, giving you the ability to tie down or secure the plastic at ground level. This method enables you to raise the edges of the plastic by simply rolling the 2 x 4 up the side of the structure during hotter summer days to allow the structure to cool and ventilate itself. To close up the ends, you can use the same 6-mil polyethylene fitted to your frame, or you can use polycarbonate panels, depending on what your budget allows. Note that the 6-mil polyethylene is not suited for long-term use outdoors. Over time, the sun and cold weather can deteriorate its strength, so you will need to replace it after a few seasons. However, it is a relatively inexpensive material to purchase for building this type of greenhouse.
Overall, a greenhouse will give your plants the advantage they need. Whether they are tropical plants better suited to hotter climates, or they will simply perform better indoors, building a greenhouse is easy, fast, and will increase your yields.
Embed the article on your site
Written by:
Your garden soil is the key to a better crop. Check out these amazing natur...
Having fresh herbs on hand is convenient, and you don’t need a lot of space...
Bored with the pots you use for container gardening? This summer, refresh y...
Get your fix of expert articles delivered straight to your inbox!
No Thanks - I don't like cool stuff