

Like what you're reading?
Get your fix of expert articles delivered straight to your inbox!
Oops! Please double check your email address.
No Thanks - I don't like cool stuff


The holidays are an exciting time of year. Christmas music blasts in every retail store and on every radio station. The smells of peppermint, gingerbread, and pumpkin grace every restaurant, bakery, and coffee shop. With all the hustle and bustle come parties, gift exchanges, and holiday decorating, all of which cost money. With a few tweaks and a clever imagination, you can beautifully yet frugally decorate your home so you have money left over to get gifts from those holiday wish lists. Here are a few indoor and outdoor budget-saving decorating tips for this holiday season.
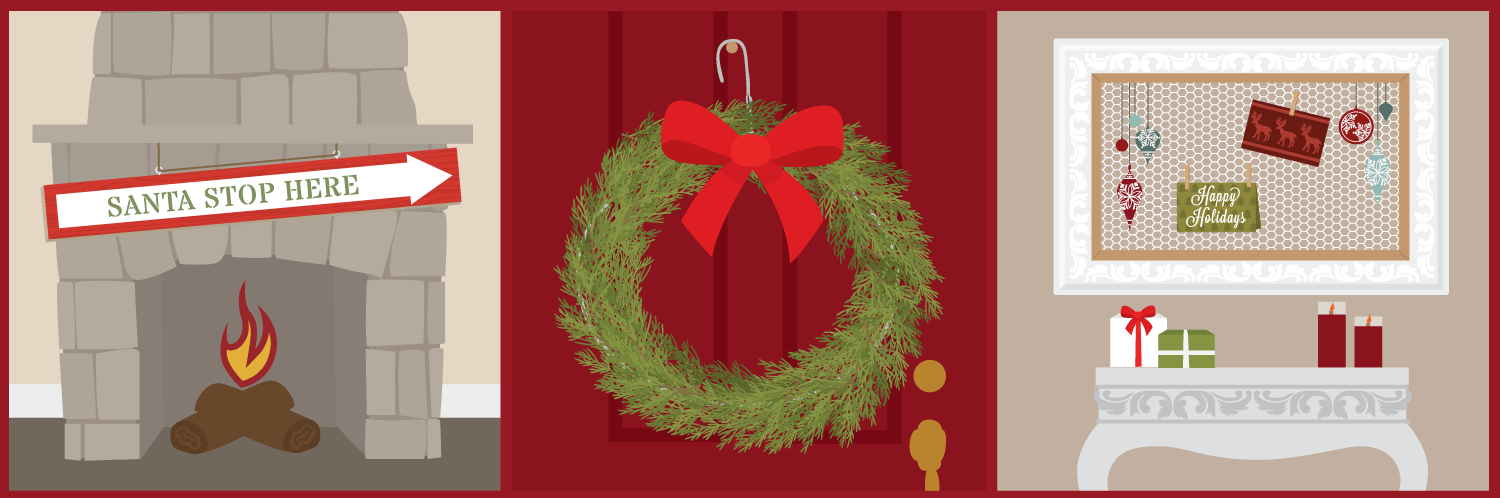
You know the holidays are here when your neighbors start decorating the outsides of their homes. The twinkle lights sparkle in the bushes, and the candles in the window go on at night. It seems that when your household includes kids, it’s natural to participate in the outdoor-decorating festivities. Every home with children needs a “Santa, Stop Here!” sign to display. You can make one for a few dollars by upcycling an old shelf or a leftover flooring plank, or you can purchase an inexpensive, unfinished 2X4.
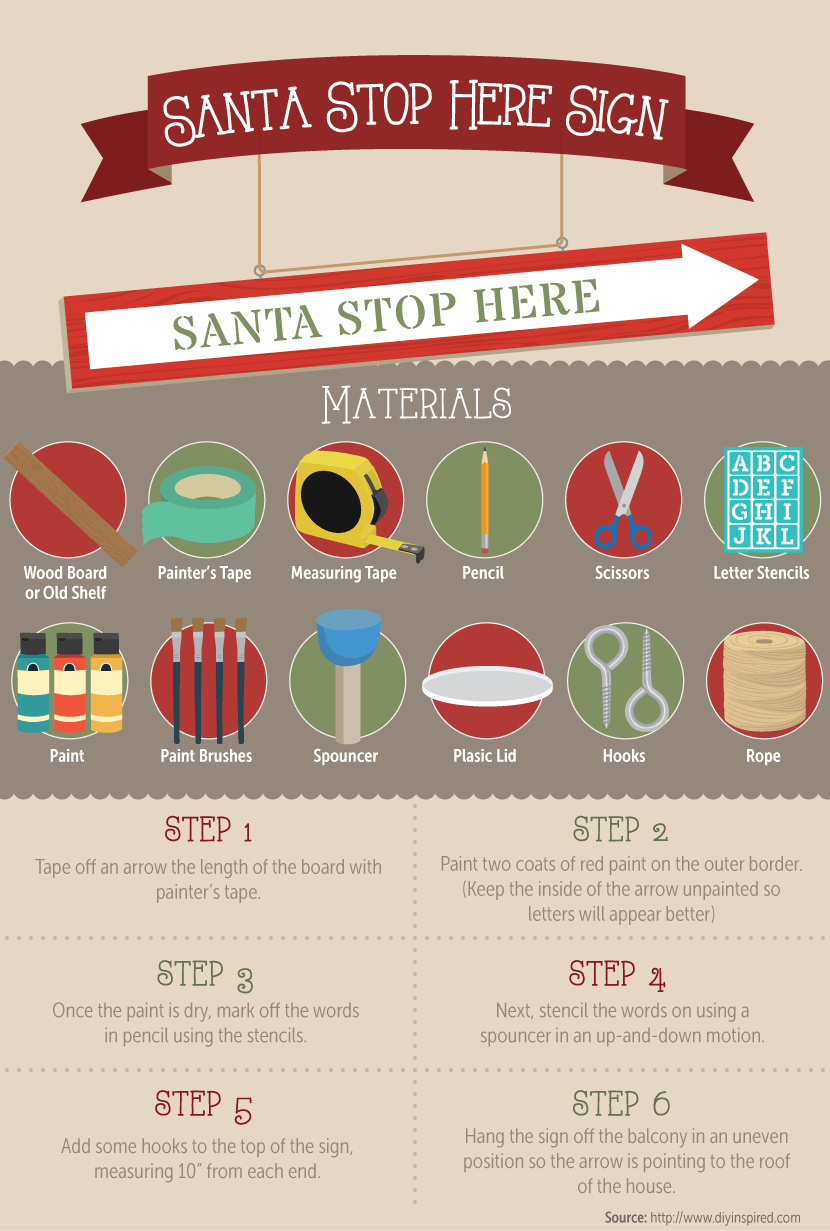
To make a “Santa, Stop Here!” outdoor sign, you need a piece of wood, measuring tape, pencil, scissors, letter stencils, paint, stencil brush, painter’s tape, hooks, and rope. First, measure the length of your wood and letters to make sure the arrow and words fit properly. Next, tape off the arrow with painter’s tape and paint the outer border. Make sure the arrow faces in the right direction, depending on where you want to hang your sign. Last, hand paint or stencil the words “Santa, Stop Here!” inside the arrow. Once the paint is dry, insert two large hooks and hang your sign. You can also make other Christmas signs with sayings such as “Let it Snow,” “Joy to the World,” “Happy Holidays,” or “Merry Christmas.”
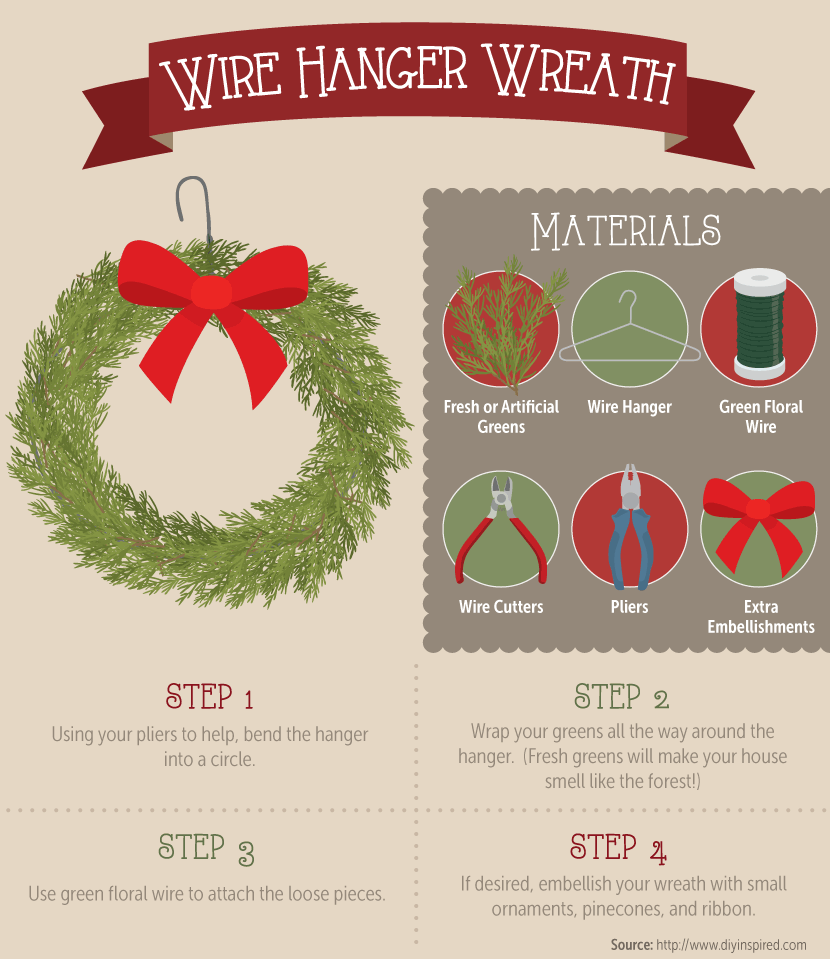
Another simple and inexpensive project is making your own wire hanger Christmas wreath. Wreaths look beautiful on front doors, in entryways, and atop fireplace mantels. They can also be pricey in stores, especially when you need more than one. To make your own, you will need fresh greenery, a wire hanger, green floral wire, pliers, and wire cutters. Greenery can be gathered from your yard, or you can use scraps from when you trim your tree. You can also ask local Christmas tree lots for some; many will gladly give them to you at no or very little cost. Using your pliers, bend the hanger to create a circle. If you have a hanger with a cardboard bottom, remove the bottom and twist the ends together to form a circle. Wrap the greenery all the way around the hanger. You don’t need much, but the more you use, the fuller the wreath. Use green floral wire to attach loose pieces of greenery. If you want, you can embellish your wreath with small ornaments, pinecones, and ribbon. Making your own wreath with fresh-cut greenery smells great, and you don’t have to worry about storing it.
Now that you have made all your wreaths, you need something to hang them on. Save a few dollars by making your own wreath hangers out of a wire hanger in just three simple steps. All you need is a wire hanger and wire cutters. Using the wire cutters, cut the hook off the wire hanger. Straighten the hanger as much as you can and fold it in half (pliers may help in this step). Create an “S” shape, squaring out the back so that the curved part is the hanger and the ends of the hanger are the back. You can use these hangers to display wreaths on mirror, stair or balcony railings, or doors.
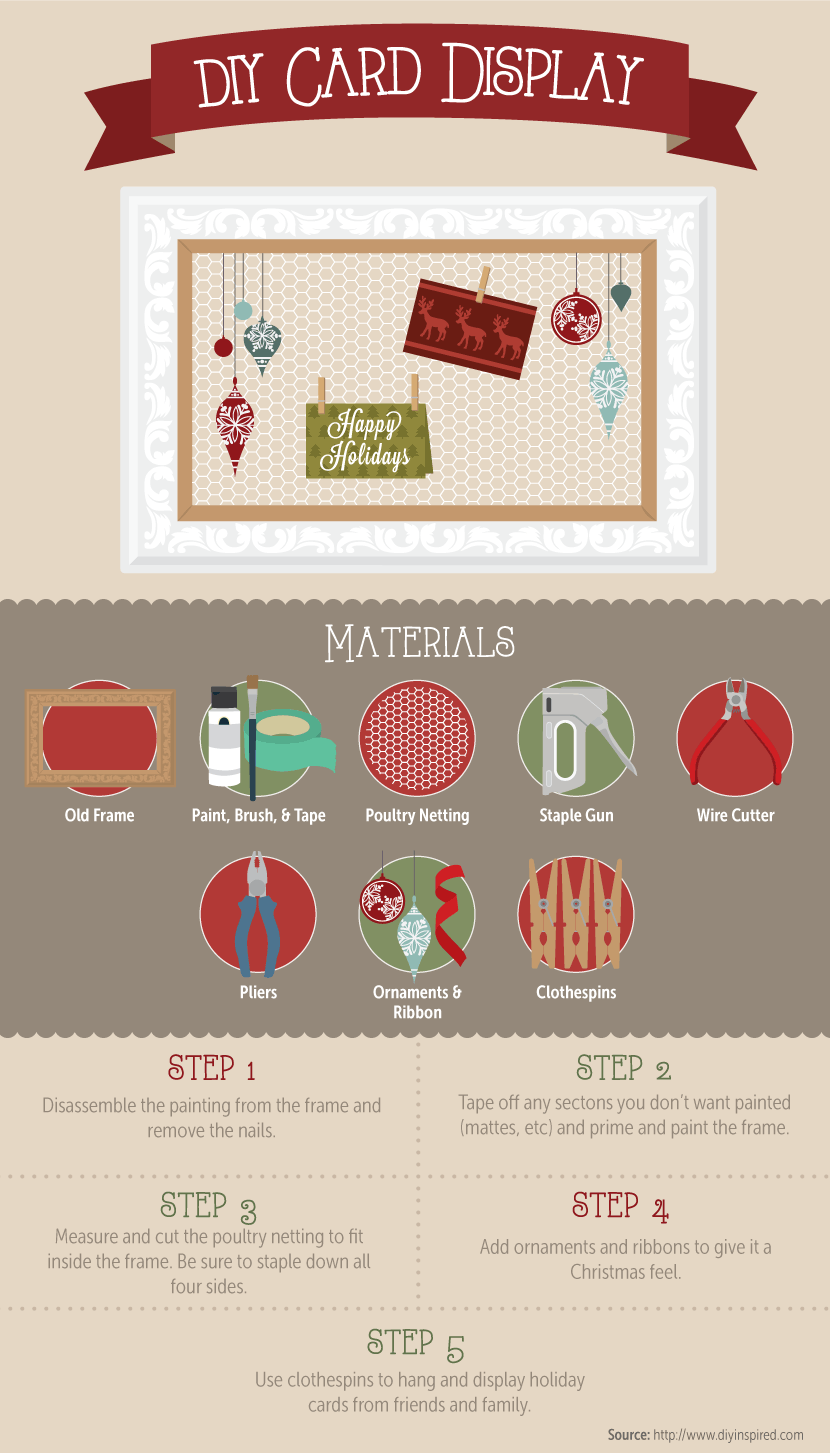
Giving and receiving Christmas cards is a wonderful tradition. Why not display the lovely sentiments you receive and use them as part of your Christmas decorations? You can make a Christmas card display using an old frame, which you can find at a thrift store or garage sale. All you need is a large wooden frame, paint, paint brush, chicken wire, wire cutters, and a staple gun. If you buy a frame that is already holding a picture, remove the picture from the frame. Paint your frame to match your décor. Measure and cut the chicken wire to fit the inside of your frame (consider wearing gloves during this step to protect yourself from the sharp edges of the chicken wire). Staple the chicken wire to the back of your frame. Hang your Christmas card display and use clothespins to hang Christmas cards as you receive them in the mail. If desired, you can decorate your frame with greenery, ribbon, and ornaments.
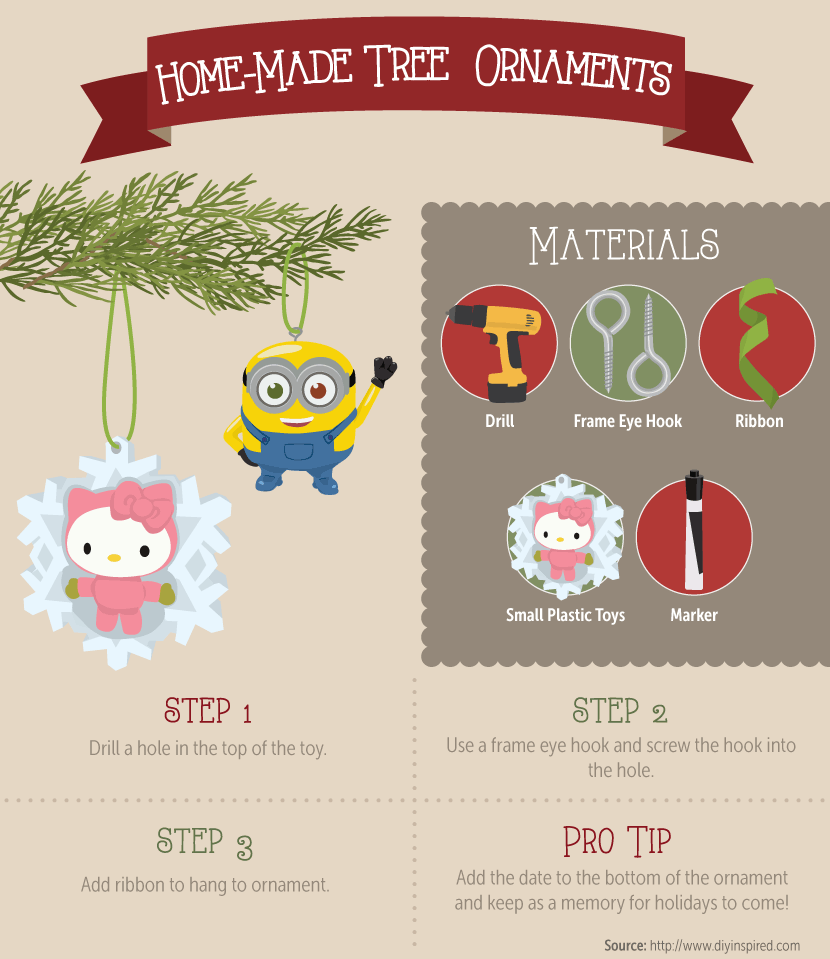
Making your own recycled Christmas ornaments is a fun craft for the whole family. Schedule a family craft night and go on a treasure hunt at home to look for items such as cardboard tubes, old Christmas cards, Scrabble tiles, pine cones, and small toys. Gather some supplies, such as glue, scissors, tape, and ribbon, and let the kids (and yourself) go to town. With a little imagination, you can fill your tree with handmade ornaments. You can cut and shape cardboard tubes and old Christmas cards to form beautiful snowflake and poinsettia ornaments. You can use Scrabble tiles to make ornaments that say “Joy,” “Noel,” or “Let it Snow” by simply gluing tiles to cardboard backing. Use a drill and an “s” hook to attach hangers to pine cones or old toys to make memory ornaments. Small toys, such as those you get in fast-good kid’s meals, are perfect for this project. Don’t forget to write the date on the bottom of each ornament to help you remember when you created each one.
As you can see, there are many budget-friendly alternatives to buying new Christmas decorations from a retail store. By shopping at garage sales and thrift stores or simply looking for unused items in your home, you can make beautiful, one-of-a-kind Christmas décor yourself or with your family.
Embed the article on your site

Written by:

Christmas doesn't have to be a stressful time of year. Learn how a little b...

This Christmas, skip the stress of the busy stores and make your own presen...

The winter holidays are a great time to relax and spend time with loved one...
Get your fix of expert articles delivered straight to your inbox!
No Thanks - I don't like cool stuff