

Like what you're reading?
Get your fix of expert articles delivered straight to your inbox!
Oops! Please double check your email address.
No Thanks - I don't like cool stuff


Do you dare install vinyl flooring in your home?
A mainstay of bargain-remodel kitchens and bathrooms, vinyl flooring has long been considered a pariah in any self-respecting home. Traditional vinyl has a few things going for it (cheap, easy to install), but everything else going against it. It is thin, unpleasant to walk on, and looks laughably unlike the natural material it tries to simulate.
As if that were not bad enough, self-stick vinyl tiles – the usual go-to product of time-starved do-it-yourself homeowners – does not stick well. Tiles mysteriously loosen and curl at the edges, especially in hot weather.
At one point, manufacturers divested the product of that problem word, vinyl, quietly renaming it resilient flooring. Consumers did not buy the ruse and flocked in record numbers towards vinyl‘s strongest contender: laminate flooring. When that happened, the market for vinyl flooring languished.
Then, the word luxury was tacked onto the name, and thus luxury vinyl flooring (popularly abbreviated to LVF) was born. But this was no mere name change for its own sake. Manufacturers had revamped the product in five major ways, making it:

What‘s in a name? Sometimes, a name can be deceptive.
Because LVF has no industry specifications, anything can be called LVF. By contrast, porcelain tile has an industry group that controls the definition of porcelain. This means you have to be a flooring detective. It is often cheaper to buy flooring online, just make sure you are happy with the appearance, and have ordered the correct amount to avoid the burden of returning it.
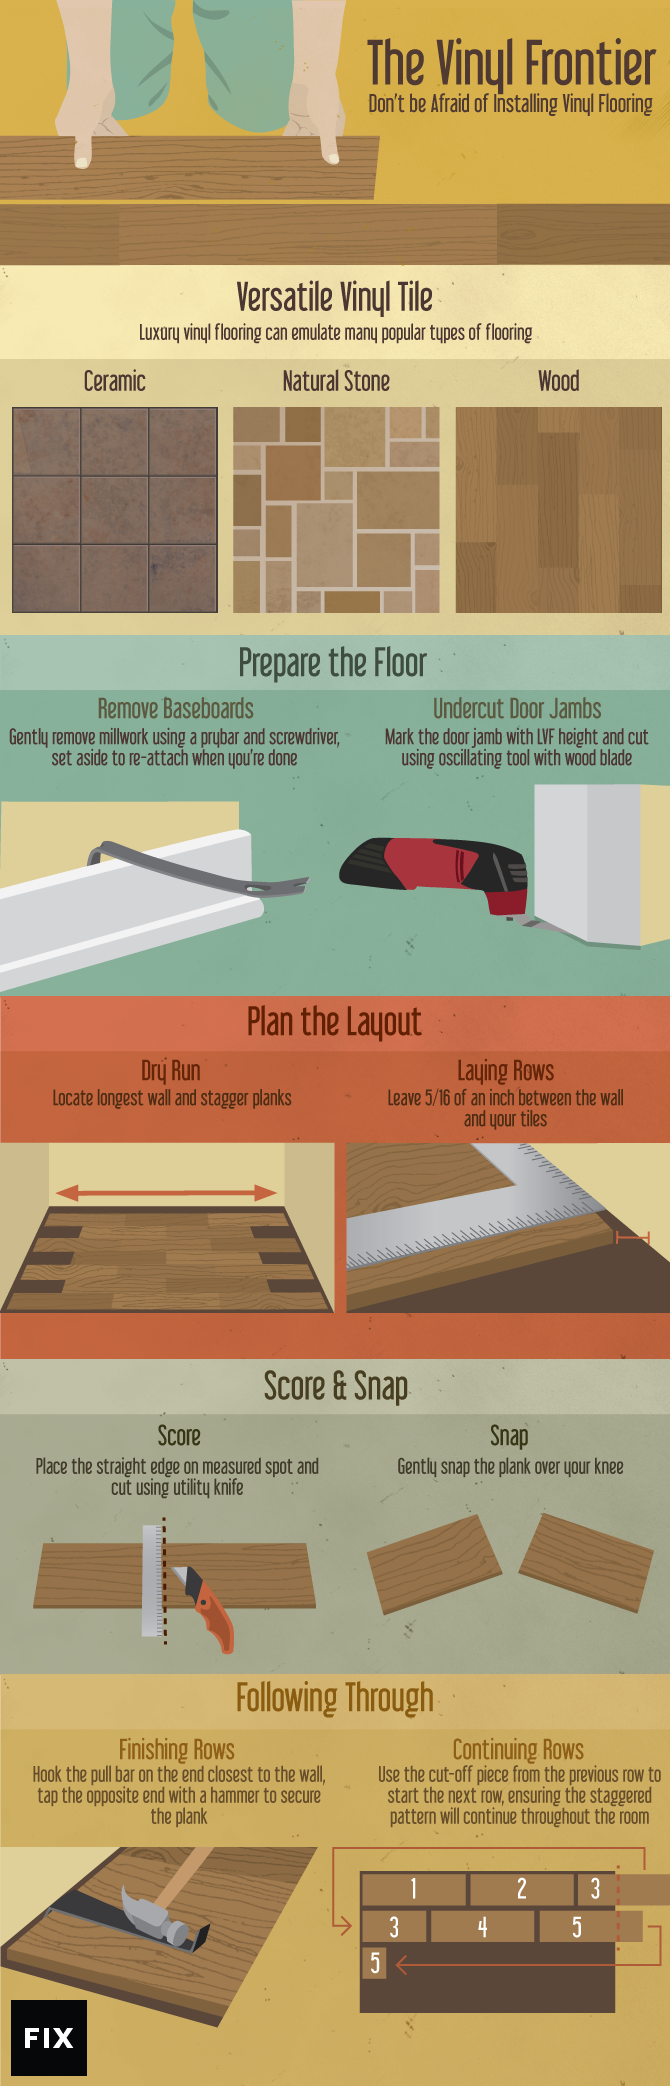
Baseboards are the strips of wood (sometimes plastic) that run along the lengths of walls, at the juncture of the floor and wall. Shoe moldings are shorter but equally long wood strips that are sometimes attached to the bottoms of baseboards. Collectively known as millwork, both items need to be removed.
Use the pry bar and flat screwdriver to gently pull the millwork away. If you can get the nose of the screwdriver behind the millwork, it is possible to rock the tool back and forth (again, gently) to create enough space in which to fit the pry bar. Pull off the millwork and set aside.
LVF is thin enough that, after a few months, it will transmit the texture of the substrate to its own surface. For example, if you were to install directly over ceramic tile, seams would eventually show up on your LVF in the form of a shadowy grid.
No type of flooring is free of texture, so you will need to either remove it or smooth it over.
Removing: Most flooring guides recommend tearing off the top layer (called the finish floor) down to its substrate. Chances are good that after removal of this finish floor you will encounter plywood subfloor. All remnants of the finish floor left on the subfloor – nails, staples, brads, glue, and mastic – must be pried off, scraped away, or sanded down. Apply leveling compound to depressions.
Smoothing: Another school of thought says that the existing finish floor can remain, as long as all protrusions are leveled down and indentations are filled. Major flooring manufacturer Shaw recommends that grout joints in tile should be filled with a high-quality cementitious patching product. For existing vinyl flooring, an embossing leveling compound or equivalent should be applied.http://shawfloors.com/tips-trends/revolutionary-resilient/resilient-installation-array
If you have removed a finish floor, you likely do not need to worry about undercutting door jambs and casings. Space has already been provided for you to slip the LVF into.
If there is no space, you must cut it with an oscillating multi-tool and attached wood blade. First, press a scrap of LVF against the jamb or casing and use it to draw a reference line. Next, carefully cut along the reference line.http://www.familyhandyman.com/floor/vinyl-flooring/how-to-install-luxury-vinyl-flooring/view-all

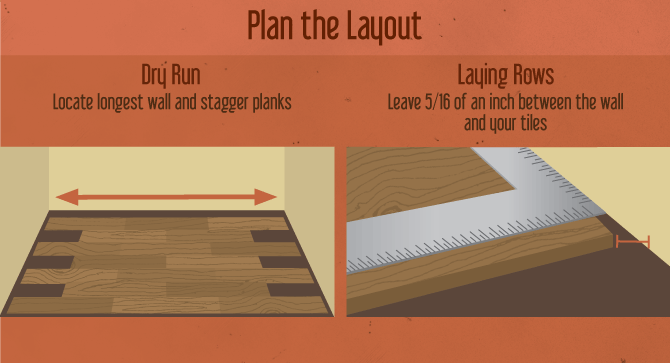
A dry run means to lay out a large number of pieces of flooring to give you a sense of what the overall layout will look like. One great benefit of LVF is that it is lightweight and easy to move around to the desired configuration.
Begin your first row along one of the long walls. Choose the wall that is most visible, as this first row is guaranteed to be a full, uncut course of planks and will run perfectly parallel to the wall.
Leave an expansion gap of 5/16"(or 8mm) between the plank and the wall. Though LVF itself does not change size, buildings will slightly expand and contract, as they are made of wood. The expansion gap will prevent the building from constricting the LVF.http://shawfloors.com/tips-trends/revolutionary-resilient/resilient-installation-array
When you reach the end of this first row, you will need to cut your last plank (unless by some fluke the last plank perfectly fits that space; it does happen sometimes).
Measure the distance with your metal straight edge. Transfer the measurement to your LVF plank by marking with the pencil or marker.
Cut this plank by running your utility knife along the side of your straight edge. Move the blade lightly along the straight edge on the top side on the plank, then snap into two pieces. You may want to snap the plank across your knee. The plank should break with little effort.

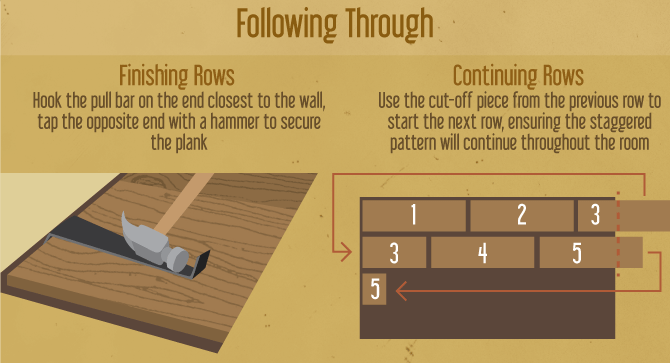
This is where the flooring pull bar comes into play. Because the end of this final plank nearly touches a wall, it is difficult, if not impossible, for you to click the piece into place with your fingers. The distance between the plank and wall, again, is that expansion gap of 5/16"(or 8mm).
Hang the hook end of the pull bar over the end of the last piece. Tap the other end of the pull bar with a hammer to snap the seam shut.
Transfer the cut-off piece of that plank to the second row, using it as the starter plank for the second row.
When laying this second row, tilt the plank upward and press the tongue into the groove of the already-installed row. Then, bring the plank down so it clicks into place.4
Ensure the seam is closed by tapping lightly with the rubber mallet.
For obstructions such as door casing, trim, outside corners of cabinets, structural columns, and the like, create a template from cardboard. In fact, the boxes the flooring came in provide suitable material for these templates.
Transfer template measurements to the face of an LVF plank with the pencil or marker. Cut with a utility knife or sharp pair of metal shears.
When you are satisfied that your new floor is properly installed, use the nail gun to secure baseboards to wall studs and fix shoe molding to the bottom of baseboards.
Now you‘re ready to embark on your own vinyl flooring adventure. If you have biases about traditional vinyl flooring, it is worth a visit to a home improvement or flooring store to see if luxury vinyl flooring is right for your home. You might be pleasantly surprised. Installing luxury vinyl flooring is mainly about layout and planning; the material itself is lightweight, easy to cut, and flexible in tight places.https://www.youtube.com/watch?v=mwNI1BgGD9s
Embed the article on your site
Written by:

Get the <i>Mad Men</i> style right in your own home. It‘s easier than you t...

The easy-to-build, multi-use X-bench has been a popular and efficient piece...

Obtaining a level measurement is incredibly important for accurately comple...
Get your fix of expert articles delivered straight to your inbox!
No Thanks - I don't like cool stuff