

Like what you're reading?
Get your fix of expert articles delivered straight to your inbox!
Oops! Please double check your email address.
No Thanks - I don't like cool stuff


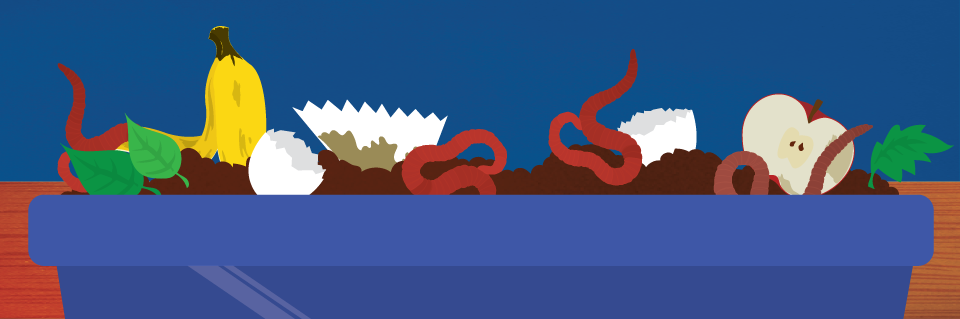
Many of us like the idea of composting but don’t have the yard space to make it happen (I’m looking at you, apartment dwellers!). Luckily you can make your own black gold in the comfort of your own home with nature’s master composters: worms.
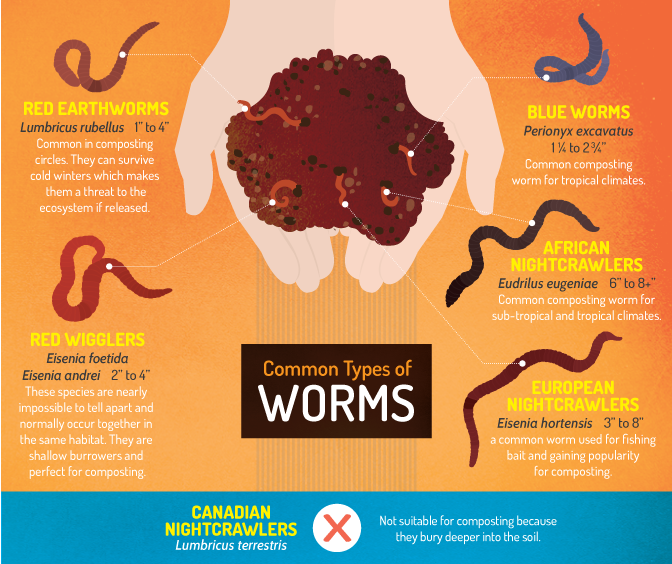
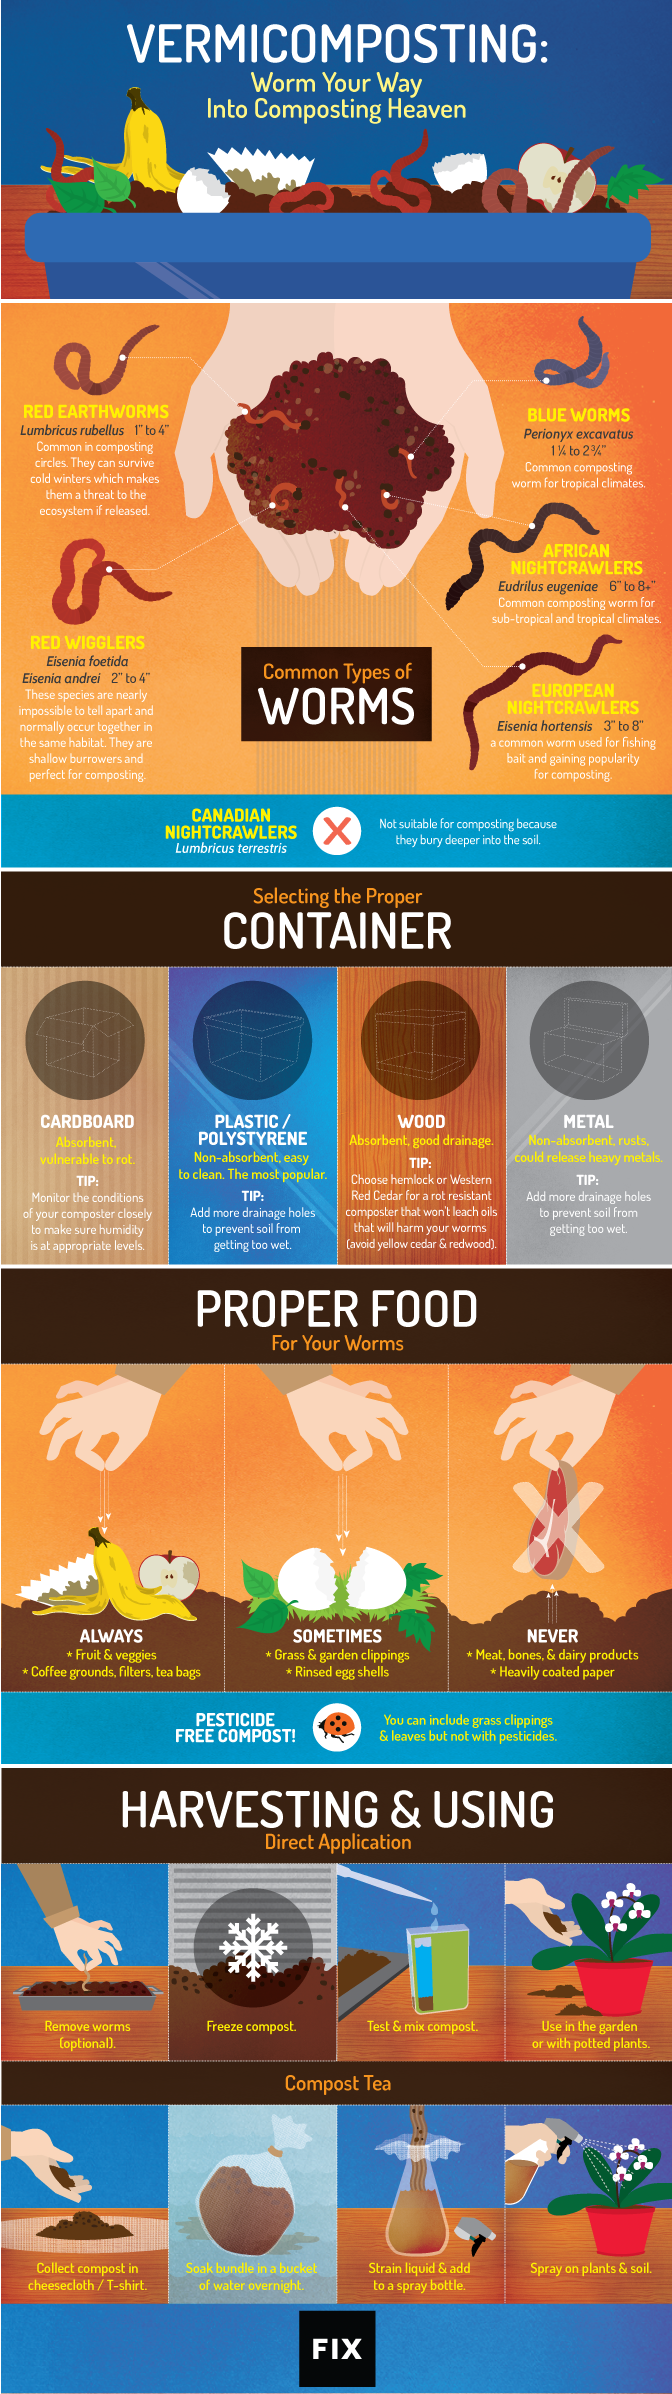
If your only experience with worms is seeing them on the end of a fishhook or dodging them on the sidewalk after a good rain, you might think all worms are the same. But they’re actually an incredibly diverse group of organisms. Most burrowing terrestrial worms are oligochaetes, a group with more than 10,000 known species. While their lot in life is to decompose organic matter, not all worms are suitable for indoor composting. Here’s a peek at the most common wrigglers, crawlers, and garden-variety earthworms.
We know that simply layering leftover lettuce on the garden isn’t enough to get the nutrients to soak into the soil and make your flowers grow. We need decomposition to break down the structure of the lettuce and transform the nutrients into a form that new plants can use. But it’s not the worms doing the work. It’s bacteria. Bacteria are mini recycling plants that multiply quickly and use enzymes to degrade organic matter particles from the outside in.
Where do worms come in, then? Worms feed on the bacteria along with the leftovers. In doing so, they accelerate the process of digestion in two ways. First, as matter passes through their digestive system, it gets physically broken down, which provides the bacteria more surface area to act on. Second, worm guts add more bacteria and enzymes to the mix, which helps speed up the chemical reactions required to produce compost. The end products of worm digestion are castings: nutrient-rich additions to your indoor or outdoor soils.
Worms, like any other organism, need food and shelter to keep them alive and happy. Let’s look at how to house your new wrigglers.
The size of your composter will depend on your space and your needs. How much space do you have? How much compost do you want to end up with? Most vermicomposters are stacked plastic bins forming layers of trays. You can purchase a starter kit and get going right away or, if you’re more of a do-it-yourselfer, build one yourself out of cardboard, metal, wood, or plastic. Here are some pros and cons of each.
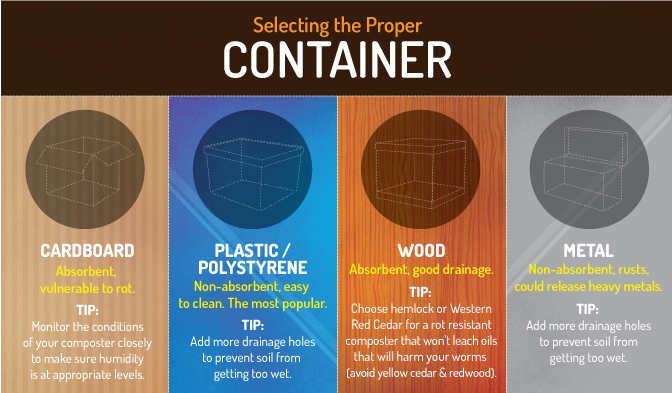
No matter what material you choose, you’ll need to add air holes to keep the soil aerated, and bedding, usually in the form of newspaper strips, to give the soil structure and maintain moderate humidity in your bin.
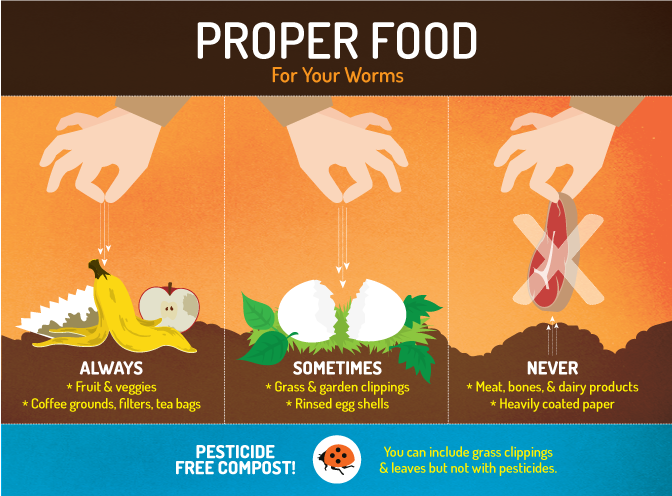
Because worms eat bacteria, the real question isn’t what to feed the worms, but what to feed the bacteria! Whatever you put in your bin will get decomposed eventually, but because this is for indoor use, we want to make sure it’s efficient and both odor- and pest-free. The easiest way to ensure an odor-free set-up is to include only plant-based food scraps in your composter. Leave the meat and dairy for the garbage bin and rinse eggshells if you want to add them to the mix.
Your bin should be odorless, except for a natural earthy smell. Worms thrive in a humid environment (not soaking wet) that is well aerated and warm – 60 to 77 degrees F is ideal. If your worms are dying or if there’s a foul smell, you might need to make a few adjustments to the moisture, oxygen, or temperature. Here are some troubleshooting tips to help you along.
Ammonia: If you smell ammonia, you’ve got anaerobic decomposition (not enough oxygen). Your soil is likely waterlogged and your worms are suffocating. Drain your composter (adding more drainage if necessary), add dry bedding, and stir up your mixture to reintroduce some air to the system.
Flies: If you have fruit flies, try burying your new food waste or covering it with a good layer of bedding when you add it.
When it comes time to use your earthy black compost you’ll have two options: direct application or compost tea. Direct application is self-explanatory, but the nutrient composition will vary from batch to batch, so you might want to test it and adjust your mixture to meet your garden’s requirements. Compost tea is just what it sounds like. You steep your compost (and add sugar and aeration if you like) to get a nutritious liquid that’s great for regular watering via spray bottle.
If you want to keep your worms for another round of composting, you’ll need to separate them from the compost. The easiest way to do this is to prepare a new bin underneath the old one with some fresh bedding and food, then place a light or two over the top of the bin. The light will encourage the worms to migrate down through the drainage holes into your new, more enticing bin.

Most, if not all, earthworms in your garden are not native to North America, since the last glacial period stripped the soil of most life: they’ve been introduced here from Europe. In general, non-native species are a major problem worldwide, both on land and in the oceans, as some species can become invasive, rapidly change an ecosystem, and cause negative impacts on other species and humans. So, while some worms have become commonplace enough to ignore, others, including hitchhikers in your vermicompost, have yet to become established. And we need to keep it that way. New worms pose a major threat to hardwood forests, where they would change the soil structure and growth dynamics of the ecosystem.
In order to be a responsible vermiculturist, just follow these easy guidelines.
Do get your worms from a reliable source. Find a local source instead of shipping them from abroad. This will greatly reduce the chance of bringing in new species.
Don’t choose red earthworms (Lumbricus rubellus), stick with red wrigglers. Red earthworms have a better chance at surviving cold winters than red wrigglers, and thus could pose an invasive environmental threat.
Don’t dispose of worms or compost in the woods or water, as they will survive there. This is the terrestrial equivalent of dumping your aquarium in the local lake. Many species of unwelcome algae, insects, and fish have spread this way.
Do freeze your vermicompost for a week before using it outside. This will kill worms and egg cocoons, ensuring that nothing but nutrients will be transferred to your garden.
Vermicompost can be a great way to get the whole family involved in a science project. There’s nothing wrong with having a pristine composting unit shipped to your doorstep, leaving it in the corner, and checking it occasionally. But if you want to take on the whole project, start small and see how long different foods take to decompose: orange rinds versus potato peels, for example. Fertilize some seedlings with compost tea and others without and watch for differences as they grow. It’s an inexpensive way to keep your kids (and you!) stimulated and thinking about the environment. Use the wealth of resources out there, and don’t be afraid to jump right in and give vermicomposting a go. Your red wrigglers might be the best pets you’ve ever had!
Embed the article on your site
Written by:
No matter what time of year it is, there‘s always some little critter tryin...

Pests can ruin the gardening experience. Follow our guide to create natura...
Joining a CSA does more than just put healthy, local food on your doorstep:...
Get your fix of expert articles delivered straight to your inbox!
No Thanks - I don't like cool stuff