

Like what you're reading?
Get your fix of expert articles delivered straight to your inbox!
Oops! Please double check your email address.
No Thanks - I don't like cool stuff


Summers at the farm, during my growing-up years, were spent in a gardening cycle of planting, harvesting, and preserving. Then, during the autumn, winter, and spring months, we ate what we’d put up and counted success by the number of jars lining the basement pantry shelves.
I don’t spend my summers like that anymore. Now I preserve only what I want; in the process, I’m helping my family save money and ensuring I know where our food comes from.
More and more people are canning: According to the Centers for Disease Control and Prevention, one in five U.S. households can their own food, and 65 percent of those households can vegetables.
Canning intimidates many people, but there are principles and tips that can help you preserve the freshness of summertime. Here’s a starting guide:
The biggest fear that many people have about canning is food poisoning, which happens when the bacteria that causes botulism meets just-right growing conditions. This commonly happens when food is canned incorrectly. These steps can help:

The type of food you’re going to can will help you decide which preserving process is best.
• Is it a low-acid food? Low-acid foods – with a pH greater than 4.6 – include red meat, seafood, poultry, milk, and fresh vegetables (except most tomatoes). Because of the difficulty in destroying the botulism bacteria, these foods should be preserved using the pressure canning method. One advantage of pressure canning: The time it takes to preserve food is greatly reduced.
• Is it an acid food? These foods include most tomatoes, fruits, pickles, sauerkraut, jams, jellies, marmalades, and fruit butters, which have a pH lower than 4.6. Acid foods may be preserved using the boiling-water canning method, which generally involves a longer preserving process.

There are two canning procedures:
Raw pack: This involves packing raw, peeled food tightly into a jar, then filling the remaining air space with hot water/liquid, and leaving adequate head space.
Hot pack: Hot packing takes longer because food must be boiled for several minutes, then added along with hot liquid to clean, hot jars. Hot packing also improves shelf life, and is the generally accepted method for canning those low-acid foods preserved with the boiling-water method.
The vessels you choose to hold your canned food are as important to your success as the process itself. Glass jars, often called Mason jars, may be “regular mouth” or “wide mouth;” they are sealed with threaded lids and come in a variety of sizes.
While the jars and screw tops may be re-used many times (as long as they remain in good condition) the flat lids may only be used once. Jars must also be properly cleaned – either in a dishwasher or by hand. Then the jars must be left in gently simmering water until filled with food. If a product is to be processed less than 10 minutes, the jars should be sterilized, which requires boiling them for at least 10 minutes or slightly longer at high altitudes.
Every canning guideline will discuss a required minimum headspace; this is the empty space between the top of the food and the lid. The headspace differs with each type of food and allows food to expand during processing, as well as to form a vacuum once the jars cool. In general, use these headspace guidelines:
¼ inch for jams and jellies
½ inch for fruits and tomatoes (processed in boiling water)
1 to 1 ¼ inches for low-acid foods (processed in a pressure canner)

There are canning instructions, specific to each type of fruit or vegetable, available from the National Center for Home Food Preservation. For specialized directions as well as additional canning tips, view the information there. But, in general, here’s the process of canning food:
Canned jars take 12 to 24 hours to cool; then you must test them to make sure the food has been preserved properly. Here’s how:
Canning instructions vary for locations higher than 1,000 feet. Generally, the time it takes to process food is longer at higher altitudes.
TIP: Never use any canning supplies that are not in perfect condition. Check for any chips or cracks in glass jars, and discard those. Use fresh lids for the best seal. And always check canned food for spoilage – such as leaks, bulging lids, or broken seals – before using. If a canned food smells or looks funny, discard it.
Embed the article on your site

Written by:
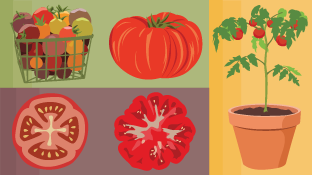
Tomatoes are the fourth-most-consumed fresh vegetable. But which tomato is ...
Bored with the pots you use for container gardening? This summer, refresh y...
Luckily for all you green-thumb wannabees, gardening isn't a passing fad. I...
Get your fix of expert articles delivered straight to your inbox!
No Thanks - I don't like cool stuff