

Like what you're reading?
Get your fix of expert articles delivered straight to your inbox!
Oops! Please double check your email address.
No Thanks - I don't like cool stuff


Water soothes the soul. It is human nature to be attracted to water. For millennia, we have established communities near bodies of water, partially because of need but also because communing with water represents meditation with nature of the highest order.
Imagine coming home after a hard day at work and relaxing next to your own body of water: a small garden pond spanned by a sturdy, simple cedar bridge. Because the pond liner is rated as fish-safe, you can even stock it with koi and goldfish varieties to delight your eyes.http://www.bhg.com/gardening/landscaping-projects/know-your-pond-fish
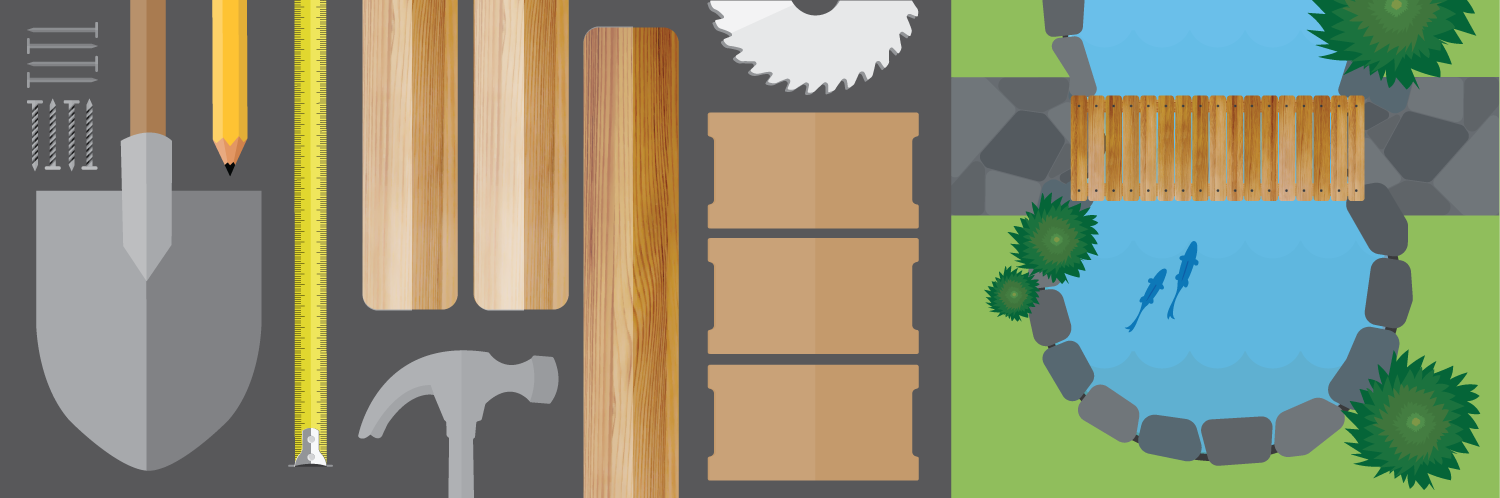
You can translate this personal dream sanctuary into a reality. Materials are few and costs minimal, but the labor is substantial. Building the pond takes little more than a shovel, rubber liner, inexpensive (or free) underlayment, and rocks, plus considerable digging. For the bridge, basic carpentry skills are needed, along with pressure-treated lumber and cedar deck boards.
Dig a pit, fill it with water? While not quite that simple, this does describe the principle behind garden pond construction. In essence, you are helping nature along by forming the pond’s shape and, especially, by lining the bottom. If the bottom is not lined, the pond water will slowly drain away.
Begin digging in spring or summer so that you are not fighting against hard, frozen ground. Plan on one to two months for pond construction.
Locate the pond at least 20 feet from your home so that water will not seep into the foundation, should the pond spring a leak. Choose a perfectly level site free of any obstructions such as tree roots or large rocks. Call your local 811 service in the United States or Canada to ensure that your dig misses gas and other utility lines.http://www.call811.com
Unless you have an unlimited budget to work with, it is recommended that you create the size of your pond in conjunction with how much money you are willing to spend on a liner. Because liners are extremely expensive, heavy, and unwieldy, you do not want to purchase a liner that is vastly larger than you need.
As a rule of thumb, calculate liner size this way:https://www.pondliner.com/blog/pond-liner-size-calculator
(Length of pond bottom) + (2 x depth of pond) + (4 feet)
The last 4 feet tacked onto the end of the calculation are to allow for 2 to 2.5 feet of liner overlap all the way around the pond. Liners cannot come right up to the pond edge. So, if you want a circular pond that is 6 feet in diameter and 2 feet deep, your calculation will be:
(6) + (2 x 2) + (4) = 14 feet
You will need to purchase a liner that is 14 x 14.
Ponds do not need to be very deep to be enjoyable. Ponds deeper than two feet actually have less visual impact than shallower ponds, because any rocks at the bottom are less visible. Fish can hide in deep ponds, too.
So, it is recommended that your pond be one or two feet deep. By keeping your pond shallower, you will have more liner available to create a larger pond.
Pond liners are specialty items that you need to purchase from a pool and pond store, either online or locally. Do not purchase ordinary sheet plastic from a home improvement store, as this is not strong enough to hold up for more than one season, if that. On the consumer market, you have two choices of liner materials: PVC or EPDM.http://www.victoria-adventure.org/water_gardening_images/joel/liners.html
Do you feel like you need exercise? You are in luck, because pond-digging is pure hard work. But keep in mind that it is satisfying hard work with a beautiful pay-off at the end.
Lay a garden hose on the ground to mark your dig dimensions (hose works better than rope). Begin by digging the outline of the pond. Once the outline is established, remove the hose.http://www.popularmechanics.com/home/outdoor-projects/how-to/a661/2770526/
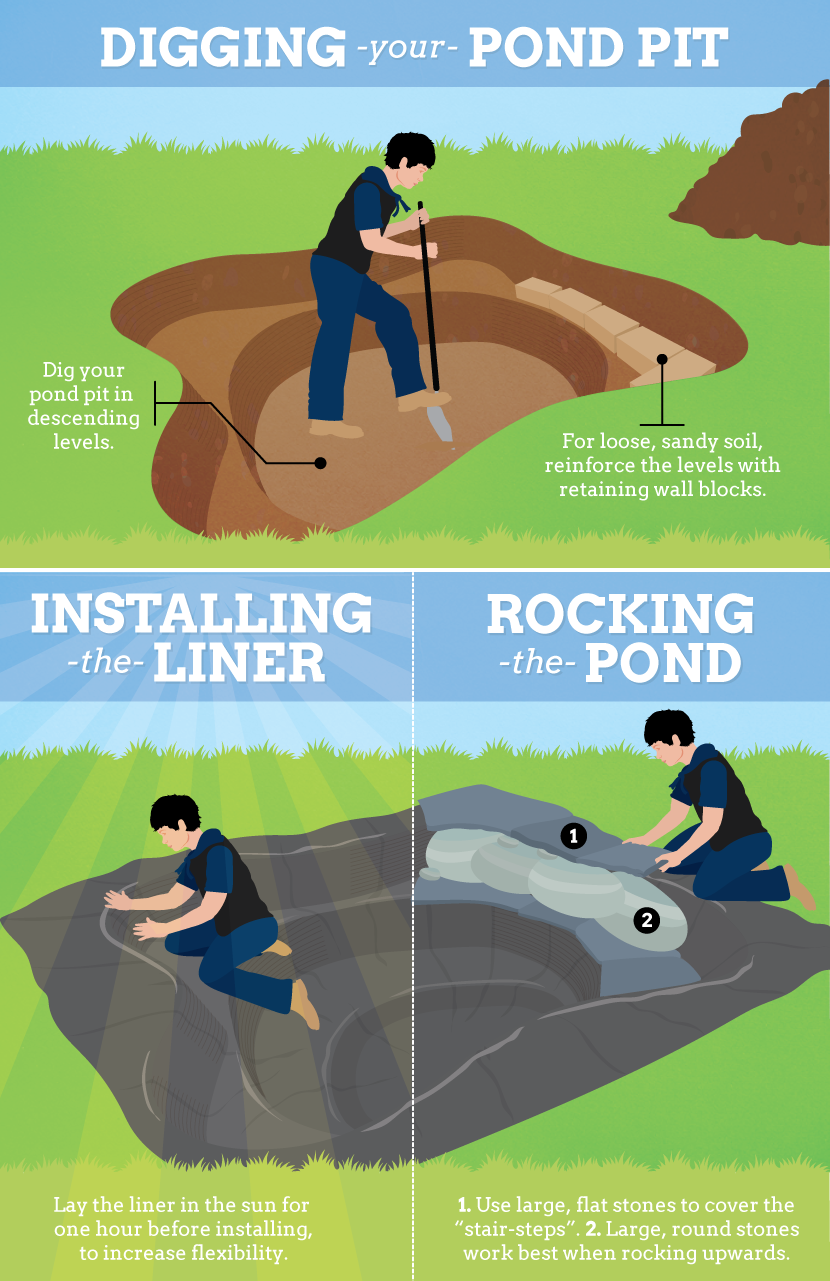
If the ground is loose and sandy, it will not be strong enough to support the pond walls. Sand tends to fall into holes until it reaches a very low angle of repose – not desirable for ponds.
For loose, sandy soil, create walls from retaining wall block, purchased at any home improvement store. If you have hard, compacted soil, you will not need to create artificial walls; the soil itself will be the wall.
Before laying down your liner, line the hole with an underlayment. The purpose of the underlayment is to prevent rocks or plant roots from piercing the liner.
Cheap geotextile underlayment costs about $50 per 15” x 15” sheet. If you are tearing out carpet or have access to cheap carpet remnants, non-organic carpeting is a widely accepted material for underlayment.
Leave your liner in the sun for at least one hour to allow the material to become flexible. With a helper, position the liner at the center of the pond pit. Unfold or unroll the liner outward and upward from that center point. Liner folds are a reality in pond-building and must be dealt with. At curves in the pond, fold the liner over to allow it to follow those curves.http://www.familyhandyman.com/landscaping/backyard-ponds/build-a-backyard-pond-and-waterfall/view-all
Once the liner is in place, it is recommended that you cover it with rock. EPDM and especially PVC liners deteriorate under the sun’s UV rays. Rock protects liners from UV rays and serves to hold it down.http://www.ameslandscape.com/page3.php
Fill your pond with water from a garden hose. It may take several hours to fill the pond. Stop at about 3” below the top to avoid spillage.
Initially, your pond will experience what is called “algae bloom.” During this 1- to 2-week process, the water will become increasingly green and murky. If your pond receives a lot of sunlight, it will grow more algae. Don’t worry: the algae bloom will subside after a couple of weeks.http://www.naturalsolutionsetc.com/garden-pond-algae-control.htm
Your pond looks complete when paired with a short garden bridge – the simpler the better. This bridge costs less than $200 to make and takes about 5 hours to complete. Because the deck is constructed of cedar, a naturally weather-resistant wood, it does not need to be sealed against the elements.
This bridge will be 7 feet long and about 5 feet wide. One end will have a 16-inch ramp and the other end will be straight.http://homerenovations.about.com/od/Pathways-and-Bridges/ss/Build-This-Japanese-Style-Garden-Bridge-In-1-Day.htm
You will need:
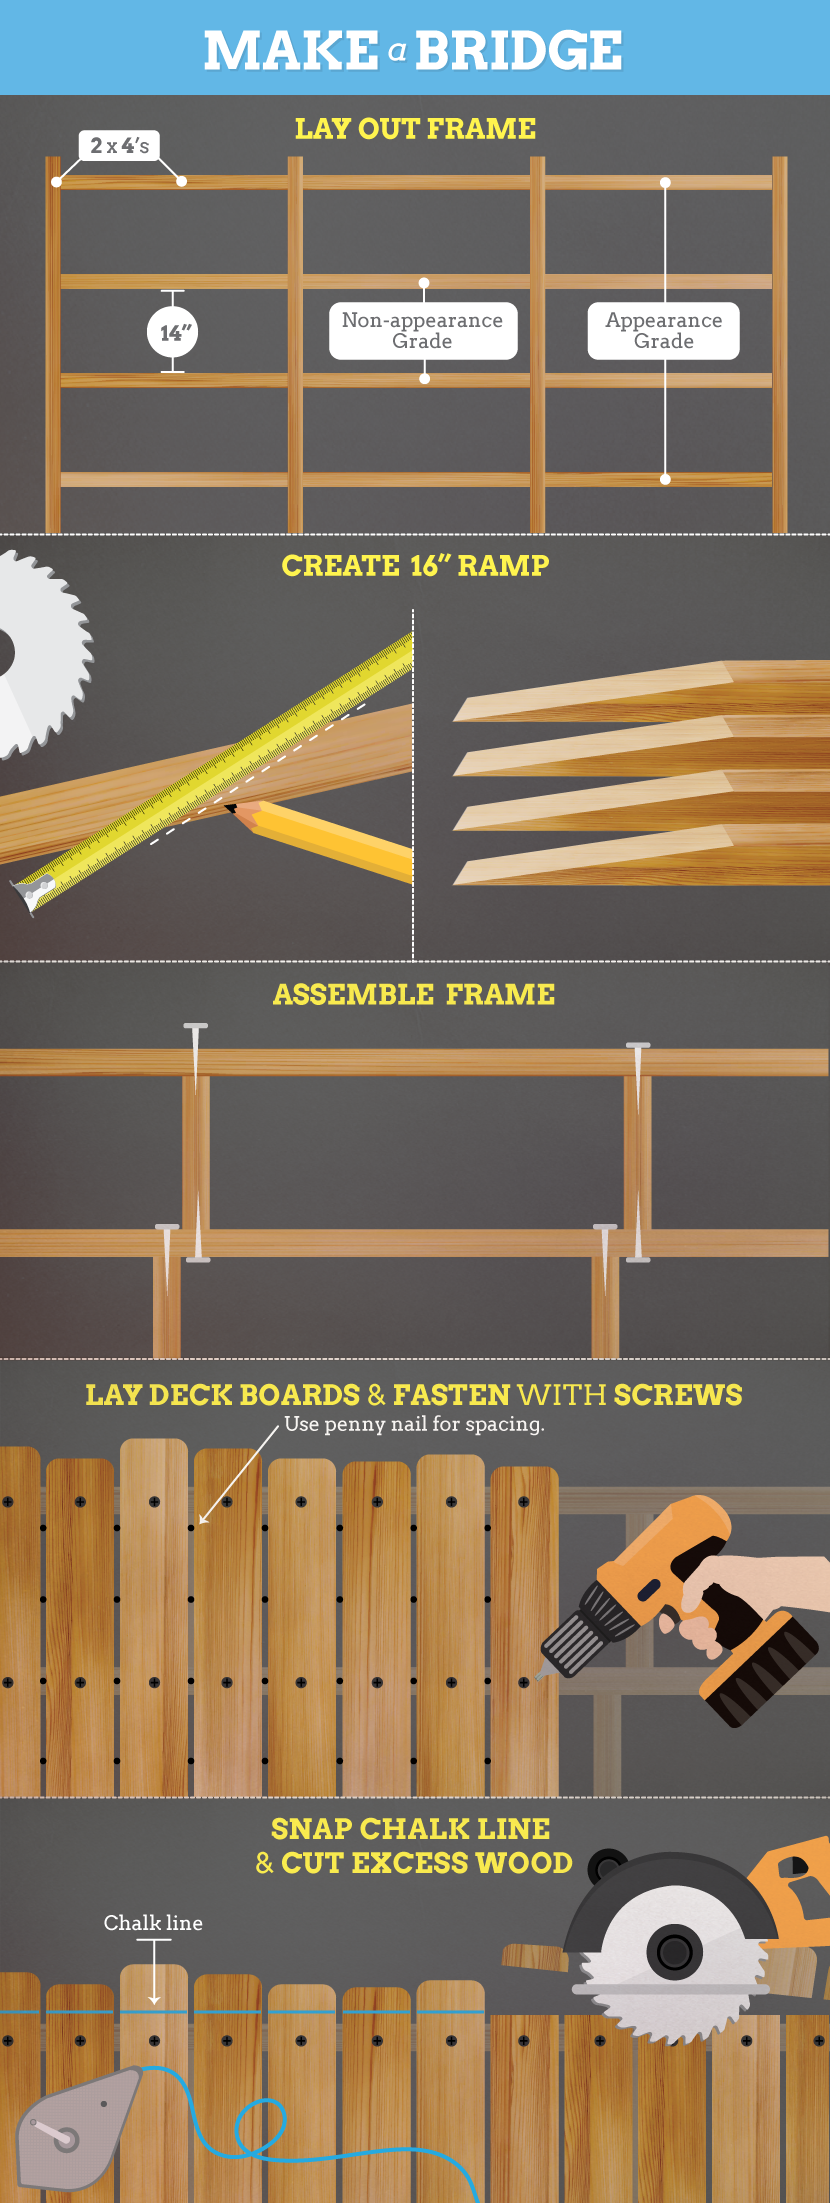
First, lay out four pressure-treated 2x4s parallel to each other, about 14” apart, as joists. Use two of the appearance-grade boards for the side joists, as they will be visible. Use two of the regular, non-appearance-grade boards for the middle joists.
With your Skil saw, cut off the end of the four boards at an angle to form a 16” long ramp. Cut one pressure-treated appearance-grade 2x4 in half. Nail one of these halves to the straight, non-ramp end of your four joists.
From your remaining non-pressure-treated lumber, cut 9 pieces, each 14” long. Nail these 9 boards perpendicular between the joists as braces.
Lay the cedar deck boards width-wise across the bridge framework, so that they are perpendicular to the joists. Let one end of the deck board hang over the edge joist by 2” to 3”. For now, do not worry about the other end, as it will be cut later.
Space the deck boards 1/8”, or the thickness of a 16-penny nail, to allow for wood expansion. Screw down each deck board with two deck screws per joist.
With your Skil saw, cut the long ends of deck boards so that they match the overhang that you created on the other side. Use your chalk line to mark the cut line.
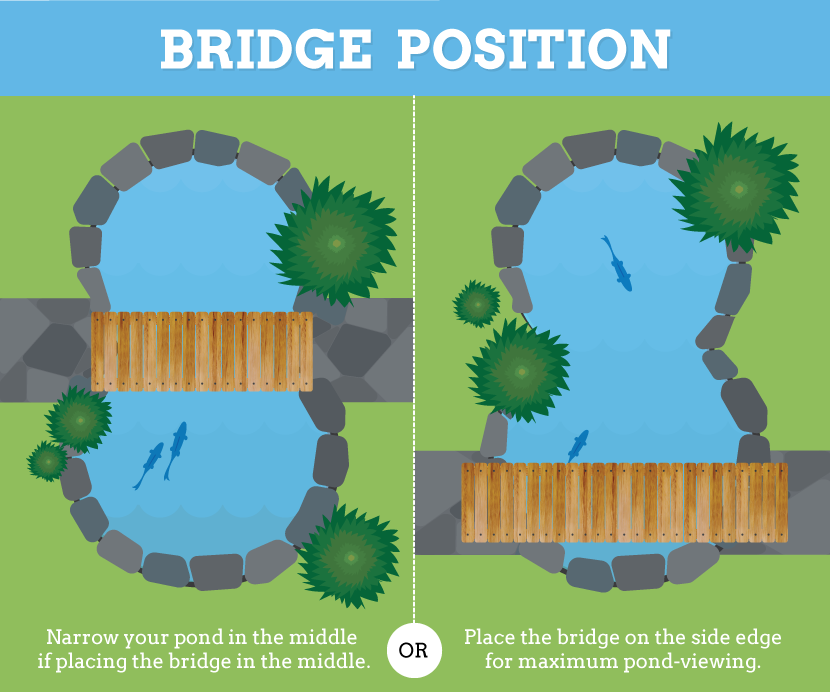
Your garden bridge can either span your pond or give the illusion of spanning the pond.
Building a garden pond and bridge is not a one-weekend, impulse project. However, the work is well worth the long-term beauty and value that this project adds to your home.
Embed the article on your site

Written by:

Your windows might be beautiful, but when you realize how much heat is esca...

Keeping your kitchen appliances in good working order is simple if you chec...

Get the <i>Mad Men</i> style right in your own home. It‘s easier than you t...
Get your fix of expert articles delivered straight to your inbox!
No Thanks - I don't like cool stuff