Why Archery is the Hottest Sport Right Now
Grab a Bow and Learn to Shoot it Like a Pro
Archery is for everyone: it’s an easy sport to get involved in and is fun for people of almost any fitness level.
Target-shooting stations can be set up in almost any large backyard, and more and more wilderness resorts are including archery in their lists of activities.
Getting Started
Beginning archery enthusiasts will want to start with target-shooting practice. Go into any outdoor gear store, however, and you’ll find several types of bows used for target shooting. What’s the difference?
1. Compound bows: Compound bows are the most technological of your choices, identified by the string and pulley system and they way the bow curves back toward the shooter.
They shoot faster and straighter than other bows. Most are lightweight and made of carbon.
2. Recurve bows: Recurve bows are named for the way the tips of the bow curve away from the shooter. More traditional-looking than compound bows, recurve bows have fewer moving parts and shoot in a higher arc (allowing you to channel your inner Katniss).
They can be made of traditional wood or high-performance carbon.

Which is best for beginners? It depends. Compound bows are easier to shoot for most beginners because, while they take significant force to begin the draw (say 70 pounds of force),
they take significantly less force to complete and hold the draw (maybe only 30 pounds). This means that the shooter can focus more on aiming than on straining to hold the bow back.
Recurve bows take the same amount of force for the whole draw, which means that beginners have to concentrate on holding their draw and aiming simultaneously.
However, depending on the bow size, recurve bows may be easier to use all around (and may be best for children).
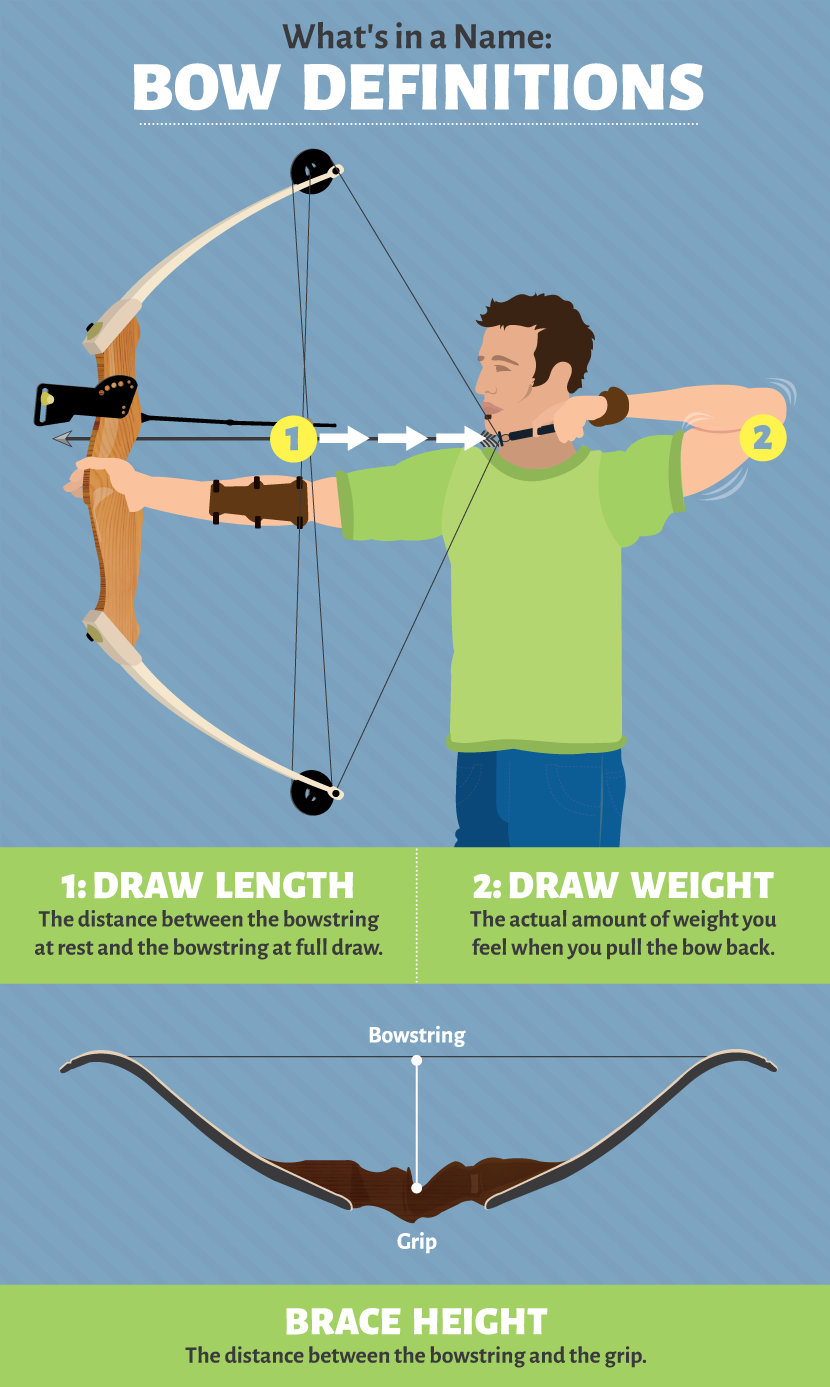
Definitely go to an outdoor store to size bows so you can try out multiple bows. Have an expert measure your arm length. It needs to be compatible with the bow’s draw length, which is simply the distance measured from a bow at rest and a bow drawn.
It’s also important that you choose a bow with a draw weight that you can manage. You want to choose the highest weight you can shoot comfortably. If it’s a big strain, it’s too heavy a weight. It is especially critical that children have the proper draw weight.
Finally, ensure that you have the correct brace height. If the grip of the bow is close to the string, you’ll have more speed but less forgiving accuracy, and vice versa.

What about arrows? Arrows can range in price, and almost all are made of carbon or fiberglass. More important than the materials, however, is that the arrows selected coordinate with your bow. Purchase arrows made for use with the bow you chose.
Making and Setting Up a Target
After selecting your bow, you’ll need something to shoot at. The easiest targets to make or buy are block targets.
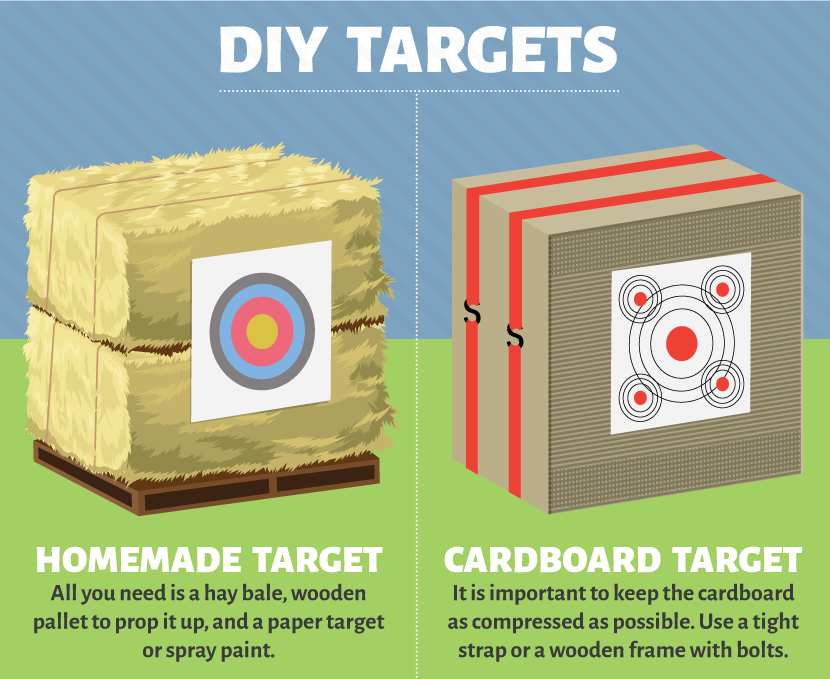
1. Make your own: To make your own target, start with an old hay bale. Bales that have been used for harvest parties or as decoration can often by found free, or they may be available for purchase at most feed or farm supply stores.
Place your bale on a wooden bench or chair, and then either spray-paint or attach a paper target.
Bales will begin to fall apart after multiple arrows have landed, but you can expect to get several months’ use out of them. Paper targets last far less time but are cheap to reproduce.
2. Buy your own: Block targets for sale are made of foam and include outlined targets on the sides of the block. They’re designed to be reused again and again, and they will last longer than most homemade targets.

Archery Basics
Good news... archery is not hard to learn! Stance and form vary somewhat by preference, so feel free to play with your stance until you feel most comfortable. The basics (regardless of bow type) include the following steps:
Step 1: Notch the arrow into the string, letting the shaft sit on the rest. Be sure that the colored feather of your arrow is facing toward you.
Step 2: Hold the arrow in place with one finger above and two fingers below. Pinch the arrow. (Alternative finger hold: three fingers below and none on top if you have a guide in your bowstring to hold your arrow in place.)
Step 3: Extend your bow arm out in front of you, and draw back. Draw your bow all the way back to the side of your mouth, ensuring that your elbow is parallel to the ground (it should be sticking out).
Your extended arm should be perfectly straight. Keep your fingers clear of the string as you release.

Try Before You Buy
Want to try archery while traveling before buying equipment at home? Many people, myself included, get started in this way. The best vacation locations to find archery include the following:
Family resorts: Think of outdoor family resorts as summer camp for kids and parents. Many will have archery included in their lists of activities.
Many lodges outside national parks and wilderness areas also offer archery, such as the Tenaya Lodge outside Yosemite National Park, CA.
Dude ranches: With their “Wild West” feel, dude ranches are great places to try traditional skills such as archery.
Take advantage of experts on site, who can help you choose from a wide variety of equipment. Take notes, and make purchases at home based on your experience on vacation.
So the next time you encounter an archery range, stop and try it out for a while! You'll be surprised how empowering it is to pick up a bow and arrow, and perfect the art of precision that is hitting a target.
Embed the article on your site

