Some of the parts we sell are eligible for mail-in rebates since we can recycle them. We will display any applicable rebates in your shopping cart. To redeem your rebate, contact Customer Service after you have received your part.
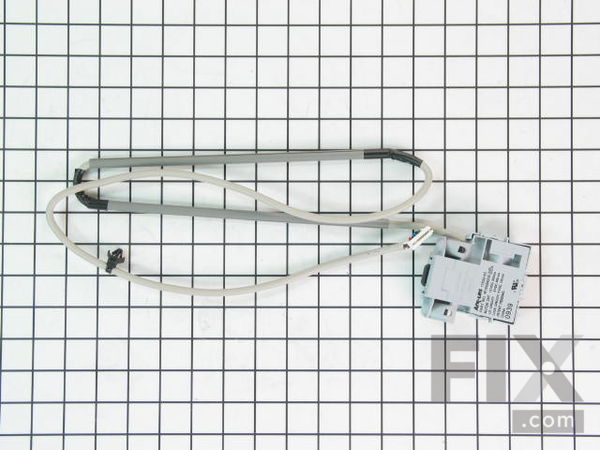
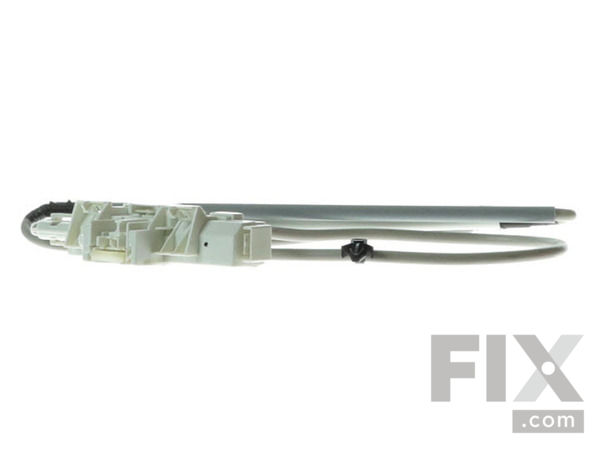
Lid Lock Assembly
$94.96
In Stock
- Fix Number:
- FIX11756782
- Manufacturer #:
- WPW10619844
- Manufactured by:
- Whirlpool
- Product Description
- This part makes sure that the lid is shut before allowing the machine to start or agitate. NOTE: This is a manufacturer substitution. Part may differ in appearance but is a functional equivalent to prior parts including
- Works with the following brands:
- Whirlpool, Maytag, Kenmore
- Works with the following products
- Washer
- Fixes the following symptoms
- Lid or door won’t close, Will Not Start, Locking Issues
- Part# WPW10619844 replaces these:
- AP6023438, 8563937, W10059230, W10619844, WPW10619844VP
Part Number Cross Reference
Product Description
This part makes sure that the lid is shut before allowing the machine to start or agitate. NOTE: This is a manufacturer substitution. Part may differ in appearance but is a functional equivalent to prior parts including
-
Works with the following brands:Whirlpool, Maytag, Kenmore
-
Works with the following products:Washer
-
Fixes the following symptoms:Lid or door won’t close, Will Not Start, Locking Issues
-
Part# WPW10619844 replaces these:AP6023438, 8563937, W10059230, W10619844, WPW10619844VP
Videos For installing this part.
Replacing your Lid Lock Assembly

Replacing your Lid Lock Assembly

Questions and Answers
We're sorry, but our Q&A experts are temporarily unavailable.
Please check back later if you still haven't found the answer you need.
Installation Instructions Provided by Fix customers like you.
- < Prev
- 1
- Next >
Sort by:
Search filter:
Clear Filter
Your search term must have 3 or more characters.
Keep searches simple. Use keywords, e.g. "leaking", "pump", "broken" or "fit".
Sorry, we couldn't find any existing installation instruction that matched.
- Customer:
- Jerry from Ludington, MI
- Parts Used:
- WPW10619844
- Difficulty Level:
- Really Easy
- Total Repair Time:
- 15 - 30 mins
Broken Lid Lock
Hired Repairman after I received the part.
6 of 6 people
found this instruction helpful.
Was this instruction helpful to you?
Thank you for voting!
- Customer:
- Ken from Red Bank, NJ
- Parts Used:
- WPW10619844
- Difficulty Level:
- Really Easy
- Total Repair Time:
- Less than 15 mins
- Tools:
- Nutdriver
error code showing--lid would not lock
just follow the wire
2 of 3 people
found this instruction helpful.
Was this instruction helpful to you?
Thank you for voting!
- Customer:
- ed from Pasadena, MD
- Parts Used:
- WPW10619844
- Difficulty Level:
- Easy
- Total Repair Time:
- 15 - 30 mins
- Tools:
- Pliers, Screw drivers
lid lock errors DL and DU
First took out the old unit by opening the lid with putty knife and removing two 1/4 inch headed screws that held it in. Confirmed it still wouldnt work. Second ordered the new part. Third rather than undo the instrument panel and have to contend with the grommet and so on, it was easier for me to cut the old wiring mid way and cut the
... Read more
new wire mid way and splice in the new part.I dont recommend that unless you know how to take measures to do good splicing of multipair wire, otherwise take the instrument panel off simply with two philip screws and run the thing the right way. Good luck. Its really not that bad. FYI you may want to check voltages on the wires and insure 12 and 5 volts are right and that this isnt a board issue or durty connection issue. You may not even need this part.
Read less
1 person
found this instruction helpful.
Was this instruction helpful to you?
Thank you for voting!
- Customer:
- laura from chicago, IL
- Parts Used:
- WPW10619844
- Difficulty Level:
- Easy
- Total Repair Time:
- 15 - 30 mins
- Tools:
- Screw drivers, Socket set
washer wont start cycle
After verifying the part was indeed the right part. The installation was quick and it only took 4 screws to do it. 1.First thing first unplug the washer from wall.....2.remove two screws (using Phillips screwdriver) from back of the control panel. 3. Remove the connector and detach the control panel completely and sit it to the sid
... Read more
e. 4. Use flat head screwdriver to pry the front of washer top apart and secure it with screwdriver to keep open. 5.unscrew old lock (*keep 2 screws) detach the lock and carefully pull out wiring harness) 6. Replace with new lid lock use the old screws to attach and follow the wiring harness back through the washer until you get it secured at the control panel area. ***please be careful applying the black plastic support it can break...... 7. Replace the control panel after attaching the lid lock wire to the control panel. Replace the screws tightly and then plug the machine back in and you should have your old washer back........
Read less
1 person
found this instruction helpful.
Was this instruction helpful to you?
Thank you for voting!
- < Prev
- 1
- Next >
★
Customer Reviews
Filter By Rating:
- < Prev
- 1
- Next >
Sort by:
Search filter:
Clear Filter
Your search term must have 3 or more characters.
Keep searches simple. Use keywords, e.g. "leaking", "pump", "broken" or "fit".
Sorry, we couldn't find any existing reviews that matched. Try using some different or simpler keywords.
Alison W - February 19, 2020
Verified Purchase
Lid lock assembly works
This product was received intact and as advertised.. It was easily installed by my husband. It functions perfectly., although it was not the reason the washer quit working.
Model Compatibility
This part works with the following models:
Fix Number: FIX11756782
Manufacturer Part Number: WPW10619844
Manufacturer Part Number: WPW10619844
Brand
Model Number
Description
✖
Mail-In Recycling Rebate


