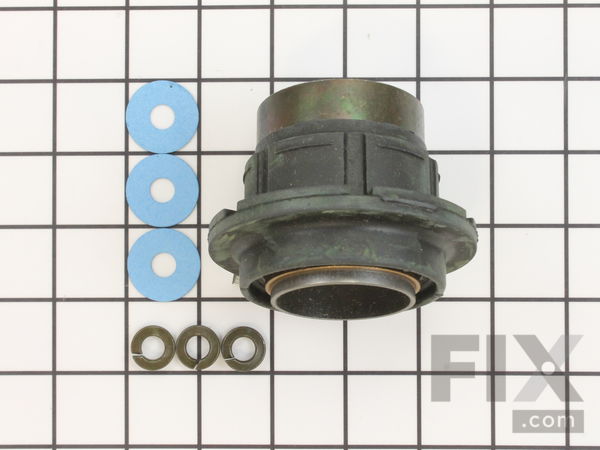
Part Location Diagram of 6-2040130 Whirlpool Tub Bearing Kit
See part 22 in the diagram
Replacing your Maytag Washer Tub Bearing Kit
( Grid squares measure 1x1 inch )

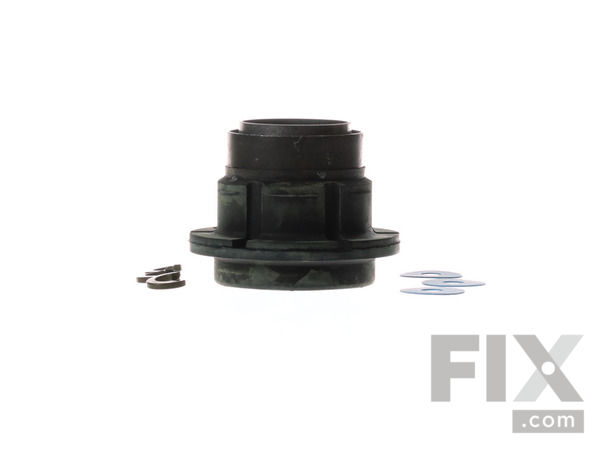
Tub Bearing Kit

Rated by 7 customers 

?

Easy 

More than 2 hours 

Ratings submitted by customers like you who bought this part.

?
$55.59
In Stock
Fix Number:
FIX2347235
Manufacturer #:
6-2040130
Manufactured by:
Whirlpool

Product Description

This kit is used on 2-belt washers. It is recommended to change the seal kit at the same time.

Videos For installing this part.

Replacing your Tub Bearing Kit

Replacing your Tub Bearing Kit

Questions and Answers

We're sorry, but our Q&A experts are temporarily unavailable.
Please check back later if you still haven't found the answer you need.

Installation Instructions Provided by Fix customers like you.

Average Repair Rating: 2.5 / 5.0, 7 reviews.
  • 1
Sort by:
Sorry, we couldn't find any existing installation instruction that matched.
Customer:
Deborah from Earlsboro, OK
Parts Used:
6-2095720, 6-2040130
Difficulty Level:
Really Easy
Total Repair Time:
30 - 60 mins
Tools:
Nutdriver, Pliers, Screw drivers, Socket set, Wrench set
Washer suddenly leakedr.
Upon removing the front cover, I could see that the bottom of the outer tub, just above the transmission had water around it. Based on the age of the machine, I went ahead and replaced the tub bearing also.I followed the repair videos. The tub seal kit video had a tub with the plastic tub cover like my model, and the tub bearing kit vid eo used a older model machine. Both videos were EXCELLENT! If you need a part very quickly though, be sure to pay extra for the guaranteed 2-3 day shipping. The website stated that most parts only take 2 days to be delivered. Mine took a week. You will also need to order the spanner wrench; luckily we had one from servicing a family members machine several years ago.
7 of 8 people found this instruction helpful.
Was this instruction helpful to you?
Thank you for voting!
Customer:
James from CLAWSON, MI
Parts Used:
6-2095720, 6-2040130
Difficulty Level:
Easy
Total Repair Time:
More than 2 hours
Tools:
Socket set
The washer was leaking at the tub seal.
I just followed the instructions given in the website video associated with the parts. The instructions were clear and concise. They were all I required.
1 person found this instruction helpful.
Was this instruction helpful to you?
Thank you for voting!
Customer:
Robert from Charlottesville, VA
Parts Used:
6-2095720, 6-2040130, WP6-2022030, 12112425
Difficulty Level:
A Bit Difficult
Total Repair Time:
More than 2 hours
Tools:
Nutdriver, Pliers, Screw drivers, Socket set, Wrench set
Big time leak from tub seal central bearing / transmission area
I found the instruction video very helpful important and pretty much went by that. Of course, the special wrench/tool to get the spindle apart after removing the agitator is essential, I'd say. Curiously, this was not available from the site (or I may have missed it?) -- I got it elsewhere. The thing was leaking from the tub seal / cen tral bearing area, so I thought while it was apart I'd replace the seal and the bearing too. However, I was unable to get the bearing sleeve off the transmission -- it was stuck/corroded on very tightly. The chap on the video warned about this and suggested it would come off after treatment with a chisel. I went at it for a while but was afraid of destroying the transmission, so I stopped chiseling, and decided to leave it. I sanded down the top area that had accumulated a bit of rust, checked that the new bearing half on the rubber housing would slip on to the old bearing sleeve, and installed the new bearing with rubber housing in the tub. Another comment I would have is that the bearing kit should come with new rubber seals (in addition to spring washers) for the 3 bolts that hold the outer tub to the sprung frame supports. Quite a bit of cleaning involved / fairly dirty job but not too bad. Very doable for anyone with the slightest interest, a few tools, and a bit of time. I spent $200 on tools and parts and if this gives this 15 year old machine a new lease of life, Kudos to the company (video Steve) and Maytag. (Saved me having to dump the thing down by the creek.) Oh, yes, I'm having to replace the hookup hoses because having removed them the seals no longer seat properly and are leaking at the wall and the machine. I've done 2 washes -- so far so good.
1 person found this instruction helpful.
Was this instruction helpful to you?
Thank you for voting!
Customer:
John from Los Angeles, CA
Parts Used:
6-2095720, 6-2040130
Difficulty Level:
Very Easy
Total Repair Time:
More than 2 hours
Tools:
Nutdriver, Pliers, Screw drivers, Socket set
Washer was leaking water from very old tub seal
The repair was simple. Just CAREFULLY follow the video instructions that are on the site. The videos are extremely easy to understand, you simply need to follow the procedure precisely. I found it absolutely necessary to buy a Maytag wrench to remove the retaining washers from both the Stem Seal and Bearing Kit. Replacing both at the same time makes sense since leaking seems to be a problem that could arise from the failure of either part, and once you get the Seal removed, the steps and logic to replace the Bearing are a no brainer. Repairing an old Maytag is a very smart decision. My machine is more than 20 years old, but the quality of the original parts will probably keep it running for another 20 years.
1 of 2 people found this instruction helpful.
Was this instruction helpful to you?
Thank you for voting!
Customer:
Frank from Monroe, CT
Parts Used:
6-2095720, 6-2040130
Difficulty Level:
Easy
Total Repair Time:
More than 2 hours
Tools:
Screw drivers, Wrench set
Small leak
Replaced tub seal and bearing. It was not difficult at all. Tested the machine with front panel removed 3 times with heavy loads - no water anywhere. Now the machine is fully reassembled and working fine.
0 of 1 people found this instruction helpful.
Was this instruction helpful to you?
Thank you for voting!
Customer:
Mark from Cincinnati, OH
Parts Used:
6-2095720, 6-2040130
Difficulty Level:
A Bit Difficult
Total Repair Time:
More than 2 hours
Tools:
Nutdriver, Screw drivers
Washer repair
the repair work is pending . I will report later
0 of 1 people found this instruction helpful.
Was this instruction helpful to you?
Thank you for voting!
Customer:
Hal from Yerington, NV
Parts Used:
6-2095720, 6-2040130
Difficulty Level:
A Bit Difficult
Total Repair Time:
More than 2 hours
Tools:
Nutdriver, Pliers, Screw drivers, Socket set, Wrench (Adjustable), Wrench set
Replace Tub Seal & Tub Bearing
Your repair video with Steve worked well for me for the two projects. Thank you for your service and instructions. H. Johnston
0 of 1 people found this instruction helpful.
Was this instruction helpful to you?
Thank you for voting!
  • 1

Model Compatibility

This part works with the following models:
Fix Number: FIX2347235
Manufacturer Part Number: 6-2040130
Brand
Model Number
Description
Maytag
6329
Washer - MAYTAG AUTOMATIC WASHER
Maytag
6349
Washer - MAYTAG AUTOMATIC WASHER
Maytag
6359
Washer - MAYTAG AUTOMATIC WASHER
Maytag
A100S
Washer - Top Loading
Maytag
A101
Washer - Top Loading
Maytag
A102
Washer - Top Loading
Maytag
A102S
Washer - Top Loading
Maytag
A103
Washer - Top Loading
Maytag
A103S
Washer - Top Loading
Maytag
A104
Washer - Top Loading
Maytag
A105
Washer - Top Loading
Maytag
A106
Washer - Top Loading
Maytag
A106S
Washer - Residential
Maytag
A107
Washer - Top Loading
Maytag
A107S
Washer - Residential
Maytag
A108
Washer - Top Loading
Maytag
A108S
Washer - Residential
Maytag
A110
Washer - Top Loading
Maytag
A112
Washer - Top Loading
Maytag
A15CA
Washer
Maytag
A15CM
Washer
Maytag
A15CT
Washer
Maytag
A16CA
Washer
Maytag
A16CM
Washer
Maytag
A16CT
Washer
Maytag
A17CA
Washer
Maytag
A17CM
Washer
Maytag
A17CT
Washer
Maytag
A180
Washer - Top Loading
Maytag
A181
Washer - Top Loading