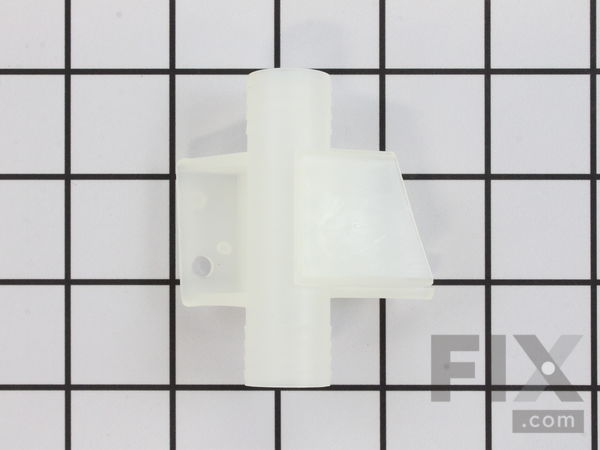
Injector Sleeve Bracket - Side Mounting
$11.10
Special Order
Fix Number: FIX11739774
Manufacturer #: WP22213057
Manufactured by:
Whirlpool
-
Product Description
This injector sleeve bracket is white and made entirely of plastic. This is a side mounting style bracket.
-
Works with the following brandsMaytag, Jenn-Air
-
Works with the following productsWasher, Washer Dryer Combo
-
Fixes the following symptomsLeaking
-
Part Number Cross ReferencePart# WP22213057 replaces these:AP6006698, 213057, 22213057
Product Description
This injector sleeve bracket is white and made entirely of plastic. This is a side mounting style bracket.
-
Works with the following brands:Maytag, Jenn-Air
-
Works with the following products:Washer, Washer Dryer Combo
-
Fixes the following symptoms:Leaking
-
Part# WP22213057 replaces these:AP6006698, 213057, 22213057
Videos For installing this part.
Replacing your Injector Sleeve Bracket - Side Mounting

Questions and Answers
We're sorry, but our Q&A experts are temporarily unavailable.
Please check back later if you still haven't found the answer you need.
Related PartsAdditional or alternate parts to consider.
Installation Instructions Provided by Fix customers like you.
- < Prev
- 1
- Next >
Sort by:
Search filter:
Clear Filter
Your search term must have 3 or more characters.
Keep searches simple. Use keywords, e.g. "leaking", "pump", "broken" or "fit".
Sorry, we couldn't find any existing installation instruction that matched.
-
Customer:Autographic Wedding and from Norwood, MA
-
Difficulty Level:A Bit Difficult
-
Total Repair Time:More than 2 hours
-
Tools:Nutdriver, Pliers, Screw drivers, Socket set
This stackable washer dryer started to leak water on the floor
Well finding information on the problem and getting the parts was not the problem, the problem was that the water valve and Rubber injector Valve were just under the lid of the washing machine, which was just underneath the dryer which had to be removed to remove the washer lid. This was the challenge. But once I figured out that 4 bolts, 2 on each side in the back held the dryer in place over the washer, it was simply a matter of picking the dryer up and setting it on the floor. Then replacing it when the repair was done. If you have help, this will not be such a big deal. I am 62 and had no one around at the time. The repair itself was easy and well outlined on this site webpage and others. There is one nut in each corner that holds the top on. Remove the front panel's two screws at the bottom and you will have access.Your going to pull the two hex nuts off the back plate that holds the connectors for the hot and cold water hoses. That is the Water Inlet Valve. Pull it through and up so you can remove the two hoses, and then unplug the upper and lower wire connectors. I marked them so I would remember but probably not necessary. I also elected to change the injector valve and injector sleeve bracket, for less then 10 bucks I did not want to be back at this thing in a few months. After you get the new parts on, push the water valve back to the rear and re attach the mounting plate, then nut that plate back to the rear of the washer. Then its just a matter of getting the dryer back on top. Take the opportunity to clean all the dust out of both parts to avoid any risk of fire. Been up and running a couple weeks now and no more issues. Less than $50 fix much better than spending another 1200 on new washer dryer.
Was this instruction helpful to you?
Thank you for voting!
- < Prev
- 1
- Next >
Model Compatibility
This part works with the following models:
Fix Number: FIX11739774
Manufacturer Part Number: WP22213057
Brand
Model Number
Description