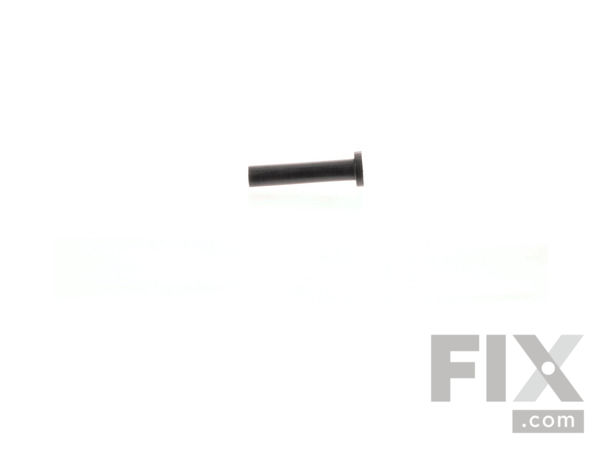
Part Location Diagram of WP216201 Whirlpool Rubber Injector Valve
See part 10 in the diagram
Replacing your Maytag Washer Rubber Injector Valve
( Grid squares measure 1x1 inch )

Rubber Injector Valve

★★★★★
★★★★★
1 Review

Rated by 9 customers 

?

Easy 

30 - 60 mins 

Ratings submitted by customers like you who bought this part.

?
$21.32
In Stock
Fix Number:
FIX11738945
Manufacturer #:
WP216201
Manufactured by:
Whirlpool

Product Description

This part is commonly known to cause a leak at the top left corner of the outer tub. It fits over the injector nozzle.

Videos For installing this part.

Replacing your Rubber Injector Valve

Replacing your Rubber Injector Valve

Questions and Answers

We're sorry, but our Q&A experts are temporarily unavailable.
Please check back later if you still haven't found the answer you need.

Installation Instructions Provided by Fix customers like you.

Average Repair Rating: 3.2 / 5.0, 9 reviews.
  • 1
Sort by:
Sorry, we couldn't find any existing installation instruction that matched.
Customer:
Rick from Nordland, WA
Parts Used:
WP216201
Difficulty Level:
Easy
Total Repair Time:
30 - 60 mins
Tools:
Nutdriver, Screw drivers, Socket set
Water leaking from near the top of the washer.
Removed the front panel by removing 2 screws near the bottom of the panel, Then removed 2 bolts holding the top panel and lifted the top panel/cover. I turned on the washer to find the source of the leak. Loosened the clamp and Removed the rubber injector valve which had a hole, causing the leak. After receiving the new part, I Insert ed the new rubber injector valve, re-attached the hose, and tightened the clamp around the hose and the injector valve. Turned on the washer to check to verify that the leak was fixed, and then closed the top cover, re-inserted the bolts. Then I re-attached the front cover with its 2 screws.
4 of 4 people found this instruction helpful.
Was this instruction helpful to you?
Thank you for voting!
Customer:
Autographic Wedding and from Norwood, MA
Parts Used:
WP22213057, WP216201, 205613
Difficulty Level:
A Bit Difficult
Total Repair Time:
More than 2 hours
Tools:
Nutdriver, Pliers, Screw drivers, Socket set
This stackable washer dryer started to leak water on the floor
Well finding information on the problem and getting the parts was not the problem, the problem was that the water valve and Rubber injector Valve were just under the lid of the washing machine, which was just underneath the dryer which had to be removed to remove the washer lid. This was the challenge. But once I figured out that 4 bolt s, 2 on each side in the back held the dryer in place over the washer, it was simply a matter of picking the dryer up and setting it on the floor. Then replacing it when the repair was done. If you have help, this will not be such a big deal. I am 62 and had no one around at the time. The repair itself was easy and well outlined on this site webpage and others. There is one nut in each corner that holds the top on. Remove the front panel's two screws at the bottom and you will have access.Your going to pull the two hex nuts off the back plate that holds the connectors for the hot and cold water hoses. That is the Water Inlet Valve. Pull it through and up so you can remove the two hoses, and then unplug the upper and lower wire connectors. I marked them so I would remember but probably not necessary. I also elected to change the injector valve and injector sleeve bracket, for less then 10 bucks I did not want to be back at this thing in a few months. After you get the new parts on, push the water valve back to the rear and re attach the mounting plate, then nut that plate back to the rear of the washer. Then its just a matter of getting the dryer back on top. Take the opportunity to clean all the dust out of both parts to avoid any risk of fire. Been up and running a couple weeks now and no more issues. Less than $50 fix much better than spending another 1200 on new washer dryer.
3 of 3 people found this instruction helpful.
Was this instruction helpful to you?
Thank you for voting!
Customer:
Albert from Unadilla, NY
Parts Used:
WP216201, WP213015, WP596669
Difficulty Level:
Easy
Total Repair Time:
30 - 60 mins
Tools:
Pliers, Screw drivers
noticed water was leaking in front of washer-right before we were leaving for vacation
Upon returning from vacation, we needed to do laundry-so I put some plastic under the washer and we did a load. The water was leaking from the seam between the lid and the back panel on the side with the hot and cold water connections- not the front. I removed two screws from the front bottom panel and two screws from the underside of th e lid.Turning the washer on showed the leak was coming from the injection valve( it was brittle from age). The rubber injection valve was replaced and installed( using a little liquid soap to help the rubber hose to slip over the rubber injection valve) with a new clamp. The leak was fixed.
2 of 2 people found this instruction helpful.
Was this instruction helpful to you?
Thank you for voting!
Customer:
Daniel from SAN CARLOS, CA
Parts Used:
WP216201
Difficulty Level:
Really Easy
Total Repair Time:
30 - 60 mins
Tools:
Pliers, Screw drivers
Water leaking from left back corner of washer
Just follow your instructions - very easy. Interest videos also helpful.
1 person found this instruction helpful.
Was this instruction helpful to you?
Thank you for voting!
Customer:
Burr from GREELEY, CO
Parts Used:
WP216201, WP213015
Difficulty Level:
Easy
Total Repair Time:
30 - 60 mins
Tools:
Nutdriver, Screw drivers, Socket set
rubber water injector valve had failed and was leaking water.
Viewed the You Tube video, which was excellent.
1 person found this instruction helpful.
Was this instruction helpful to you?
Thank you for voting!
Customer:
heinz from amherst, NY
Parts Used:
WP216201, WP213015, 206154
Difficulty Level:
Really Easy
Total Repair Time:
30 - 60 mins
Tools:
Nutdriver, Pliers, Screw drivers
water leak far left corner
removed front panel via two screws near bottom, then lift top to expose water injecter hose. I pulled control knob to activate water fill to verify were it was leaking. Once replaced,I reactivated water fill to verify no leaks.
1 person found this instruction helpful.
Was this instruction helpful to you?
Thank you for voting!
Customer:
susan from milwaukee, WI
Parts Used:
WP216201, WP213015
Difficulty Level:
Easy
Total Repair Time:
1- 2 hours
Tools:
Nutdriver, Socket set
washer leaked from the bottom when FILLING
The U-Tube video from this site was great. SHOULD have taken a half-hour-- tops-- but the most difficult part was freeing up one of the screws at the bottom of the front panel. Finally had to drill it out. AFTER COMPLETING THE ACTUAL REPAIR, the leaking problem was solved.
0 of 1 people found this instruction helpful.
Was this instruction helpful to you?
Thank you for voting!
Customer:
Crawford from Lancaster, SC
Parts Used:
WP216201, WP213015
Difficulty Level:
Really Easy
Total Repair Time:
15 - 30 mins
Tools:
Screw drivers, Socket set
The Inlet Valve was leaking every time the washer would fill to start washing. The water would run out the side near the top.
I removed the front cover and disconnected the bleach filler tube from the top cover. I removed the two screws that held the top cover on and tilted the top cover back. I located the injector valve and determined that it was bad by starting the washer while watching the valve run over into the floor. I loosened the first clamp on the i njector valve and slipped the injector valve and plastic nozzle out. I slid the new plastic injector nozzle into the new rubber injector valve. I rubbed a little grease around the rim of the injector valve so it would slide back into the hose easily into place. I reconnected the hose clamp and started the washer. No more water leak. I connected the bleach filler tube and put the covers back on. I put the washer back into it's place and started washing clothes. Its been two weeks and I haven't seen any water in the floor. This includes about six loads of clothes.
0 of 1 people found this instruction helpful.
Was this instruction helpful to you?
Thank you for voting!
Customer:
janetjean from fairbury, NE
Parts Used:
WP216201, WP213015
Difficulty Level:
Easy
Total Repair Time:
15 - 30 mins
Tools:
Pliers, Screw drivers
leaking
Looked it up on your site , watched the video, odered the part and put it on. Seems to have been the problem because it is not leaking now . Thank You for your prompt service
0 of 1 people found this instruction helpful.
Was this instruction helpful to you?
Thank you for voting!
  • 1
Customer Reviews
Average Rating: (1 Review)
5.0
★★★★★
★★★★★
Filter By Rating:
  • 5
    1
  • 4
    0
  • 3
    0
  • 2
    0
  • 1
    0
  • 1
Sort by:
Sorry, we couldn't find any existing reviews that matched. Try using some different or simpler keywords.

Model Compatibility

This part works with the following models:
Fix Number: FIX11738945
Manufacturer Part Number: WP216201
Brand
Model Number
Description
Maytag
A104
Washer - Top Loading
Maytag
A105
Washer - Top Loading
Maytag
A106
Washer - Top Loading
Maytag
A106S
Washer - Residential
Maytag
A107
Washer - Top Loading
Maytag
A107S
Washer - Residential
Maytag
A108
Washer - Top Loading
Maytag
A108S
Washer - Residential
Maytag
A110
Washer - Top Loading
Maytag
A112
Washer - Top Loading
Maytag
A15CA
Washer
Maytag
A15CM
Washer
Maytag
A15CT
Washer
Maytag
A16CA
Washer
Maytag
A16CM
Washer
Maytag
A16CT
Washer
Maytag
A17CA
Washer
Maytag
A17CM
Washer
Maytag
A17CT
Washer
Maytag
A180
Washer - Top Loading
Maytag
A181
Washer - Top Loading
Maytag
A182
Washer - Top Loading
Maytag
A183
Washer - Top Loading
Maytag
A18CA
Washer
Maytag
A18CM
Washer
Maytag
A18CT
Washer
Maytag
A190
Washer - Top Loading
Maytag
A1910
Washer - Top Loading
Maytag
A206
Washer - Top Loading
Maytag
A206S
Washer - Top Loading