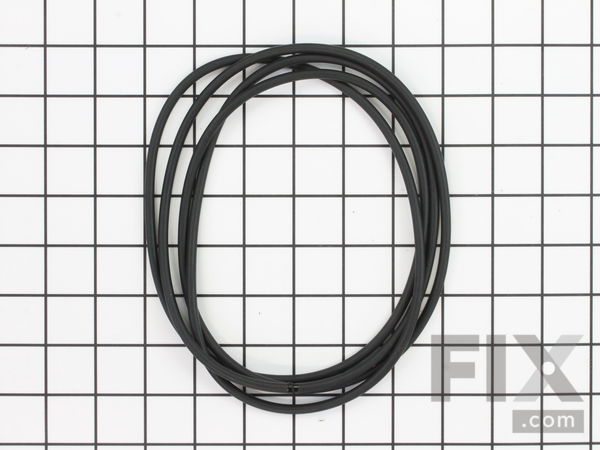
Part Location Diagram of 4036ER4001B LG Gasket
See part K141 in the diagram
( Grid squares measure 1x1 inch )

Gasket 4036ER4001B

Rated by 7 customers 

?

A Bit Difficult 

More than 2 hours 

Ratings submitted by customers like you who bought this part.

?
$31.51
In Stock
Fix Number:
FIX3522859
Manufacturer #:
4036ER4001B
Manufactured by:
LG

Product Description

Questions and Answers

We're sorry, but our Q&A experts are temporarily unavailable.
Please check back later if you still haven't found the answer you need.

View More View Less
Rear Tub Gasket
$31.51
In Stock
BEARING,BALL
$63.65
In Stock
Washer Tub Bearing, Rear
$37.30
In Stock
SPIDER
$214.38
In Stock
BEARING,BALL
$58.41
In Stock
Washer Tub Bearing
$48.25
In Stock
Affresh Washing Machine Cleaner - 3 pack
$12.58
In Stock
Produce Preserver Filter
$21.50
In Stock
Affresh Dishwasher Cleaner Tablets - 6
$19.09
In Stock
Cooktop Cleaning Cream
$15.57
In Stock
Cooktop Cleaner
$17.74
In Stock
Affresh Cleaner
$19.09
In Stock

Installation Instructions Provided by Fix customers like you.

Average Repair Rating: 2.2 / 5.0, 7 reviews.
  • 1
Sort by:
Sorry, we couldn't find any existing installation instruction that matched.
Customer:
Andrew from COLORADO SPGS, CO
Parts Used:
4280FR4048Z, 4280EN4001C, MHW61841101, MDS62058301, 4036ER4001B
Difficulty Level:
A Bit Difficult
Total Repair Time:
More than 2 hours
Tools:
Nutdriver, Pliers, Screw drivers, Socket set, Wrench (Adjustable), Wrench set
High pitch noise during spin cycles
Great video on how to repair........I removed the machine to the garage and began work.

Time to Repair - 4+ Hours

Number of times to get the repair right: 3

What I did right: Had all the tools and supplies mise en place. I also decided to replace the Spider and not just the bearings since I would have it all apart....this was a brilliant call. Plus I replaced the gaskets and seals, especially the bearing seal gasket.

What I did wrong: Thinking I was the Maytag repairman who came out of retirement and saved the day

How did it go: Well, lets just say that if you asked me what was more difficult and stressful: Being married 25 years, OR, fixing the wash machine....the later would take the cake. First off moving the thing to the garage to work on it was my biggest mistake (read why later). The overall disassembly is easy and just like the video. Nothing can prepare you, however, for the sight of a spider assembly that has been in the trenches with four teenage boys for the last 6 years. Like I gave this thing a full military send off with flyovers and everything when it went in the trash. Can you image the nastiness that it went through? Well, little pieces of history were stuck to this thing to the point some C4 was considered to put it out of its misery. Un Pro Tip: If you can get a jet propulsion pressure washer it still wouldn't work. Anyway.....Replace the spider assembly. Also enlist one of said teenage boys to pressure wash and scrub the inner and outer tub cause its going to look like the undercarriage of a hearse driving through a flooded cemetery. That part is a walk in the park to change compared to removing the bearings.

Bearings are very happy where they are currently installed. Like they ain't coming out for no reason. Its kinda like trying to remove a sheep carcass from a pack of hungry wolves...someone is gonna get hurt. So if you want to buy a whole new tub assembly for the bearings that would be Un Pro Tip #2: that I missed. Reseating the bearings is not too bad if you are good with having intellectual discussions with drunk people or teenage boys. And after that reassembly is a snap.

Un Pro Tip #3: There is a small, seemingly harmless tube at the bottom of the tub in back. It just pushes on. Push harder. Lube that thing up with dish soap and shove it on there like your life depended on it. Cause its gonna come back to bite you.

Un Pro Tip #4: Don't open the washer door because you are frustrated there is water leaking out the bottom (from previous Tip #3), you have unplugged said machine, and the tub is full of water. You will get a life like recreation of what the Egyptians felt like when Moses walked out of the Red Sea. You might just need to dry your shoes out. Or the basement.

Un Pro Tip #5: When you are overly frustrated from Un Pro Tip#4 DO NOT do anything until your shoes have dried out. Like try to drag the washer by yourself back to the garage. This will create other problems that lengthen the repair time to DAYS because you thought the Maury Povich show had some brilliant ideas on self management when frustrated.

Fixing the leak because you didn't push the small little drain tube onto its shaft with enough force is a reason to fell a little better, until you realized you took half the washer apart to find out you only needed to remove the back panel. This might be an Un Pro Tip, I don't know.

Un Pro Tip#6. Remain calm when after you install everything for the second time it still leaks like Russian atomic submarine. This is caused because you punctured the drain tube from violently trying to understand that little hole that didn't get enough shoving. BTW....drain tubes are inexpensive and ship within 3 days, so teenage boys only have to wear their skivies twice before washing. This is not unusual.

Replacing the drain tube is fairly easy after you have taken the machine apart 5 times now, so one hour and you are done.

The stress from sitting here typing this while drowning in a Old Fashioned and hearing the washing machine process britches that have not been washed in a week is more stressful than watching Joe Biden walk up the steps to an airplane. Like this thing could blow at any minute.

Un Pro Tip #7: Don't read emails that ask for your repair opinion 3 days after screwing it up several times and then consulting Jack Daniels for advice. You might just be honest.

Good luck.
12 of 12 people found this instruction helpful.
Was this instruction helpful to you?
Thank you for voting!
Customer:
bechara from MOBILE, AL
Parts Used:
4280FR4048Z, 4280EN4001C, MDS62058301, 4036ER4001B
Difficulty Level:
A Bit Difficult
Total Repair Time:
More than 2 hours
Tools:
Nutdriver, Pliers, Screw drivers, Socket set, Wrench (Adjustable), Wrench set
LOUD NOISE WHEN SPINNING
Special attention and "hardest" part of the job is pushing the bearings out without damaging the housing
12 of 12 people found this instruction helpful.
Was this instruction helpful to you?
Thank you for voting!
Customer:
Greg from Hillsboro, OR
Parts Used:
4280EN4001C, 4280EN4001D, 4036ER4001B, 4036ER2004A
Difficulty Level:
Difficult
Total Repair Time:
More than 2 hours
Tools:
Pliers, Screw drivers, Socket set
Excessive noise during spin cycle
Be sure to read other instructions posted on this site, and watch the LG washer teardown videos on YouTube. DO NOT attempt to repair unless you have genuine LG (OEM) parts, such as those sold by this site. The most difficult step is removing the spider from the rear case; I had to use a 4lb sledge hammer to hit the spider shaft; use a str ip of softer metal, such as 1/8" aluminum, to protect the shaft. Once the spider is removed, the bearings can be tapped-out of the rear case. My spider was worn because the bearing seized and needed replacement. Also, the bolts connecting the spider to the drum were severely corroded, so the drum also needed replacement.
6 of 6 people found this instruction helpful.
Was this instruction helpful to you?
Thank you for voting!
Customer:
Charlie from Diamondhead, MS
Parts Used:
4434ER0002H, 4280EN4001C, 4280EN4001D, 4036ER4001B, 4036ER2004A
Difficulty Level:
Easy
Total Repair Time:
More than 2 hours
Tools:
Pliers, Screw drivers, Socket set
loud noise during spin only
Disassembly time was about four hours, repair time about thirty minutes, and reassembly around two hours.I had really cramped quarters in which to work. I could either push the machine forward and work on the back or push it back and work on the front.I looked up bearing repair on You Tube then played it on a tablet one part at a time for disassembly. Once I got to the stator cover bolt, I removed it and the stator cover. I left the stator in place but was careful not to damage any of the coils. Taking the spider off was the biggest challenge. The video I was watching didn't mention that the screws had thread-lock on them and it felt like the threads would strip. After additional research, I used the penetrant and let it sit for about a half hour. Everything proceeded from there without incident. I followed the video recommendation to use dishwashing liquid to coat the bearings for installation. Reassembly was straightforward. There were two items that gave me the most trouble. The first was removal and installation the tub. Here it helps to have another set of hands. The second was installation of the tub seal clamp, but I didn't have locking pliers. In closing, one thing does not identify itself well on the illustrated parts drawings that are available--the large tub seal. I called LG tech support to verify it was correct before submitting my parts order.
6 of 6 people found this instruction helpful.
Was this instruction helpful to you?
Thank you for voting!
Customer:
Craig from Buckeye, AZ
Parts Used:
4280EN4001C, 4280EN4001D, 4036ER4001B, 4036ER2004A
Difficulty Level:
Easy
Total Repair Time:
More than 2 hours
Tools:
Pliers, Screw drivers, Socket set, Wrench set
Noisy bearings
First, I ordered both bearings, shaft and tub seals but I got it apart and the back tub had bulges and cracks around the bearing pocket. I then ordered the back tub half and it came with the bearings, shaft seal and the 3 accordion hoses installed. I wish I would have ordered the tub half the first time around. I recommend NOT to bother w ith just the bearings and shaft seal. Craig.
6 of 6 people found this instruction helpful.
Was this instruction helpful to you?
Thank you for voting!
Customer:
Eduard from Indianapolis, IN
Parts Used:
4986ER0004F, 4280EN4001C, 4280EN4001D, 4036ER4001B, 4036ER2004A
Difficulty Level:
Really Easy
Total Repair Time:
More than 2 hours
Washer vibrating during spin cycle
Replaced the tub bearings, seal and the 3 shocks. The most difficult part was the removal of the axle. I suggest you spray the axle with WD-40 and leave this at least 1 day. Clean the Tub and outer part with a high pressure spray (if available). Once completed the washer is performing as a brand new washer. The parts were delivered on-t ime and prices were reasonable. I highly recommend this supplier.
1 person found this instruction helpful.
Was this instruction helpful to you?
Thank you for voting!
Customer:
michael from mesa, AZ
Parts Used:
4036FR4050A, 4036ER4001B
Difficulty Level:
A Bit Difficult
Total Repair Time:
More than 2 hours
Tools:
Pliers, Screw drivers, Socket set
very loud noises when drum turns
I found some videos on YouTube that described how to disassemble the washing machine - very helpful! It is a reasonable job for one person to do. The top comes off, and the control panel, and the rest of the front panel, the motor must be unbolted from the drum assembly, and then the drum can be unhooked and pulled out. The drum assembly is then separated into its two halves (remember to order a new seal ring for this!) and the drum pulls out of the bearings. In my case, it wasn't too rusty, and practically fell out. I did NOT need to replace the shaft. (Had it been rusty, it would have been very difficult to remove without air tools, and it would have meant another $120 in parts.) The bearings must be driven out of the back of the drum housing. I used my air chisel, which made the job simple. It's too large to get into a bearing press, and clumsy to do with a hammer. New bearings must be pressed in using a threaded rod and washers to support the bearing and cover the drum housing's bore. NEVER install a bearing by pushing on the center of the bearing! Reassembly was the reverse of disassembly, and was straightforward. Take photos as you disassemble, for reference. Total time about 3 hours.
1 person found this instruction helpful.
Was this instruction helpful to you?
Thank you for voting!
  • 1

Model Compatibility

This part works with the following models:
Fix Number: FIX3522859
Manufacturer Part Number: 4036ER4001B
Brand
Model Number
Description
LG
40272
Washer - LG Washing Machine Model 40272 Parts
LG
40311
Washer - Washer
LG
40318
Washer - LG Washing Machine Model 40318 Parts
LG
40441
Washer - LG Washing Machine Model 40441 Parts
LG
40448
Washer - LG Washing Machine Model 40448 Parts
LG
40512
Washer - LG Washing Machine Model 40512 Parts
LG
40518
Washer - LG Washing Machine Model 40518 Parts
LG
41022
Washer - LG Washing Machine Model 41022 Parts
LG
41028
Washer - LG Washing Machine Model 41028 Parts
LG
41029
Washer - LG Washing Machine Model 41029 Parts
LG
41172
Washer - LG Washing Machine Model 41172 Parts
LG
41182
Washer - LG Washing Machine Model 41182 Parts
LG
41272
Washer - LG Washing Machine Model 41272 Parts
LG
41282
Washer - LG Washing Machine Model 41282 Parts
LG
41283
Washer - LG Washing Machine Model 41283 Parts
LG
41372
Washer - LG Washing Machine Model 41372 Parts
LG
41379
Washer - LG Washing Machine Model 41379 Parts
LG
41472
Washer - LG Washing Machine Model 41472 Parts
LG
41473
Washer - LG Washing Machine Model 41473 Parts
LG
41532
Washer - LG Washing Machine Model 41532 Parts
LG
41538
Washer - LG Washing Machine Model 41538 Parts
LG
41542
Washer - LG Washing Machine Model 41542 Parts
LG
41548
Washer - LG Washing Machine Model 41548 Parts
LG
41549
Washer - LG Washing Machine Model 41549 Parts
LG
41572
Washer - LG Washing Machine Model 41572 Parts
LG
41573
Washer - LG Washing Machine Model 41573 Parts
LG
41722
Washer - LG Washing Machine Model 41722 Parts
LG
41728
Washer - LG Washing Machine Model 41728 Parts
LG
41729
Washer - LG Washing Machine Model 41729 Parts
LG
42192
Washer - LG Washing Machine Model 42192 Parts