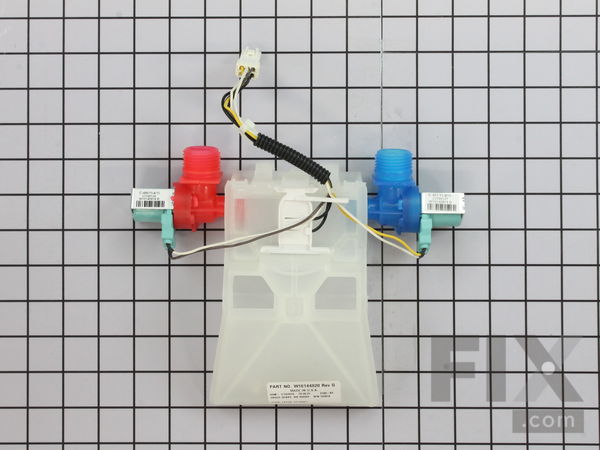
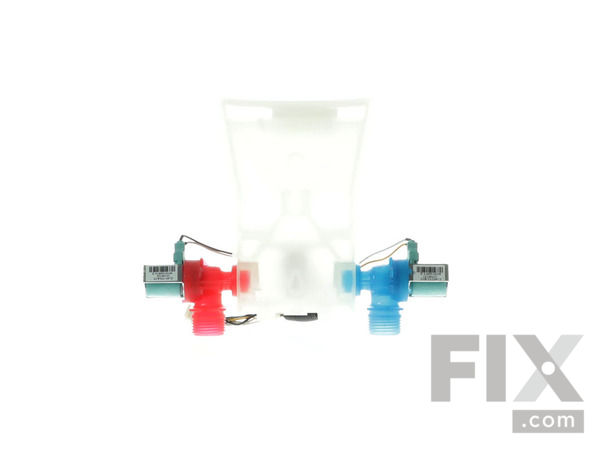
Part Location Diagram of WPW10144820 Whirlpool Washer Water Inlet Valve with Thermistor
See part 18 in the diagram
Replacing your Kenmore Washer Washer Water Inlet Valve with Thermistor
( Grid squares measure 1x1 inch )

Washer Water Inlet Valve with Thermistor

★★★★★
★★★★★
2 Reviews

Rated by 12 customers 

?

Really Easy 

30 - 60 mins 

Ratings submitted by customers like you who bought this part.

?
$59.88
In Stock
Fix Number:
FIX11749042
Manufacturer #:
WPW10144820
Manufactured by:
Whirlpool

Product Description

This part is used to help control and balance the water temperature flowing in to the washer tub.

Videos For installing this part.

Replacing your Washer Water Inlet Valve with Thermistor

Replacing your Washer Water Inlet Valve with Thermistor

Questions and Answers

We're sorry, but our Q&A experts are temporarily unavailable.
Please check back later if you still haven't found the answer you need.

Installation Instructions Provided by Fix customers like you.

Average Repair Rating: 3.8 / 5.0, 12 reviews.
  • 1
  • 2
Sort by:
Sorry, we couldn't find any existing installation instruction that matched.
Customer:
Karen from Benson, AZ
Parts Used:
WPW10144820
Difficulty Level:
Very Easy
Total Repair Time:
15 - 30 mins
Tools:
Wrench (Adjustable)
No cold water running into machine. Cracked solinoid.
Disconnect water hoses. Pull the agitator aside to reach into the the back to remove the clamps that secure the back of machine. Unplug wires on the assembly by gently pulling apart from attached plug. Assembly then lifts right out to replace with new one.
6 of 11 people found this instruction helpful.
Was this instruction helpful to you?
Thank you for voting!
Customer:
Jerold from Mora, MN
Parts Used:
WPW10144820
Difficulty Level:
Really Easy
Total Repair Time:
15 - 30 mins
Tools:
Nutdriver, Screw drivers
Waterr would not shut off completely
I followed the instruction video that this site provides for this specific repair / replacement. The video was not specific to my particular model but close enough to make the replacement very simple. Essentially, after disconnecting the power and water hoses, it involves removing the two Phillips head screws on the back corners of the control box which attach it to the machine housing and flipping it to the rear to expose and remove the spring clips which hold the back panel and machine enclosure together. Removing the clips allows the back panel and cabinet to be moved sufficiently to expose the water valve assembly and it's related wiring harness. Only one hex head screw and some tabs on the valve assembly allow it to be removed from the back panel. I was amazed at how simple it was to get the machine apart and expose virtually all it's component parts. Reassembly is obviously in reverse order. I won't hesitate to make other repairs in the future if necessary and cost effective. The local appliance dealer / service company we purchased the machine form new quoted $370.00 for this specific repair. It ultimately cost a grand total of less than $70.00 and no more the 30 minutes time including cleaning up the dust bunnies under the machine.
5 of 6 people found this instruction helpful.
Was this instruction helpful to you?
Thank you for voting!
Customer:
john from LAS VEGAS, NV
Parts Used:
WPW10144820
Difficulty Level:
Really Easy
Total Repair Time:
15 - 30 mins
Tools:
Pliers, Screw drivers
water leaking into tub when not in use
Watch the video before ordering part. makes the repair simple and easy. Best parts site on the internet !
3 of 3 people found this instruction helpful.
Was this instruction helpful to you?
Thank you for voting!
Customer:
Ronald from Palm City, FL
Parts Used:
WPW10144820
Difficulty Level:
Really Easy
Total Repair Time:
30 - 60 mins
Tools:
Pliers, Screw drivers
No cold water, only hot on any setting
Thanks, part arrived earlier than expected. Went on the internet and did the "how to" thing. Glad I did. With the Whirpool washer you do not take the back off as I had started to do. You remove the top control section and lean the front and sides forward. Everything is then exposed and it was a "piece of cake" to replace the water in let valve.Liked the plug and play electrical connection, like my Yamaha Outboard motor if it plugs in then you have it correct, it goes there.
2 of 2 people found this instruction helpful.
Was this instruction helpful to you?
Thank you for voting!
Customer:
Francis from Colorado Springs, CO
Parts Used:
WPW10144820
Difficulty Level:
Easy
Total Repair Time:
1- 2 hours
Tools:
Pliers, Screw drivers, Wrench (Adjustable), Wrench set
Water dripping into wash basin when washer was not running
There are numerous you tube videos out there which describe how to remove the control panel and cabinet in order to access the part. I saved a lot of time by doing some basic research first. The entire job, start to finish, took about an hour. Most of that time was positioning the washer and gaining access to the part. The actual part removal/replacement was easy, about 15 minutes. This particular washer has a control panel with two cross point (Phillips) screws in the rear. Simply loosen them and pull up on the panel to remove it. It has one electrical connection to be removed. The cabinet is removed by releasing two clips (look for a good you tube video on removing a washer cabinet). The inlet valve is right behind the wash basin and easily reached. It has one electrical connection and is secured by several plastic clips. Simply pull the part upward and it pops out. There may be a plastic retainer (looks like a large-head screw) on the cold water inlet. You'll need to remove that to get the inlet valve out. Put the new part in, reverse the steps above and you're done. Btw, the part was a perfect fit.
2 of 2 people found this instruction helpful.
Was this instruction helpful to you?
Thank you for voting!
Customer:
Rebecca from Lead Hill, AR
Parts Used:
WPW10144820
Difficulty Level:
Easy
Total Repair Time:
15 - 30 mins
Tools:
Screw drivers
Water keeps running, won't turn off
Using the paint scraper to raise the control panel and a screwdriver to remove clips, I opened the washing machine body. The part is very easy to take out and replace. Just unplug it from the washer and it comes right out. Put the new one in its place and plug it in to the washer. Close the washing machine body, attach the hoses, plug it in, turn on the water and it's working as good as new.
1 person found this instruction helpful.
Was this instruction helpful to you?
Thank you for voting!
Customer:
Linda from Richmond, KY
Parts Used:
WPW10144820
Difficulty Level:
Easy
Total Repair Time:
30 - 60 mins
Tools:
Pliers, Screw drivers, Socket set
One of the valves had cracked. Lots of sediment on one of the screens. we live in a old house and had already replaced some old water lines. We don't think we will have that sediment anymore.
My husband did the repairs and it didn't take him very long.We looked the directions up on the internet. Now my washing machine is working just fine. The water flow is so much better.
0 of 1 people found this instruction helpful.
Was this instruction helpful to you?
Thank you for voting!
Customer:
bob from Grayland, WA
Parts Used:
WPW10144820
Difficulty Level:
Easy
Total Repair Time:
30 - 60 mins
Tools:
Nutdriver, Pliers, Screw drivers
cold water would not shut off
Ordered and replaced the water inlet valve Thermistor.
0 of 1 people found this instruction helpful.
Was this instruction helpful to you?
Thank you for voting!
Customer:
Tim from Houma, LA
Parts Used:
WPW10144820
Difficulty Level:
A Bit Difficult
Total Repair Time:
30 - 60 mins
Tools:
Screw drivers, Socket set
water valve was leaking
Turned off water and disconnected hoses. Removed the back panel from the machine, removed the water valve, put the new one on, put panel back on, reconnected water and power. Had problem putting back on as there were two hooks that I couldn't get back onto so I drilled two holes through back and machine and put two screws instead. Works f ine now.
0 of 1 people found this instruction helpful.
Was this instruction helpful to you?
Thank you for voting!
Customer:
larry from wilmington, IL
Parts Used:
WPW10144820
Difficulty Level:
Really Easy
Total Repair Time:
15 - 30 mins
Tools:
Nutdriver, Screw drivers
cold water kept running
On this model it was easy as it has a screw on each corner to remove the top control panel-tips forward. then you have 2 spring clips and the whole housing tips forward. You actually work from behind the entire time. All items just plug/unplug that you need to and the valve snap attaches in place. Very simple to do
0 of 1 people found this instruction helpful.
Was this instruction helpful to you?
Thank you for voting!
  • 1
  • 2
Customer Reviews
Average Rating: (2 Reviews)
5.0
★★★★★
★★★★★
Filter By Rating:
  • 5
    2
  • 4
    0
  • 3
    0
  • 2
    0
  • 1
    0
  • 1
Sort by:
Sorry, we couldn't find any existing reviews that matched. Try using some different or simpler keywords.

Model Compatibility

This part works with the following models:
Fix Number: FIX11749042
Manufacturer Part Number: WPW10144820
Brand
Model Number
Description
Kenmore
11018812701
Washer
Kenmore
11020522900
Washer
Kenmore
11028222701
Washer
Kenmore
11029422801
Washer
Kenmore
11029432801
Washer
Kenmore
11029442801
Washer
Kenmore
11029522801
Washer
Kenmore
11029532801
Washer
Kenmore
11029592801
Washer
Kenmore
11029622801
Washer
Kenmore
11029632801
Washer
Kenmore
11029672801
Washer
Kenmore
11029682801
Washer
Kenmore
11029692801
Washer
Kenmore
11029722801
Washer
Kenmore
11029727801
Washer
Kenmore
11029732801
Washer
Kenmore
11029737801
Washer
Kenmore
1105062110
Washer
Whirlpool
1CWTW5200VQ1
Washer - Residential
Whirlpool
1CWTW5300VW1
Washer - Residential
Whirlpool
1CWTW5505VQ1
Washer - Residential
Whirlpool
1CWTW5590VQ1
Washer - Residential
Whirlpool
1CWTW5790VQ1
Washer - Residential
Maytag
7MMMS0560WW0
Washer - AUTOMATIC WASHER
Maytag
7MMTS0520WW0
Washer - AUTOMATIC WASHER
Admiral
ATW4475VQ0
Washer - RESIDENTIAL WASHER
Admiral
ATW4475VQ1
Washer - AUTOMATIC WASHER
Admiral
ATW4475XQ0
Washer - AUTOMATIC WASHER
Crosley
CAWS14234VQ0
Washer - Residential