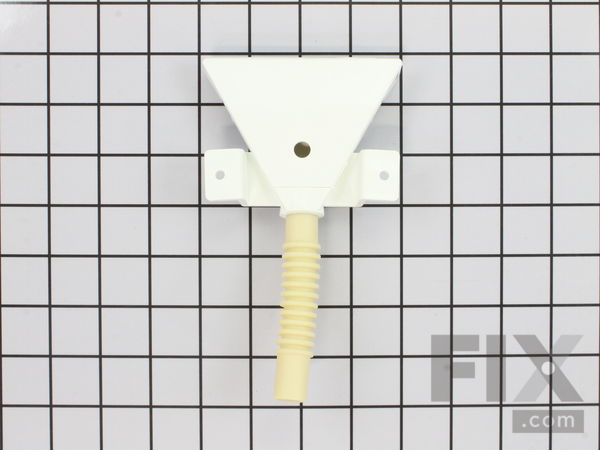
Part Location Diagram of WH41X10299 GE FUNNEL SHOWER HEAD Assembly
See part 803 in the diagram
( Grid squares measure 1x1 inch )

FUNNEL SHOWER HEAD Assembly

Rated by 1 customers 

?

Easy 

30 - 60 mins 

Ratings submitted by customers like you who bought this part.

?
$17.78
In Stock
Fix Number:
FIX4704246
Manufacturer #:
WH41X10299
Manufactured by:
GE

Product Description

Questions and Answers

We're sorry, but our Q&A experts are temporarily unavailable.
Please check back later if you still haven't found the answer you need.

Installation Instructions Provided by Fix customers like you.

Average Repair Rating: 3.3 / 5.0, 1 reviews.
  • 1
Sort by:
Sorry, we couldn't find any existing installation instruction that matched.
Customer:
Mahesh from Hopewell Junction, NY
Parts Used:
WH41X10299
Difficulty Level:
Easy
Total Repair Time:
30 - 60 mins
Tools:
Nutdriver, Pliers, Screw drivers
Funnel Showerhead assembly was leaking
TURN OF POWER AND WATER TO THE UNIT.1) Put putty knife about six inches from left and push to release clip holding the front to the top. Repeat on right hand side and release clip. 2) Front panel comes out. 3) Remove two screws holding top of washer and lift up top carefully. Top will not come up all the way until you remove sensor by g ently prying it out of top using a screw driver. 4) On the under side of the top, shower head funnel is visible. Remove two screws to get it out. Carefully pry out a sensor that is in the shower head assembly. 5) Remove three screws in the rear and you will see the showerhead hose connecting to the mixing valve. Undo the hose clamp and slide out the old showerhead. Install the hose of the new showerhead on the mixing valve. 7) Return to the front and install the new showerhead first by putting in the sensor in the hole in the middle and then securely installing and tightening the two screws. 8) Reinstall the rear panel and the top of the washer including the sensor in the top and tightening the two screws. Reinstall the front panel by making sure it catches on tabs in the front push so it clicks in place. MAKE SURE ALL YOUR WORK IS SAFE AND ALL THE WATER HAS BEEN DRIED OF. I AM A LAYMAN AND THESE INSTRUCTIONS ARE PROVIDED AS A COURTESY. YOU ARE SOLELY RESPONSIBLE FOR YOUR WORK. Turn on power and water and check for leaks.
0 of 1 people found this instruction helpful.
Was this instruction helpful to you?
Thank you for voting!
  • 1

Model Compatibility

This part works with the following models:
Fix Number: FIX4704246
Manufacturer Part Number: WH41X10299
Brand
Model Number
Description
General Electric
GCWN4950D0WS
Washer
General Electric
GCWN4950D1WS
Washer
General Electric
GCWN4950D2WS
Washer - WASHER
General Electric
GCWN5550D0WW
Washer
General Electric
GHWN4250D0WW
Washer
General Electric
GHWN4250D1WW
Washer
General Electric
GHWN4250D2WW
Washer - WASHER
General Electric
GHWN5250D0WS
Washer
General Electric
GHWN5250D1WS
Washer
General Electric
GLWN5250D0WW
Washer
General Electric
GLWN5250D1WW
Washer
General Electric
GLWN5550D0WW
Washer
General Electric
GLWN5550D1WW
Washer
General Electric
GMAN5650D0WW
Washer
General Electric
GMAN5650D1WW
Washer
General Electric
GRWN5550D0WS
Washer
General Electric
GRWN5550D0WW
Washer
General Electric
GRWN5550D1WS
Washer
General Electric
GTAN4250D0WW
Washer
General Electric
GTAN4250D1WW
Washer
General Electric
GTAN4250D2WW
Washer - WASHER
General Electric
GTAN5250D0WW
Washer
General Electric
GTAN5250D1WW
Washer
General Electric
GTAN5250D2WW
Washer - WASHER
General Electric
GTAN5550D0WW
Washer
General Electric
GTAN5550D1WW
Washer
General Electric
GTAP2250D0WW
Washer - WASHER
General Electric
GTAP2250D1WW
Washer - WASHER
General Electric
GTMP280ED6WW
Dryer - Dryer
General Electric
GTWN4250D0WS
Washer