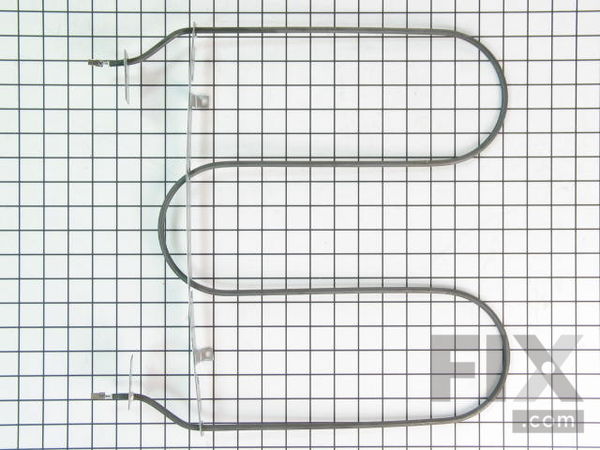
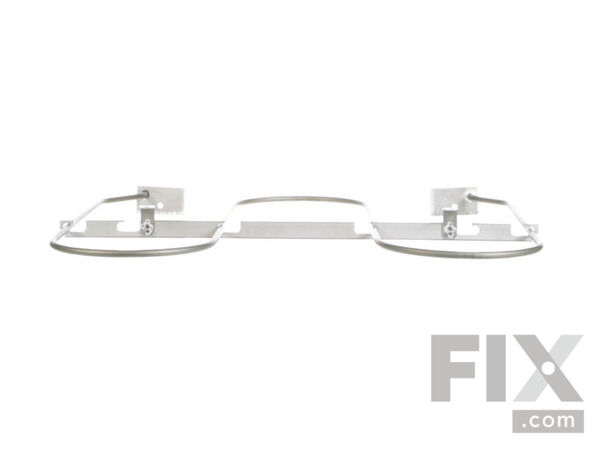
Part Location Diagram of WP9760767 Whirlpool Broil Element
See part 2 in the diagram
( Grid squares measure 1x1 inch )

Broil Element WP9760767

Rated by 3 customers 

?

Easy 

15 - 30 mins 

Ratings submitted by customers like you who bought this part.

?
$98.05
In Stock
Fix Number:
FIX11747301
Manufacturer #:
WP9760767
Manufactured by:
Whirlpool

Product Description

This broil element is found on the roof of the oven.

Questions and Answers

We're sorry, but our Q&A experts are temporarily unavailable.
Please check back later if you still haven't found the answer you need.

View More View Less
Bake Element
$70.31
In Stock
Affresh Washing Machine Cleaner - 3 pack
$12.58
In Stock
Produce Preserver Filter
$21.50
In Stock
Affresh Dishwasher Cleaner Tablets - 6
$19.09
In Stock
Cooktop Cleaning Cream
$15.57
In Stock
Cooktop Cleaner
$17.74
In Stock
Affresh Cleaner
$19.09
In Stock

Installation Instructions Provided by Fix customers like you.

Average Repair Rating: 4.1 / 5.0, 3 reviews.
  • 1
Sort by:
Sorry, we couldn't find any existing installation instruction that matched.
Customer:
Robert from Louise, TX
Parts Used:
WP9760767
Difficulty Level:
Really Easy
Total Repair Time:
Less than 15 mins
Tools:
Pliers, Screw drivers
Broiler element sparked and burned out
The repair was very simple. First, I shut off the oven power at the breaker box. Next, I used a Phillips head screwdriver to loosen two screws at the back of oven where the broiler element was inserted. Then I removed two screws at the top of the oven where the mounting rack was attached. The next step is to partially move the element forward so that the electrical wires attached to the element could be detached. I used pliers to disengage the push type electrical connection. The wires only protrude about 3", so be careful not to pull the element out too far at this step. Now, just reverse the steps to install the new element.
2 of 2 people found this instruction helpful.
Was this instruction helpful to you?
Thank you for voting!
Customer:
Bryan from Rio Rancho, NM
Parts Used:
WP9760767, WP4449154
Difficulty Level:
Really Easy
Total Repair Time:
Less than 15 mins
Tools:
Screw drivers
The Broil element caught fire and was burning like a weld.
note: The only way my broil element would stop burning was by disconnecting the power via flipping the breaker in the garage. Not sure if that will work for others but it worked for me. After ordering the parts, I followed these simple steps to replace the broil element. 1) Turn off power (i.e. flip the breaker). 2) Unscrew five screws holding the broil element in place. 3) Use two twisty ties to wrap around the electrical wires connecting to the element. This prevents the wires from falling back into the wall behind the oven. 4) With a small amount of force, disconnect the two ends of the element from the electrical wires, making sure that the wires do not fall back behind the wall. 5) Connect new broil element to the electrical wires. 6) Screw the new broil element into place. NOTE: The original broil element had five screws. The replacement part only had four but was still held in place securely. 7) Turn on power
0 of 1 people found this instruction helpful.
Was this instruction helpful to you?
Thank you for voting!
Customer:
John from Newton, NJ
Parts Used:
WP9760767
Difficulty Level:
A Bit Difficult
Total Repair Time:
30 - 60 mins
Tools:
Screw drivers
Broiler element stopped working
First turn off the power for your oven at the electric panel breaker. Removing the old element, the screws are a special Phillips head, which I didn't have. Using a very pointed Phillips head worked. Once the screws are out, all that is holding the element on are connectors, pull those off. Install new element. The screws up in the corner s are hard to reach, that is what takes the most time.
0 of 1 people found this instruction helpful.
Was this instruction helpful to you?
Thank you for voting!
  • 1

Model Compatibility

This part works with the following models:
Fix Number: FIX11747301
Manufacturer Part Number: WP9760767
Brand
Model Number
Description
Whirlpool
8RBS245PDQ1
Wall Oven - Built-in, Electric
Whirlpool
GBD277PDB0
Wall Oven - Built-in 27" Electric, Double
Whirlpool
GBD277PDB1
Wall Oven - Built-in, Electric
Whirlpool
GBD277PDB2
Wall Oven - Built-in, Electric
Whirlpool
GBD277PDB3
Wall Oven - Built-in, Electric
Whirlpool
GBD277PDB4
Wall Oven - Built-in, Electric
Whirlpool
GBD277PDB5
Wall Oven - Built-in, Electric
Whirlpool
GBD277PDB6
Wall Oven - Built-in, Electric
Whirlpool
GBD277PDB7
Wall Oven - Built-in, Electric
Whirlpool
GBD277PDB8
Wall Oven - Built-in, Electric, Double
Whirlpool
GBD277PDQ0
Wall Oven - Built-in 27" Electric, Double
Whirlpool
GBD277PDQ1
Wall Oven - Built-in, Electric
Whirlpool
GBD277PDQ2
Wall Oven - Built-in, Electric
Whirlpool
GBD277PDQ3
Wall Oven - Built-in, Electric
Whirlpool
GBD277PDQ4
Wall Oven - Built-in, Electric
Whirlpool
GBD277PDQ5
Wall Oven - Built-in, Electric
Whirlpool
GBD277PDQ6
Wall Oven - Built-in, Electric
Whirlpool
GBD277PDQ7
Wall Oven - Built-in, Electric
Whirlpool
GBD277PDQ8
Wall Oven - Built-in, Electric, Double
Whirlpool
GBD277PDS1
Wall Oven - Built-in, Electric
Whirlpool
GBD277PDS2
Wall Oven - Built-in, Electric
Whirlpool
GBD277PDS3
Wall Oven - Built-in, Electric
Whirlpool
GBD277PDS4
Wall Oven - Built-in, Electric
Whirlpool
GBD277PDS5
Wall Oven - Built-in, Electric
Whirlpool
GBD277PDS6
Wall Oven - Built-in, Electric
Whirlpool
GBD277PDS7
Wall Oven - Built-in, Electric
Whirlpool
GBD277PDS8
Wall Oven - Built-in, Electric, Double
Whirlpool
GBD277PDT7
Wall Oven - Built-in, Electric
Whirlpool
GBD277PDT8
Wall Oven - Built-in, Electric, Double
Whirlpool
GBD307NKB0
Range - Whirlpool Range/Stove/Oven Model GBD307NKB0 Parts