Some of the parts we sell are eligible for mail-in rebates since we can recycle them. We will display any applicable rebates in your shopping cart. To redeem your rebate, contact Customer Service after you have received your part.
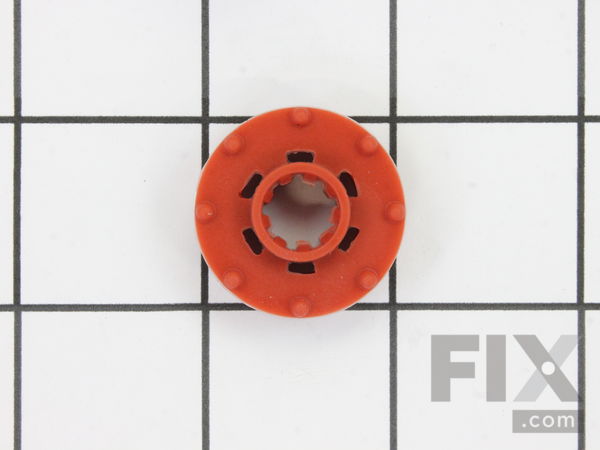
Evaporator Fan Grommet - Red
- Fix Number:
- FIX963756
- Manufacturer #:
- WR02X12008
- Manufactured by:
- GE
- Product Description
- The evaporator fan grommet is used to provide a cushion between the fan motor and the motor mounting bracket in your freezer. This genuine OEM part is about one inch in diameter and is red in color. It is part of the motor assembly found behind the evaporator fan cover at the back of your freezer. If the fan has become quite noisy, it may be time to replace the grommet. To complete this repair, you will need to remove everything from the freezer including the ice tray, the fan cover, freezer floor, evaporator cover, and the fan motor assembly. The tools you will need for this job include a pair of needle nose pliers, a Philips screwdriver and a small flat blade screwdriver, along with a 1/4-inch and a 5/16-inch nut driver. Please ensure that you disconnect the power supply to your fridge before you begin this repair.
- Works with the following brands:
- General Electric, Hotpoint
- Works with the following products
- Refrigerator, Freezer
- Fixes the following symptoms
- Noisy, Fridge too warm, Clicking sound, Freezer section too warm
- Part# WR02X12008 replaces these:
- AP3795810, 1091586, WR02X10519, WR2X10519
Product Description
The evaporator fan grommet is used to provide a cushion between the fan motor and the motor mounting bracket in your freezer. This genuine OEM part is about one inch in diameter and is red in color. It is part of the motor assembly found behind the evaporator fan cover at the back of your freezer. If the fan has become quite noisy, it may be time to replace the grommet. To complete this repair, you will need to remove everything from the freezer including the ice tray, the fan cover, freezer floor, evaporator cover, and the fan motor assembly. The tools you will need for this job include a pair of needle nose pliers, a Philips screwdriver and a small flat blade screwdriver, along with a 1/4-inch and a 5/16-inch nut driver. Please ensure that you disconnect the power supply to your fridge before you begin this repair.
-
Works with the following brands:General Electric, Hotpoint
-
Works with the following products:Refrigerator, Freezer
-
Fixes the following symptoms:Noisy, Fridge too warm, Clicking sound, Freezer section too warm
-
Part# WR02X12008 replaces these:AP3795810, 1091586, WR02X10519, WR2X10519
Questions and Answers
We're sorry, but our Q&A experts are temporarily unavailable.
Please check back later if you still haven't found the answer you need.
Related Parts Additional or alternate parts to consider.
Installation Instructions Provided by Fix customers like you.
- < Prev
- 1
- Next >
- Customer:
- Michael from Burlington, MA
- Parts Used:
- WR02X12008, WR02X10540
- Difficulty Level:
- Really Easy
- Total Repair Time:
- 30 - 60 mins
- Tools:
- Nutdriver, Screw drivers
- Customer:
- Richard from Hilliard, OH
- Parts Used:
- WR60X31522, WR02X12008, WR02X10540
- Difficulty Level:
- Really Easy
- Total Repair Time:
- 30 - 60 mins
- Tools:
- Nutdriver, Pliers, Screw drivers
- Customer:
- Joseph from Midland, TX
- Parts Used:
- WR60X31522, WR60X10204, WR02X12008
- Difficulty Level:
- Really Easy
- Total Repair Time:
- 15 - 30 mins
- Tools:
- Nutdriver, Pliers, Screw drivers
- Customer:
- ROD from WEST MIDDLESEX, PA
- Parts Used:
- WR02X12008
- Difficulty Level:
- A Bit Difficult
- Total Repair Time:
- 15 - 30 mins
- Tools:
- Nutdriver, Pliers, Screw drivers, Socket set
- Customer:
- georgia from Libby, MT
- Parts Used:
- WR60X10204, WR60X31522, WR02X12008
- Difficulty Level:
- Really Easy
- Total Repair Time:
- Less than 15 mins
- Tools:
- Screw drivers, Socket set
- Customer:
- Henry from Flushing, NY
- Parts Used:
- WR02X12008
- Difficulty Level:
- Easy
- Total Repair Time:
- 15 - 30 mins
- Tools:
- Nutdriver, Screw drivers
- < Prev
- 1
- Next >
Model Compatibility
Manufacturer Part Number: WR02X12008


