Some of the parts we sell are eligible for mail-in rebates since we can recycle them. We will display any applicable rebates in your shopping cart. To redeem your rebate, contact Customer Service after you have received your part.
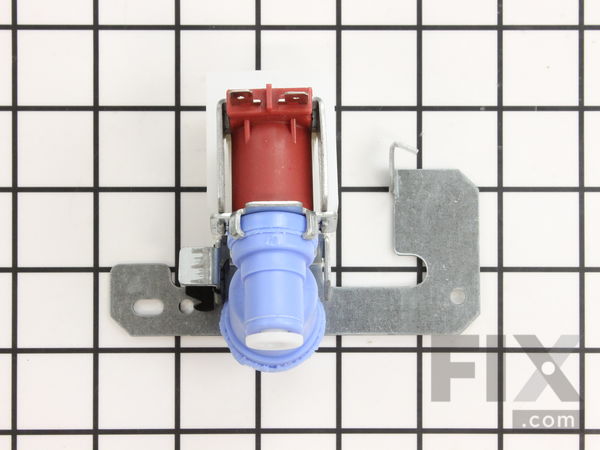
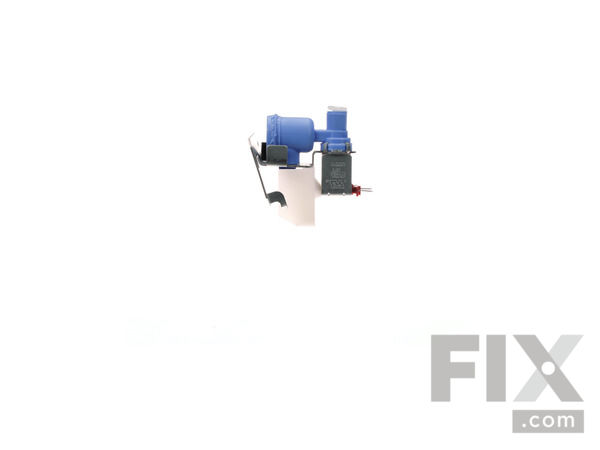
Single Outlet Valve Kit
$67.70
In Stock
- Fix Number:
- FIX304375
- Manufacturer #:
- WR57X10033
- Manufactured by:
- GE
- Product Description
- This single outlet valve has 1/4 inch compression fittings, and is intended for use with refrigerators that have ice makers that make crescent shaped ice cubes. NOTE: As per the manufacturer this valve has new quick connection. You must cut retaining nut off of the current plastic water line and gently push it into new valve. To remove, depress ring that the tube slides into.
- Works with the following brands:
- General Electric, Kenmore, Hotpoint
- Works with the following products
- Refrigerator, Freezer, Ice Maker
- Fixes the following symptoms
- Ice maker not making ice, Leaking, Ice maker won’t dispense ice, Not dispensing water
- Part# WR57X10033 replaces these:
- AP3189335, 914151, WR57X10033, 66049, SWR57X0090, SWR57X0093, SWR57X90, SWR57X93, WR57X0090, WR57X0093, WR57X0095, WR57X0096, WR57X0102, WR57X0110, WR57X10015, WR57X10034, WR57X10049, WR57X10063, WR57X10075, WR57X102 ... Show more , WR57X110, WR57X21266, WR57X90, WR57X93, WR57X95, WR57X96 Show less
Part Number Cross Reference
Product Description
This single outlet valve has 1/4 inch compression fittings, and is intended for use with refrigerators that have ice makers that make crescent shaped ice cubes. NOTE: As per the manufacturer this valve has new quick connection. You must cut retaining nut off of the current plastic water line and gently push it into new valve. To remove, depress ring that the tube slides into.
-
Works with the following brands:General Electric, Kenmore, Hotpoint
-
Works with the following products:Refrigerator, Freezer, Ice Maker
-
Fixes the following symptoms:Ice maker not making ice, Leaking, Ice maker won’t dispense ice, Not dispensing water
-
Part# WR57X10033 replaces these:AP3189335, 914151, WR57X10033, 66049, SWR57X0090, SWR57X0093 ... Show more , SWR57X90, SWR57X93, WR57X0090, WR57X0093, WR57X0095, WR57X0096, WR57X0102, WR57X0110, WR57X10015, WR57X10034, WR57X10049, WR57X10063, WR57X10075, WR57X102, WR57X110, WR57X21266, WR57X90, WR57X93, WR57X95, WR57X96 Show less
Questions and Answers
We're sorry, but our Q&A experts are temporarily unavailable.
Please check back later if you still haven't found the answer you need.
Installation Instructions Provided by Fix customers like you.
- < Prev
- 1
- Next >
Sort by:
Search filter:
Clear Filter
Your search term must have 3 or more characters.
Keep searches simple. Use keywords, e.g. "leaking", "pump", "broken" or "fit".
Sorry, we couldn't find any existing installation instruction that matched.
- Customer:
- Steven from Hailey, ID
- Parts Used:
- WR57X10033
- Difficulty Level:
- Really Easy
- Total Repair Time:
- 15 - 30 mins
- Tools:
- Nutdriver, Wrench (Adjustable)
Ice maker was not receiving water - faulty valve solenoid
Unplug refrigerator. Shut off source of water to faulty icemaker valve , disconnect power clip to valve, water in and water out tubing from valve. Install new valve reversing the dismantling steps. Keep in mind that the replacement valve has a slip fitting for the out tubing to the icemaker vs. a threaded connection, and the new mounting
... Read more
bracket may face the new valve in a different orientation than the previous valve - but should be no problem. After re-attaching valve to refer body, restore power, and water supply to icemaker. Monitor new valve for leaks and correct as necessary. This site had my replacement in my hand fast and I saved money doing the repair myself.
Read less
1 person
found this instruction helpful.
Was this instruction helpful to you?
Thank you for voting!
- Customer:
- Pamela from Birmingham, AL
- Parts Used:
- WR57X10033
- Difficulty Level:
- Really Easy
- Total Repair Time:
- 15 - 30 mins
- Tools:
- Nutdriver, Screw drivers
Ice maker wasn't working
I ordered a single inlet valve and matched up the two hoses, Took out one screw , put the new one on and that ws it . too , too easy.
0 of 1 people
found this instruction helpful.
Was this instruction helpful to you?
Thank you for voting!
- Customer:
- Harley from Heaters, WV
- Parts Used:
- WR57X10033
- Difficulty Level:
- Very Easy
- Total Repair Time:
- Less than 15 mins
- Tools:
- Nutdriver, Screw drivers, Wrench (Adjustable)
couldn't get water to icemaker
Unhooked the old valve kit, got the part number and called the toll free number and 3 days later got my part. It took less than ten minutes to install, now I have ice
0 of 1 people
found this instruction helpful.
Was this instruction helpful to you?
Thank you for voting!
- Customer:
- George from North Tonawanda, NY
- Parts Used:
- WR57X10033
- Difficulty Level:
- Really Easy
- Total Repair Time:
- 15 - 30 mins
- Tools:
- Screw drivers, Socket set
solenoid valve inoperative
Turn off water, pull out refrigerator, replace solenoid valve, trim line to ice mold to fit new style connection, turn water on, check for leaks, return refrigerator to position, observe operation
0 of 1 people
found this instruction helpful.
Was this instruction helpful to you?
Thank you for voting!
- Customer:
- Ralph from Statesville, NC
- Parts Used:
- WR57X10033
- Difficulty Level:
- Very Easy
- Total Repair Time:
- Less than 15 mins
- Tools:
- Screw drivers, Wrench set
water was frezzing at the ice tray.
This was caused by fill valve not shutting off completly, dippng water.Removed back panel turned off water R&R the valve, leak checked it. Waited until the next day to close everything up just so I could ops check. Good to go
0 of 1 people
found this instruction helpful.
Was this instruction helpful to you?
Thank you for voting!
- Customer:
- Joe from Katy, TX
- Parts Used:
- WR57X10033
- Difficulty Level:
- Really Easy
- Total Repair Time:
- Less than 15 mins
- Tools:
- Nutdriver, Pliers, Wrench (Adjustable)
Water valve for ice maker not cycling
Shut the water going to the refrigerator water valve off. Removed the old valve and installed new valve. Very simple and straightforward.
0 of 1 people
found this instruction helpful.
Was this instruction helpful to you?
Thank you for voting!
- Customer:
- Marvin from Manhattan, KS
- Parts Used:
- WR57X10033
- Difficulty Level:
- Really Easy
- Total Repair Time:
- 15 - 30 mins
- Tools:
- Wrench set
Found water under the refrigerator and the ice maker quit making ice.
I found the replacement part and the instructions for installing it. It was quite simple and solved the problem. this was much cheaper that buying a new refrigerator. Connecting the lines to the new part was simple. All you had to do was follow the lines off the old unit to find where the new unit went it. It is easy to access this p
... Read more
art of the frig since it is on the back side and is open and easy to get to.
Read less
0 of 1 people
found this instruction helpful.
Was this instruction helpful to you?
Thank you for voting!
- Customer:
- Loren from Goldsboro, NC
- Parts Used:
- WR57X10033
- Difficulty Level:
- Easy
- Total Repair Time:
- 30 - 60 mins
- Tools:
- Nutdriver, Pliers, Screw drivers
no water to Icemaker
Shut off water, unplugged unit, removed back panel, disconnected water valve and replaced with new. The old water valve was leaking a bit after each cycle and was not the complete problem. I had to defrost the fill tube from the back of the unit to the ice maker proper. This was a bit harder, it required removing the IM and the rear wall
... Read more
of the freezer section. complete job from start to finish about an hour most of the time was defrosting the tube, was solid ice.
Read less
0 of 1 people
found this instruction helpful.
Was this instruction helpful to you?
Thank you for voting!
- Customer:
- David from Buda, TX
- Parts Used:
- WR57X10033
- Difficulty Level:
- Really Easy
- Total Repair Time:
- 15 - 30 mins
No water getting to the ice maker
It took several trials and errors before I narrowed down the issue to the inlet valve. I also replaced the anti-flood water line which i think had stuck closed. Seriously, installing this valve can almost be done with your eyes closed. I trimmed down the water line that ran from the valve to the top of the fridge because it was excessi
... Read more
vely long. Although it probably wasn't necessary, I also pulled out the ice maker - also easy (two screws) - and cleaned it. Now we're swimming in ice! If you can remember righty tighty, lefty loosy, you can do this repair!
Read less
0 of 1 people
found this instruction helpful.
Was this instruction helpful to you?
Thank you for voting!
- < Prev
- 1
- Next >
★
Customer Reviews
Filter By Rating:
- < Prev
- 1
- Next >
Sort by:
Search filter:
Clear Filter
Your search term must have 3 or more characters.
Keep searches simple. Use keywords, e.g. "leaking", "pump", "broken" or "fit".
Sorry, we couldn't find any existing reviews that matched. Try using some different or simpler keywords.
Sheryl G - July 21, 2021
Verified Purchase
Easy peasy!
Worked like a charm!
Model Compatibility
This part works with the following models:
Fix Number: FIX304375
Manufacturer Part Number: WR57X10033
Manufacturer Part Number: WR57X10033
Brand
Model Number
Description
✖
Mail-In Recycling Rebate


